
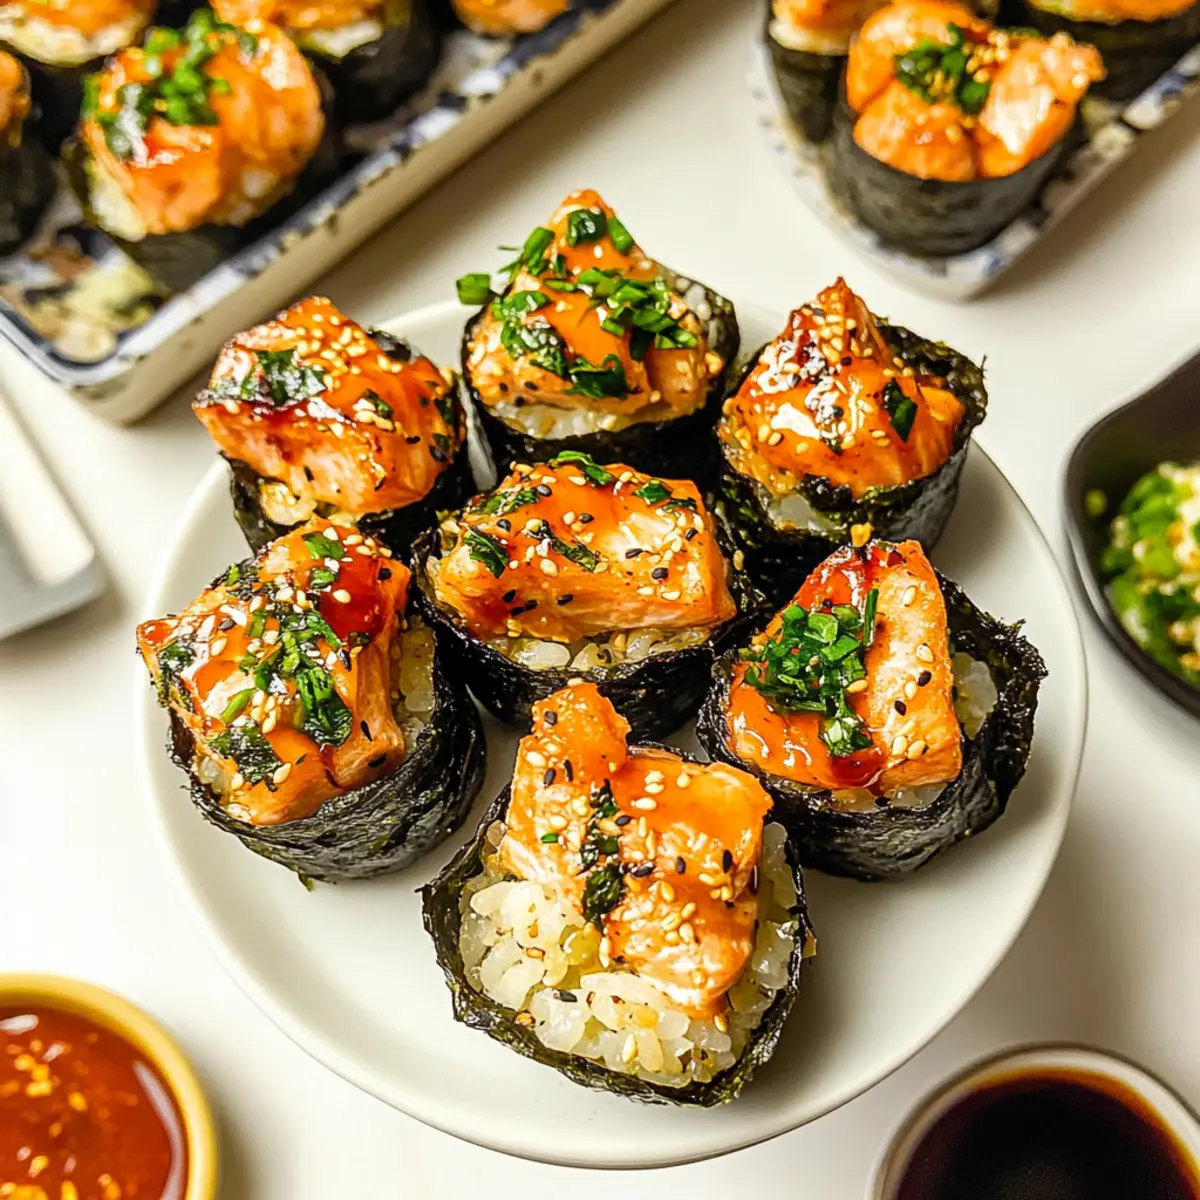
As I dug through my kitchen one rainy afternoon, I stumbled upon the perfect way to mix comfort food with a taste of adventure—Baked Salmon Sushi Cups! These delightful treats are not just a fun twist on traditional sushi; they’re incredibly easy to whip up and customizable to suit any palate. Imagine tender cubes of salmon nestled atop perfectly cooked sushi rice, all wrapped in crispy nori and baked to perfection in your muffin tin. Whether you’re hosting a cozy gathering or simply seeking a tasty appetizer, these little sushi cups are a crowd-pleaser that won’t let you down. Plus, they’re a fantastic way to bring a little creativity to your weeknight meal rotation. Curious about how to create these fabulous bites? Let’s dive into the recipe!

Why Try Baked Salmon Sushi Cups?
Unique Flavor Fusion: These Baked Salmon Sushi Cups combine the best of sushi and baked goodness, giving you a delightful explosion of flavors.
Customizable: Feel free to get creative with toppings! Add avocado, pickled ginger, or your favorite veggies to personalize each cup.
Effortless Preparation: Using a muffin tin makes assembly quick and easy—perfect for busy weeknights or last-minute gatherings.
Crowd-Pleasing Snack: Friends and family will love these! Serve them at parties, game nights, or as fun appetizers.
Healthier Alternative: With fresh salmon and wholesome ingredients, you’ll feel good serving these instead of store-bought snacks.
Discover even more delicious recipes like Gingerbread Cheesecake Cups or Sprinkle Cookie Cups that make entertaining a breeze!
Baked Salmon Sushi Cups Ingredients
For the Salmon Mixture
- Salmon – Use fresh or frozen (thawed) salmon for rich, savory flavor in your sushi cups.
- Soy Sauce – Adds umami and saltiness; tamari can be used for a gluten-free option.
- Kewpie Mayo – This creamy ingredient imparts a distinct sweetness; regular mayo is a viable substitution.
- Sriracha – Adjust the quantity to control the heat level according to your preference.
- Sesame Oil – Enhances nutty aroma; substitute with vegetable oil if needed.
For the Sushi Rice
- Sushi Rice – Use short-grain rice for its sticky texture that holds the mixture together.
- Rice Vinegar – Essential for flavor balance, adding a slight tang to the sushi rice.
- White Sugar – Sweetens the rice vinegar mixture; coconut sugar can be an alternative.
For the Wrap and Garnish
- Nori Sheets – Provide that classic seaweed flavor; cut into squares to perfectly fit muffin tins.
- Furikake – This optional seasoning mix adds an extra layer of flavor; it’s highly recommended!
- Green Onion – Fresh garnish for color and a mild onion flavor boost.
Get ready to impress your friends and family with these delectable Baked Salmon Sushi Cups!
Step‑by‑Step Instructions for Baked Salmon Sushi Cups
Step 1: Cook Sushi Rice
Begin by rinsing 1 cup of sushi rice under cold water until the water runs clear to remove excess starch. Combine the rinsed rice with 1 ¼ cups of water in a pot and bring it to a boil. Once boiling, reduce the heat to low, cover, and simmer for about 15 minutes or until the water is absorbed. Remove from heat and let it sit covered for an additional 10 minutes.
Step 2: Flavor Rice
While the rice rests, in a microwave-safe bowl, mix 2 tablespoons of rice vinegar and 1 tablespoon of white sugar. Microwave for 30 seconds until the sugar dissolves, creating a sweet-tart mixture. Once the sushi rice is ready, fluff it with a fork and gently fold in the vinegar mixture to evenly distribute the flavor. Set aside to cool slightly.
Step 3: Preheat Oven
Preheat your oven to 400℉ (200℃). This temperature will perfectly crisp the nori and cook the salmon just right. While the oven heats up, gather your muffin tin, greasing each cup lightly with a non-stick spray to prevent sticking. This makes it easy to remove your delightful Baked Salmon Sushi Cups after baking.
Step 4: Prepare Salmon Mixture
In a mixing bowl, combine 1 cup of cubed salmon with 2 tablespoons of soy sauce, 2 tablespoons of Kewpie mayo, 1 tablespoon of sriracha, and a dash of sesame oil. Stir until all the ingredients are well incorporated. The mixture should look creamy and colorful, ready to bring robust flavor to your sushi cups.
Step 5: Assemble Cups
Cut nori sheets into squares roughly the size of your muffin tin cups. Gently press each nori square into the greased muffin tins, creating a cup shape. Fill each nori cup with a generous portion of sushi rice, pressing it down lightly to create a stable base. Top each rice-filled cup with the salmon mixture, mounding it slightly for a hearty bite.
Step 6: Bake
Carefully place the muffin tin in your preheated oven and bake for 15 minutes. Keep an eye on them; the salmon should appear cooked through, and the tops should turn a lovely golden color. The nori will also crisp up nicely, creating that inviting texture that pairs beautifully with the salmon.
Step 7: Garnish and Serve
Once baked to perfection, allow the Baked Salmon Sushi Cups to cool for a few minutes before carefully removing them from the muffin tin. Drizzle with extra sriracha or Kewpie mayo, sprinkle with furikake, and garnish with finely chopped green onions for a burst of fresh flavor. Serve these delightful cups warm, and watch them disappear!

What to Serve with Baked Salmon Sushi Cups?
These delightful bite-sized treats are just waiting for the perfect companions to complete your meal experience.
-
Pickled Ginger: This tangy, sweet accompaniment adds a refreshing burst of flavor that cuts through the richness of the salmon.
-
Cucumber Salad: A light and crunchy salad with a hint of vinegar provides a cool, refreshing contrast to the warm sushi cups.
-
Wasabi: A touch of wasabi gives an extra kick, enhancing the overall flavor profile while complementing the flavors of fish.
-
Yuzu Dressing: Drizzle this citrusy dressing over a mixed greens salad for a bright, zesty contrast to the savory sushi cups.
-
Edamame: These protein-packed pods offer a satisfying crunch and subtle flavor, perfect for snacking alongside your sushi cups.
Enjoy these delicious pairings, and turn your Baked Salmon Sushi Cups into an unforgettable dining experience!
Expert Tips for Baked Salmon Sushi Cups
Avoid Overcooking: Ensure your salmon is cooked just through; overcooked salmon can become dry and lose flavor.
Cool Before Toppings: Allow the sushi cups to rest for a few minutes after baking before adding drizzles of sriracha or mayo to prevent sogginess.
Use Quality Rice: Opt for high-quality sushi rice for the best texture; stickiness is key to holding the Baked Salmon Sushi Cups together.
Customize Wisely: Experiment with different toppings, but be cautious not to overpower the delicate flavors of the salmon and the subtle crunch of the nori.
Prep Ahead: Feel free to prepare the salmon mixture and cook the rice a day in advance; simply assemble and bake when ready to serve.
Baked Salmon Sushi Cups Variations
Feel free to mix things up with these fun variations to make your Baked Salmon Sushi Cups truly your own!
-
Seafood Swap: Use cooked shrimp or crab instead of salmon for a delicious twist. Both options bring a unique flavor to each bite. Imagine the sweetness of crab complementing the soft sushi rice—it’s a game-changer!
-
Veggie Delight: Add diced cucumbers, shredded carrots, or even avocado into the salmon mixture for a crunchy, fresh contrast. The veggies not only enhance texture but also add a burst of color to your cups.
-
Spicy Kick: If you love heat, toss in some chopped jalapeños or a few extra dashes of sriracha to the salmon mix. The spiciness will take these sushi cups to another level. For a milder option, just a sprinkle of red pepper flakes can do the trick!
-
Flavor Variations: Experiment with different sauces like teriyaki or a wasabi mayo for a flavorful twist. These swaps can totally transform the taste, giving a delightful surprise in each cup.
-
Herb Infusion: Fresh herbs like cilantro or basil can ramp up the freshness. Chopping these herbs and mixing them into your salmon or using them as a garnish will add a fragrant touch.
-
Gluten-Free Options: Swap soy sauce with tamari or coconut aminos to make this recipe gluten-free while still keeping that umami flavor. You won’t miss the gluten at all!
-
Cheesy Creaminess: For those who enjoy a rich flavor, mix in some cream cheese with the salmon for a creamy texture. It balances well with the tang of sriracha, creating a delightful mouthfeel.
And if you’re looking for more delightful ideas for appetizers, check out these Smoked Salmon Crostini or even sweet treats like Gingerbread Cheesecake Cups. There’s always something tasty waiting for you!
How to Store and Freeze Baked Salmon Sushi Cups
Fridge: Store leftovers in an airtight container for up to 2-3 days. Make sure they cool completely before sealing to maintain freshness.
Freezer: To freeze Baked Salmon Sushi Cups, let them cool thoroughly, then wrap individually in plastic wrap and place in a freezer-safe bag. They can be stored for up to 2 months.
Reheating: Reheat in the oven at 350℉ for about 10 minutes or until warm. Microwaving is also an option; just make sure to cover them to retain moisture.
Enjoying Leftovers: For the best flavor, it’s recommended to consume the sushi cups within a few days of storage, as the texture may change over time.
Make Ahead Options
These Baked Salmon Sushi Cups are a fantastic choice for busy home cooks looking to save time without sacrificing flavor. You can prepare the sushi rice and salmon mixture up to 24 hours in advance; simply store the rice in an airtight container in the fridge to maintain its texture, and keep the salmon mixture separate to prevent it from becoming watery. When you’re ready to enjoy your sushi cups, assemble them using the prepped components, bake for about 15 minutes at 400℉ (200℃) until golden and crispy, and serve. This way, you’ll have savory, restaurant-quality results with minimal effort on your hands!
Baked Salmon Sushi Cups Recipe FAQs
What type of salmon should I use for Baked Salmon Sushi Cups?
Absolutely! You can use either fresh or frozen salmon, as long as it’s thawed. Look for salmon that has a vibrant color and is free from dark spots, which indicate age or spoilage. Fresh salmon should have a mild scent, not a strong fishy odor, to ensure quality.
How should I store leftover Baked Salmon Sushi Cups?
Very simply! Place your leftover sushi cups in an airtight container and store them in the refrigerator for up to 2-3 days. Make sure they cool completely before sealing to keep them fresh and tasty for your next snacking session.
Can I freeze Baked Salmon Sushi Cups?
Of course! To freeze, let the sushi cups cool thoroughly. Then, wrap each cup individually in plastic wrap and place them in a freezer-safe bag. They can last for up to 2 months in the freezer. When you’re ready to enjoy them, just reheat them in the oven at 350℉ for about 10 minutes.
What can I do if my sushi rice is too sticky?
If you find your sushi rice is too sticky during preparation, don’t worry! Gently fluff the rice with a fork to help separate the grains. You can also mix in a tiny splash of rice vinegar to loosen it up a bit without sacrificing the flavor. Cooking it with the right amount of water next time will help achieve a better texture.
Are Baked Salmon Sushi Cups suitable for people with allergies?
Absolutely, but be cautious! The main allergens in this recipe are salmon, soy sauce (which can contain gluten), and mayo. If you are preparing these for someone with allergies, consider using tamari instead of soy sauce for a gluten-free option, and try making your own mayonnaise if needed. Always check labels to ensure ingredients meet dietary needs!
How long can I keep Baked Salmon Sushi Cups in the fridge?
You can store your sushi cups in the fridge for about 2-3 days. Just make sure they’re in an airtight container and allow them to cool completely before sealing. This way, they’ll maintain their delightful flavors and textures when you’re ready to enjoy them again!

Delicious Baked Salmon Sushi Cups for Flavorful Fun
Ingredients
Equipment
Method
- Rinse 1 cup of sushi rice under cold water until the water runs clear. Combine with 1 ¼ cups of water, boil, reduce heat, cover, and simmer for 15 minutes. Let sit covered for 10 minutes.
- In a microwave-safe bowl, mix 2 tablespoons of rice vinegar and 1 tablespoon of white sugar. Microwave for 30 seconds until the sugar dissolves. Fluff the sushi rice and fold in the vinegar mixture.
- Preheat your oven to 400℉ (200℃) and grease the muffin tin with non-stick spray.
- Combine 1 cup of cubed salmon, 2 tablespoons of soy sauce, 2 tablespoons of Kewpie mayo, 1 tablespoon of sriracha, and a dash of sesame oil in a mixing bowl.
- Cut nori sheets into squares, press them into the muffin tins. Fill with sushi rice and top with the salmon mixture.
- Bake for 15 minutes until the salmon is cooked and nori is crispy.
- Let cool for a few minutes, then garnish with sriracha, Kewpie mayo, furikake, and green onion.
Leave a Reply