
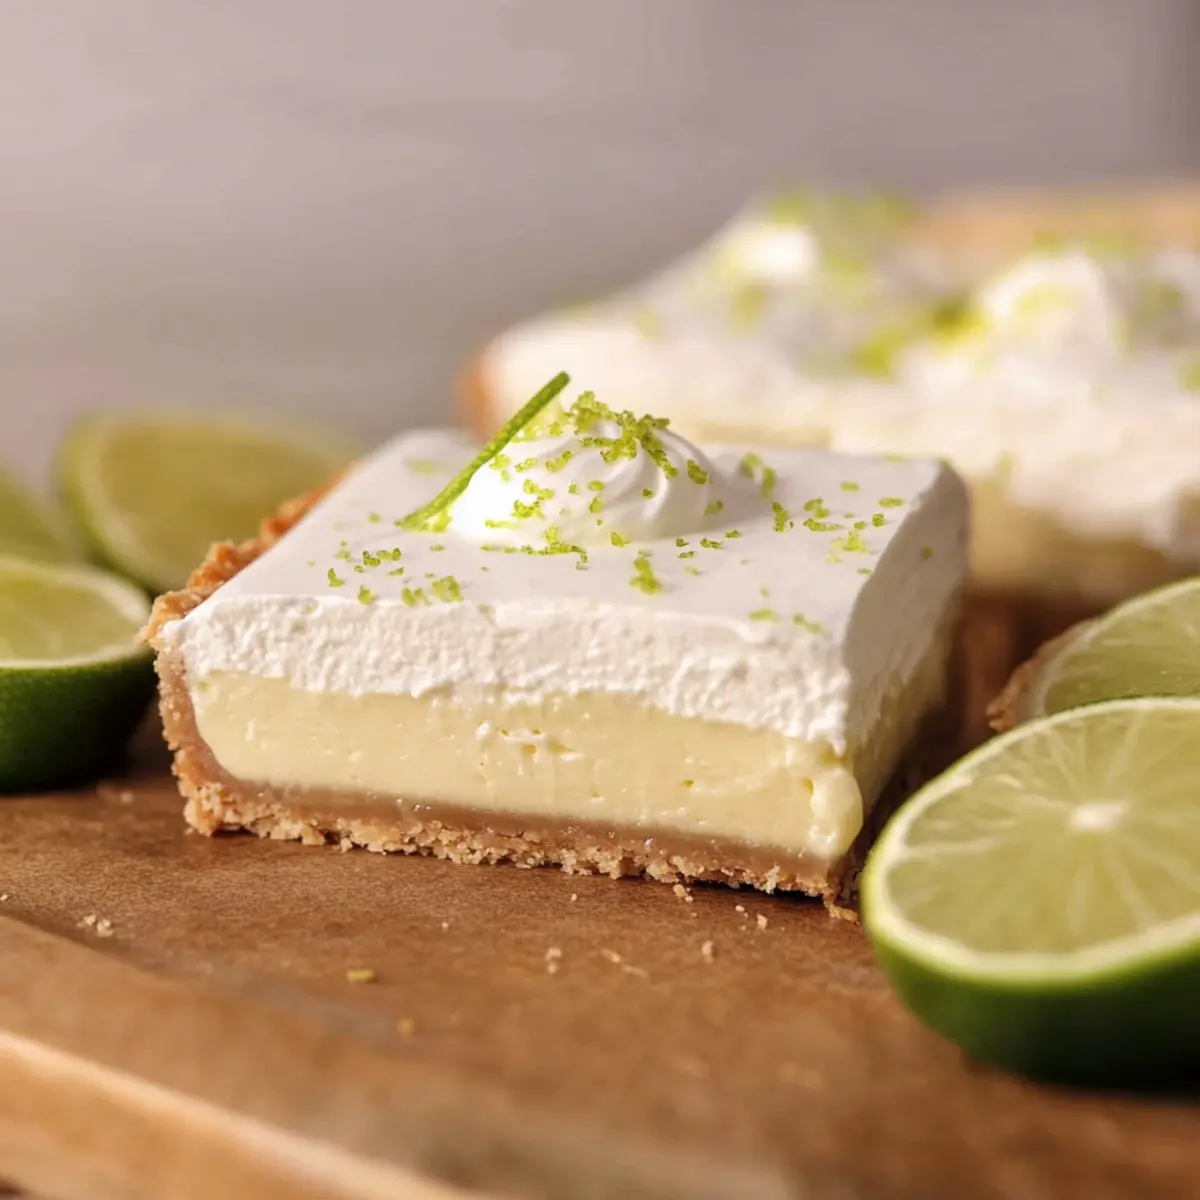
As the sweet, tangy aroma of Key Lime Pie Bars fills the kitchen, I can’t help but feel a wave of nostalgia wash over me. This easy dessert captures the essence of sun-soaked summers and lazy afternoons spent with family and friends. With just 9 simple ingredients and a mere 15 minutes of prep time, these bars offer a quick solution for anyone seeking to ditch fast food and embrace homemade goodness. Plus, they’re not just an indulgence; they’re a refreshing treat perfect for summer gatherings or a cozy night in. Whether you’re looking for a gluten-free option or simply a delicious way to satisfy that sweet tooth, these Key Lime Pie Bars are sure to please. Are you ready to dive into this tropical delight?
Why Are Key Lime Pie Bars a Must-Try?
Bright, Tangy Flavor: The zesty combination of fresh key lime juice and creamy filling creates a refreshing burst of flavor that’s undeniably uplifting.
Quick and Easy: With only 15 minutes of prep, you can whip these up in no time, making them perfect for impromptu gatherings or a sweet weeknight treat.
Versatile Options: Whether you want to enjoy them gluten-free or explore variations with different citrus flavors, these bars can easily adapt to your cravings.
Crowd-Pleaser: Serve them at summer barbecues or family get-togethers – they’re sure to wow your guests and leave them asking for the recipe!
No-Fuss Preparation: Enjoy the satisfaction of a homemade dessert without the long hours in the kitchen. Just prepare the crust, mix the filling, and bake!
Treat yourself to these delightful Key Lime Pie Bars, perfect for any occasion. If you’re in the mood for more easy desserts, check out my Apple Cider Whoopie and Holiday Cranberry Pie recipes!
Key Lime Pie Bars Ingredients
• Get ready for a zesty treat!
For the Crust
- Graham Crackers – They provide a sweet, crunchy base; feel free to substitute with gluten-free cookie crumbs if needed.
- Butter – Use unsalted butter for richer flavor and to control the saltiness of the crust.
For the Filling
- Key Limes (or regular limes) – These are key for that vibrant, tangy flavor; start with less juice if using regular limes and adjust to taste.
- Sweetened Condensed Milk – This creates the luscious creamy texture; a lower-sugar version can be used but may alter the consistency.
- Vanilla Extract – Opt for pure vanilla for the best flavor enhancement.
- Sour Cream (or Greek yogurt) – Adds creaminess and a subtle tang; can substitute with more sweetened condensed milk, though texture may differ.
- Egg Yolks – Essential for structure in the filling, but you can substitute with 2 tbsp of yogurt for a vegan version.
For the Topping
- Heavy Cream – Whip it chilled to add lightness to the dessert.
- Sugar – Sweetens the whipped cream; adjust according to your taste for the topping.
Dive into these Key Lime Pie Bars and enjoy a quick and easy dessert that everyone will adore!
Step‑by‑Step Instructions for Key Lime Pie Bars
Step 1: Prepare the Crust
Preheat your oven to 350°F (175°C). In a mixing bowl, crush graham crackers into fine crumbs and combine them with melted unsalted butter until mixture resembles wet sand. Press this mixture firmly into the base of a 9×9-inch square pan to form an even layer. Bake the crust for about 10 minutes until lightly golden and fragrant, then remove it from the oven and allow it to cool slightly.
Step 2: Make the Filling
While the crust cools, zest and juice key limes to capture their vibrant flavor. In a large bowl, whisk together the lime juice, sweetened condensed milk, vanilla extract, sour cream, and egg yolks until the mixture is silky smooth. Ensure there are no lumps, as a creamy filling is essential for your Key Lime Pie Bars. Set this mixture aside briefly while the crust cools.
Step 3: Bake the Filling
Pour the lime filling over the warm crust, spreading it evenly with a spatula. Place the pan back into the oven and bake for 15-20 minutes. You want the edges to be set while the center should still jiggle slightly, indicating a creamy texture. Once done, remove the bars from the oven and let them cool at room temperature for about 30 minutes before transferring them to the refrigerator to chill.
Step 4: Whip the Topping
After the Key Lime Pie Bars have cooled completely in the refrigerator, grab a mixing bowl and a hand mixer. Pour in the heavy cream and add sugar to taste. Whip this mixture on medium-high speed until stiff peaks form, creating a light and fluffy topping. Be careful not to overmix, as you want a lovely airy texture to complement the tangy filling.
Step 5: Serve and Enjoy
Once the whipped cream is ready and the bars have chilled for at least two hours, slice them into squares using a sharp knife. For the cleanest cuts, wipe the knife between slices. Top each square generously with whipped cream, and if desired, garnish with extra lime zest for a burst of color and flavor. These refreshing Key Lime Pie Bars are now ready to be served chilled, perfect for any summer gathering!
Storage Tips for Key Lime Pie Bars
-
Room Temperature: Key Lime Pie Bars should not be left out for longer than 2 hours. If serving outdoors, keep them chilled to maintain freshness.
-
Fridge: Store your bars in an airtight container in the refrigerator for up to 4 days. This helps preserve the creamy texture and zesty flavor of the Key Lime Pie Bars.
-
Freezer: You can freeze uncut bars for up to 2 months. Wrap them tightly in plastic wrap and aluminum foil to prevent freezer burn. Thaw in the fridge before serving.
-
Reheating: There’s no need to heat these bars; they are best served cold. If they’ve been frozen, let them chill in the refrigerator for several hours to restore their delicious texture.
Key Lime Pie Bars Variations
Feel free to get creative with your Key Lime Pie Bars and make them uniquely yours!
- Gluten-Free: Use gluten-free graham crackers or alternative cookie crumbs for a delightful crust everyone can enjoy.
- Different Citrus: Substitute key limes with lemons, or even oranges, for a refreshing twist on the flavor profile. This small change offers a whole new taste adventure!
- Biscoff Crust: Swap graham crackers for crushed Biscoff cookies to add a spicy, caramel-like flavor to your crust that will intrigue your taste buds.
- Coconut Cream: For a tropical flair, replace heavy cream with coconut cream in the topping; it brings a delightful coconut flavor to the mix.
- Extra Zing: Add a teaspoon of lime zest to the filling for an intensified citrus burst that’ll elevate each bite with a fresh twist.
- Vegan Option: Replace egg yolks with 2 tablespoons of additional yogurt or silken tofu for a plant-based dessert without sacrificing creaminess.
- Berry Topping: Top your bars with fresh berries like raspberries or blueberries for a sweet and visually appealing contrast to the tart lime.
- Spicy Kick: For those who enjoy heat, consider adding a pinch of cayenne pepper to the filling to create an unexpected spicy-sweet combo.
With these variations, your Key Lime Pie Bars can be the ultimate crowd-pleaser at your next gathering. If you’re looking for more tasty desserts, check out my Chocolate Cheesecake Bars and Pecan Cream Pie recipes for additional inspiration!
Expert Tips for Key Lime Pie Bars
- Fresh Limes Matter: Use fresh key limes for the best flavor. Bottled lime juice can taste flat and lack the vibrant tang that makes these bars special.
- Watch the Baking Time: Don’t overbake the filling; it should jiggle slightly in the center when you take it out. Overbaking can result in a dry texture, ruining the creamy filling.
- Perfect Slicing: Use a sharp knife to cut the bars, cleaning it between slices for neat edges. This will help keep the lovely presentation intact when serving.
- Chill for Texture: Allow the bars to chill in the refrigerator for at least two hours before serving. This helps the filling set properly and enhances the refreshing taste of your Key Lime Pie Bars.
- Whipped Cream Tip: For best results, whip your heavy cream in a cold bowl. Keeping everything chilled helps achieve the light, fluffy topping that pairs perfectly with the tart filling.
What to Serve with Key Lime Pie Bars
As you slice into these delightful bars, the sweet-tart aroma fills the air, inviting you to create a full meal experience around this refreshing treat.
-
Fresh Berries: Mixed berries add a burst of color and sweetness that beautifully contrasts the tangy lime flavor.
-
Creamy Coconut Sorbet: This light, tropical dessert elevates the pie bars with a smooth, refreshing complement to the zesty filling.
-
Crisp Green Salad: A salad with mixed greens, avocado, and citrus vinaigrette balances the dessert’s richness while adding a fresh crunch.
-
Iced Tea: Serve these bars with a glass of sweetened or unsweetened iced tea for a refreshing beverage pairing that enhances the vibrant flavors.
-
Toasted Coconut Flakes: Sprinkle toasted coconut on top for added texture and an extra layer of tropical flavor that harmonizes with the key lime.
-
Limeade Spritzers: A fizzy limeade mixed with sparkling water is a lively drink option that echoes the tangy essence of the pie bars.
-
Grilled Pineapple: Charred pineapple brings a caramelized sweetness and smoky flavor that pairs well with the bright freshness of the bars.
-
Chocolate-Covered Pretzels: The salty crunch of pretzels dipped in chocolate can round out the meal, providing a satisfying blend of sweet and salty for your guests.
-
Vanilla Ice Cream: A scoop of creamy vanilla ice cream offers a classic pairing, complementing the tartness with rich, velvety goodness that rounds out the dessert experience.
-
Citrus Fruit Salad: Light and refreshing, a salad of various citrus fruits can add a colorful, juicy touch that echoes the flavors of the Key Lime Pie Bars.
Make Ahead Options
These Key Lime Pie Bars are a fantastic choice for meal prep! You can prepare the crust and filling up to 24 hours in advance by following the initial steps of the recipe. Simply cool the baked crust and store it in an airtight container. For the filling, mix all the ingredients but don’t bake it yet; refrigerate it in a separate container. When you’re ready to indulge, pour the chilled filling over the crust and bake as directed. This way, you can enjoy the refreshing taste of homemade Key Lime Pie Bars without the last-minute rush, ensuring they’re just as delicious when served!
Key Lime Pie Bars Recipe FAQs
What type of limes should I use for Key Lime Pie Bars?
Absolutely! For the best flavor, I recommend using fresh key limes. They’re smaller and pack a more aromatic punch than regular limes. If you only have regular limes available, that’s perfectly fine—just start with a bit less juice and adjust to taste!
How should I store leftover Key Lime Pie Bars?
You can store your Key Lime Pie Bars in an airtight container in the refrigerator for up to 4 days. Keeping them chilled helps maintain their creamy texture and zesty flavor. If serving outside, be mindful to keep them cold for freshness.
Can I freeze Key Lime Pie Bars?
Absolutely! To freeze uncut bars, wrap them tightly in plastic wrap followed by aluminum foil to prevent freezer burn. They can be stored in the freezer for up to 2 months. When you’re ready to enjoy them, simply thaw in the fridge overnight for the best texture.
How can I prevent the Key Lime filling from becoming dry?
Very good question! The essential trick is not to overbake the filling. Once you’ve poured the lime mixture onto the crust, bake until the edges are set but the center still jiggles slightly. This should take about 15-20 minutes. Allow it to cool properly, and your bars will be perfectly creamy!
Are there any dietary considerations I should keep in mind for Key Lime Pie Bars?
Yes, indeed! These bars contain dairy and eggs, so if you’re looking for a dairy-free or vegan option, you can substitute the eggs with 2 tablespoons of additional yogurt or sour cream in the filling, as these alternatives help maintain the creaminess of the dessert. Also, for a gluten-free option, swap graham crackers with gluten-free cookie crumbs.
Zesty Key Lime Pie Bars for a Quick and Easy Treat
Ingredients
Equipment
Method
- Preheat your oven to 350°F (175°C). In a mixing bowl, crush graham crackers into fine crumbs and combine them with melted unsalted butter until mixture resembles wet sand. Press this mixture firmly into the base of a 9x9-inch square pan to form an even layer. Bake the crust for about 10 minutes until lightly golden and fragrant, then remove it from the oven and allow it to cool slightly.
- While the crust cools, zest and juice key limes to capture their vibrant flavor. In a large bowl, whisk together the lime juice, sweetened condensed milk, vanilla extract, sour cream, and egg yolks until the mixture is silky smooth. Ensure there are no lumps.
- Pour the lime filling over the warm crust, spreading it evenly with a spatula. Bake for 15-20 minutes until the edges are set and the center jiggles slightly. Let cool at room temperature for about 30 minutes before chilling in the refrigerator.
- Whip chilled heavy cream with sugar until stiff peaks form to create a light, fluffy topping. Be careful not to overmix.
- Once whipped cream is ready and bars have chilled for at least two hours, slice into squares. Top each square with whipped cream and garnish with extra lime zest if desired. Serve chilled.
Leave a Reply