
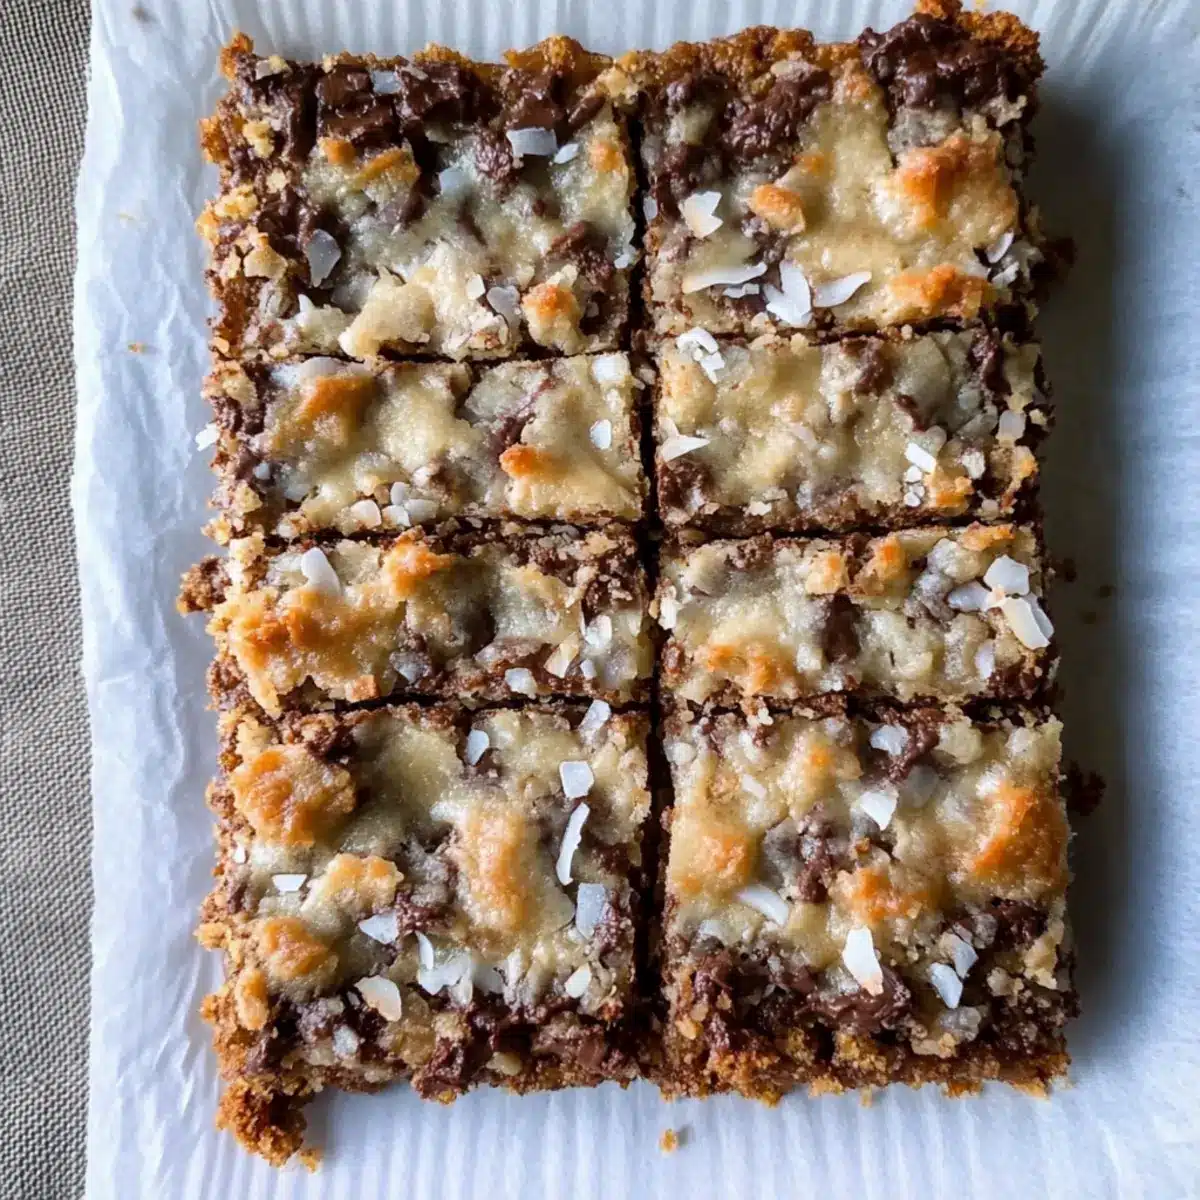
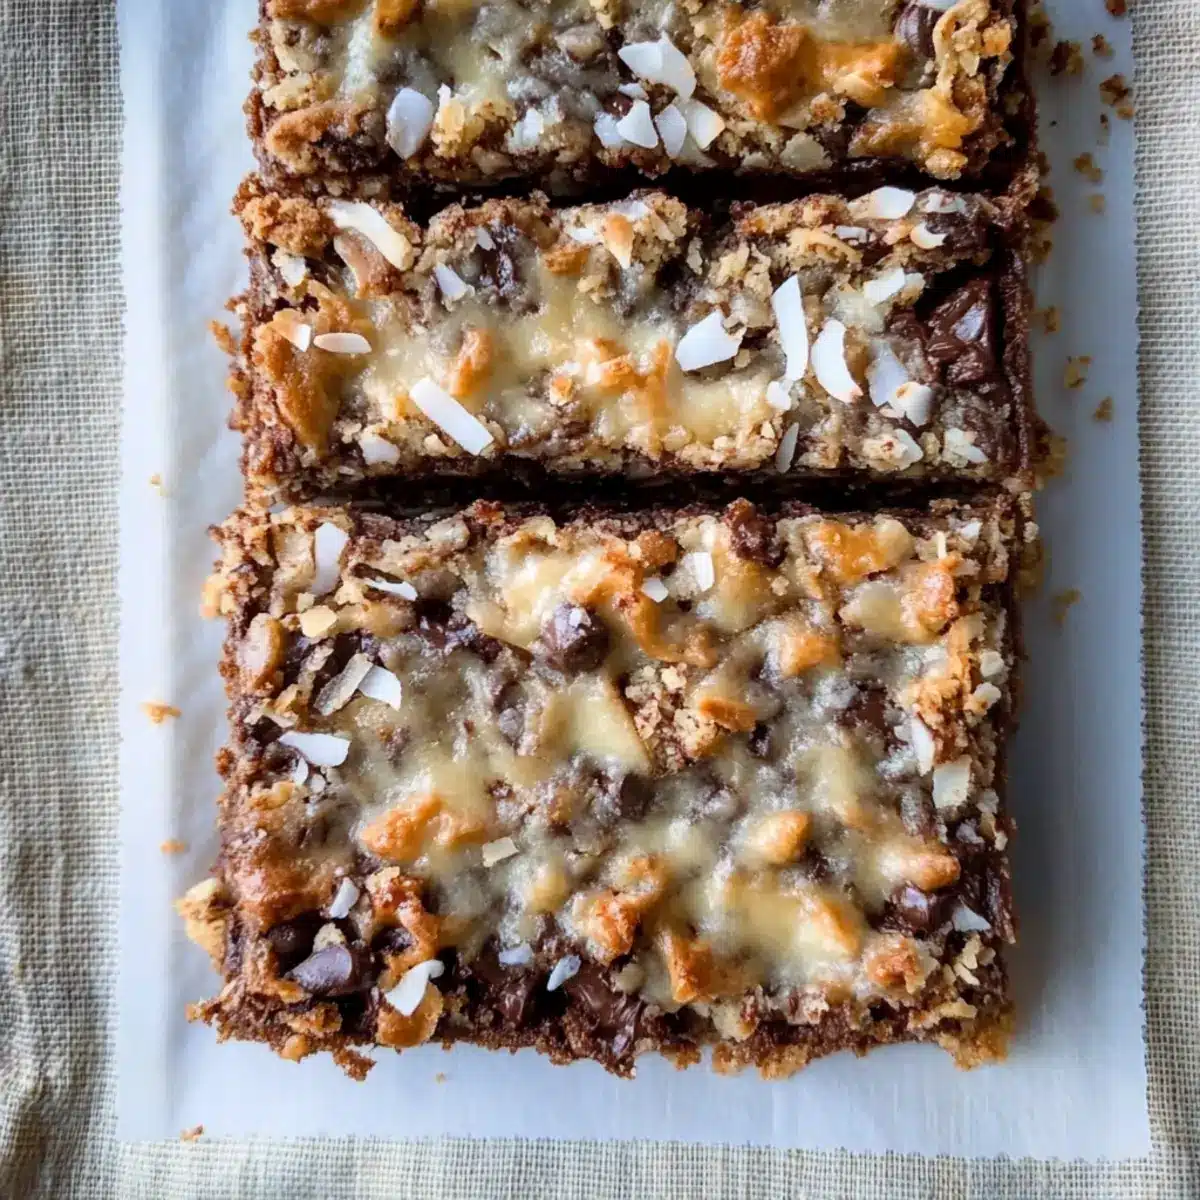
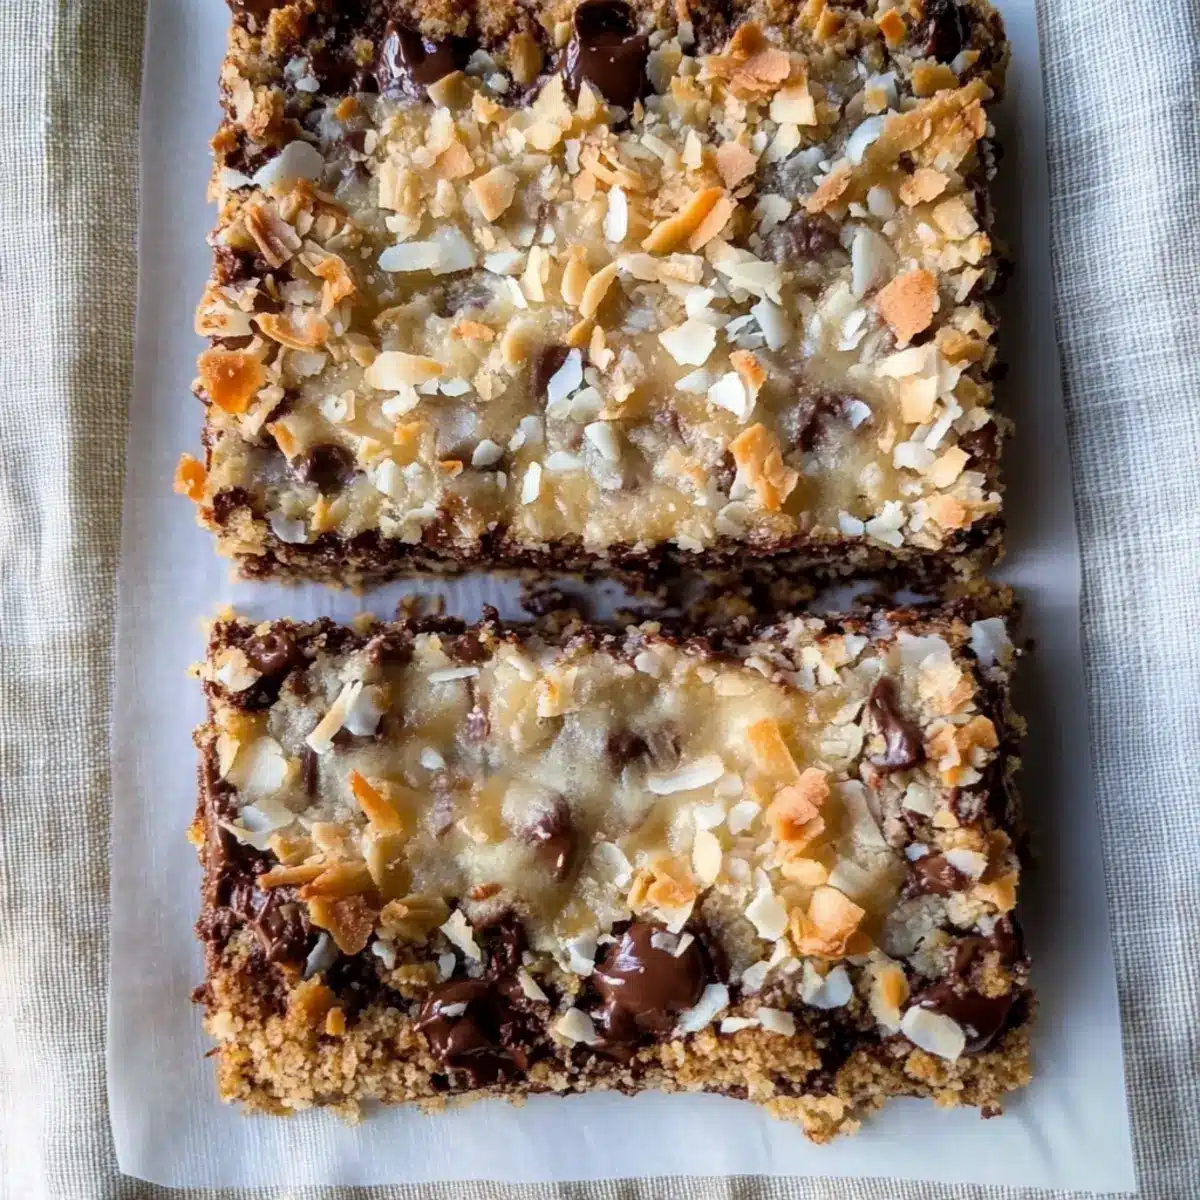
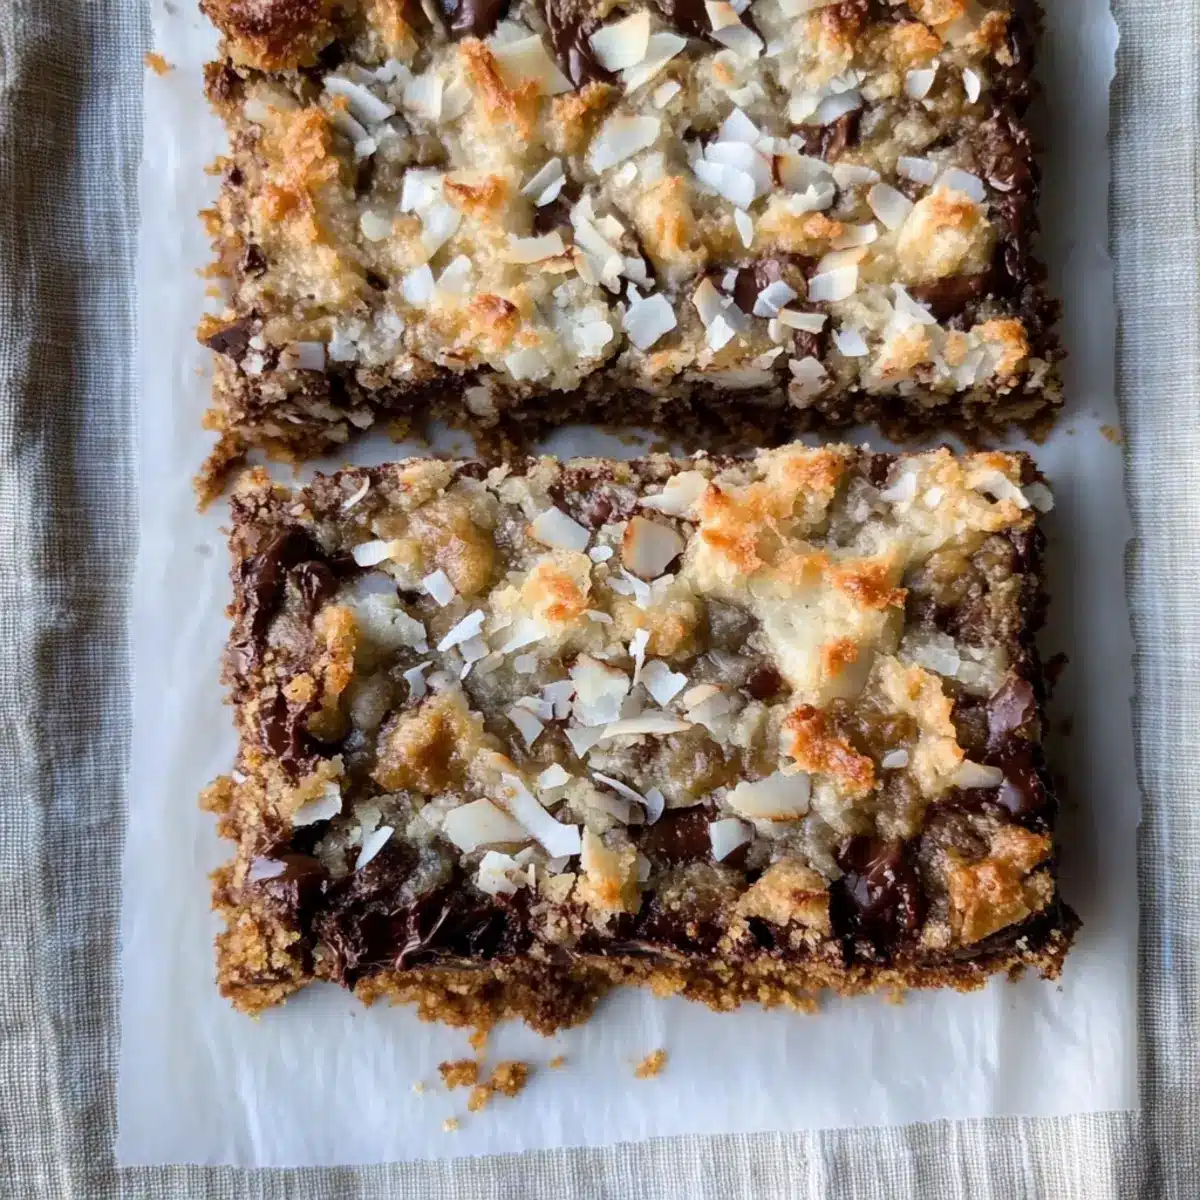
As I pulled the warm Magic Bars from the oven, the sweet aroma of melting chocolate and butterscotch wafted through my kitchen, instantly brightening my day. This delightful dessert, also known as Hello Dolly Bars, strikes the perfect balance between rich flavors and chewy goodness, all nested in a buttery graham cracker crust. What makes these Magic Bars truly special is their versatility; you can easily customize them with your favorite toppings, whether that’s a handful of coconut, nuts, or different types of chocolate. Best of all, they whip up in no time, making them a fantastic choice for gatherings or a little indulgence at home. Are you ready to embark on this sweet adventure with me?
Why Are Magic Bars So Irresistible?
Simplicity at Its Finest: Creating these Magic Bars is a breeze, requiring minimal ingredients and just a few simple steps, making it perfect for busy home cooks. Versatile Toppings: Whether you prefer butterscotch, chocolate chips, or even dried fruits, these bars can be tailored to fit your flavor cravings. Crowd-Pleasing Delight: They are always a hit at gatherings, leaving friends and family asking for the recipe. Texture Contrast: Enjoy the delightful combination of a buttery crust with chewy layers that provide a satisfying mouthfeel. Plus, if you’re looking for other easy dessert inspirations, check out my delicious Chocolate Cheesecake Bars or Gingerbread Latte Cookies for more sweet treats!
Magic Bars Ingredients
• Whether you’re a seasoned home chef or just starting out, gathering these ingredients is the first step to creating these delicious Magic Bars!
For the Crust
- Salted Butter – Provides richness and moisture for the crust; can substitute with unsalted butter and add a pinch of salt if needed.
- Graham Cracker Crumbs – Forms the sturdy base layer; try crushed Oreos or shortbread for a twist.
For the Layers
- Semi-Sweet Chocolate Chips – Adds a melty, sweet layer; dark or milk chocolate chips are great alternatives.
- Butterscotch Chips – Provides a sweet, caramel-like flavor; white chocolate chips may be used instead.
- Shredded Coconut – Contributes delightful texture; for less sweetness, consider using unsweetened coconut.
- Chopped Pecans – Adds crunch and flavor depth; swap for almonds, walnuts, or omit for a nut-free option.
For the Binding
- Sweetened Condensed Milk – Acts as a crucial binding agent for the layers; this ingredient is irreplaceable without altering the recipe’s integrity.
- Sea Salt (optional) – Enhances flavor; feel free to omit if desired.
Step‑by‑Step Instructions for Magic Bars
Step 1: Preheat the Oven and Prepare the Pan
Begin by preheating your oven to 350°F (175°C). While the oven warms up, grab a 9×13 inch baking pan and line it with parchment paper for easy removal of your Magic Bars later. Lightly spray the lined pan with a non-stick cooking spray to ensure a beautiful release after baking.
Step 2: Create the Crust
In a mixing bowl, combine melted salted butter with graham cracker crumbs, stirring until the crumbs are evenly moistened. Pour this mixture into your prepared pan, then press it firmly and evenly into the bottom using a spatula or your fingers for a solid base for your Magic Bars. This will provide a sturdy foundation that holds all the luscious layers.
Step 3: Add the Layers
Next, sprinkle semi-sweet chocolate chips evenly over the pressed graham cracker crust, creating a delightful chocolatey layer. Follow this by adding butterscotch chips, shredded coconut, and chopped pecans in an even distribution. Each topping will contribute its unique texture and flavor, making your Magic Bars truly irresistible.
Step 4: Drizzle with Condensed Milk
Take a can of sweetened condensed milk and drizzle it evenly across the layered toppings. Use a spoon or knife to give it a little jiggle, ensuring it covers all corners and edges without pooling in one spot. This will help bind the layers together as they bake into a delicious, gooey treat.
Step 5: Bake to Golden Perfection
Place the baking pan in your preheated oven and bake for about 25 minutes. Keep an eye on the edges; they should turn a lovely golden brown and the layers will look set. Your kitchen will be filled with enticing aromas that will have everyone excited for your Magic Bars!
Step 6: Cool and Cut
Once baked, remove the pan from the oven and let the Magic Bars cool completely in the pan. This step is crucial for achieving neat, clean cuts. After cooling for at least an hour, lift the bars out using the parchment paper and cut them into squares or bars with a sharp knife.
Step 7: Store and Enjoy
Store your Magic Bars at room temperature in an airtight container for up to five days, or refrigerate them for a longer freshness. These delightful treats are perfect for sharing at gatherings or satisfying your sweet tooth at home whenever you desire a scrumptious dessert!
How to Store and Freeze Magic Bars
- Room Temperature: Keep your Magic Bars in an airtight container for up to 5 days at room temperature, ensuring they remain fresh and delicious.
- Fridge: For longer freshness, store them in the refrigerator, where they can last up to 2 weeks while retaining their yummy taste and texture.
- Freezer: To freeze, wrap individual bars tightly in plastic wrap and place them in a freezer-safe bag. They can stay good for up to 3 months, making them perfect for future cravings.
- Reheating: When ready to enjoy frozen bars, thaw them in the refrigerator overnight, and feel free to warm them slightly in the microwave for that fresh-from-the-oven taste!
Make Ahead Options
These Magic Bars are perfect for busy home cooks who want to save time without sacrificing taste! You can prepare the crust by mixing the graham cracker crumbs and melted butter up to 24 hours in advance and store it tightly covered in the fridge. Additionally, you can layer the chocolate chips, butterscotch chips, coconut, and pecans in the pan without baking; cover and refrigerate for up to 3 days. When you’re ready to enjoy your bars, simply drizzle the sweetened condensed milk evenly across the toppings, bake, and cool as instructed. This way, you’ll have delicious, freshly baked Magic Bars with minimal effort on the day you serve them!
What to Serve with Magic Bars?
Indulging in rich, chewy Magic Bars is a delightful experience, but pairing them with the right accompaniments takes your dessert to new heights.
- Fresh Berries: Juicy strawberries or raspberries provide a tart contrast, brightening the sweetness of the bars.
- Vanilla Ice Cream: A scoop of creamy vanilla adds a luscious element, enhancing the rich flavors of chocolate and butterscotch. Each mouthful is an explosion of creamy and chewy goodness!
- Chocolate Sauce Drizzle: A warm, decadent drizzle elevates the chocolate richness while inviting a luxurious touch to the dessert.
- Coffee or Espresso: A brewed cup brings out the deep flavors and balances the sweetness, perfect for dessert lovers of all backgrounds.
- Whipped Cream: Light, fluffy whipped cream adds a delightful contrast that makes every bite feel festive and special.
- Caramel Sauce: The sweet, buttery goodness drizzled over the top enhances the flavor profiles beautifully, creating a delightful combination with the graham cracker crust.
- Nutty Trail Mix: Offering a crunchy, savory component, mixed nuts or even a trail mix with chocolate bits adds texture and a delightful contrast to the layered magic.
- Mint Tea: A refreshing herbal tea complements the dessert and cleanses the palate, making it easier to savor every layer of flavor.
Magic Bars: Customize Your Layers
Indulge your creativity and tailor these Magic Bars to suit your taste buds with delightful twist options.
- Dairy-Free: Substitute salted butter with coconut oil and use dairy-free chocolate chips for a creamy, plant-based treat.
- Nuts About It: Swap chopped pecans for walnuts or almonds to give your bars a different crunch and flavor profile. Nuts add a beautiful richness, creating even more depth in each bite.
- Caramel Drizzle: Drizzle some caramel sauce over the top before serving for an irresistible sweet surprise in every mouthful. The creamy caramel will harmonize beautifully with the chocolate and butterscotch layers.
- Spiced Coconut: For an exotic flair, try adding a pinch of cinnamon or nutmeg to the shredded coconut for a spiced version. This subtle warmth can transform the bars, making them perfect for cozy evenings.
- Mini Marshmallows: Add a handful of mini marshmallows atop the layers before baking for a gooey sweetness that will remind you of campfire treats. They’ll melt nicely, creating delightful pockets of chewiness throughout.
- Fruit Fusion: Toss in some dried cranberries or cherries for a tartness that beautifully offsets the sweet layers in your bars. This twist will also add a lovely pop of color!
- Chocolate Overload: Use a mix of semi-sweet and white chocolate chips for a decadent double chocolate experience that’s sure to please all chocoholics. The contrast will leave everyone wanting more!
Look beyond just Magic Bars and consider other creative desserts like my sweet and rich Chocolate Cheesecake Bars or classic Gingerbread Latte Cookies for your next baking adventure. Enjoy customizing your treat!
Expert Tips for Magic Bars
- Pack the Crust Firmly: Ensuring a well-packed graham cracker crust will help achieve a crispier base, preventing it from crumbling when cut.
- Cool Completely: Allowing the bars to cool entirely before cutting is essential for creating clean edges and avoiding a gooey mess.
- Evenly Distribute Milk: Drizzle sweetened condensed milk carefully to cover all toppings without pooling, promoting even cooking and a perfect blend of flavors.
- Customizable Layers: Don’t hesitate to experiment with your favorite toppings! You can mix and match for unique variations of these delicious Magic Bars.
- Storage Tips: Keep your Magic Bars in an airtight container for up to five days to maintain freshness, or refrigerate them if you prefer them chilled.
Magic Bars Recipe FAQs
What is the best way to choose ripe ingredients for Magic Bars?
Absolutely! For the best results, start with fresh ingredients. When selecting the shredded coconut, look for a bag that feels moist and has little to no dark spots. For nuts, choose pecans that are fragrant and free of any bitterness. Fresh, high-quality chocolate chips will melt beautifully, so opt for brands that you trust to ensure a rich flavor.
How should I store my Magic Bars after baking?
To keep those mouthwatering Magic Bars at their best, store them in an airtight container at room temperature for up to 5 days. If you live in a warm climate or want to extend their life, I often recommend refrigerating them where they’ll stay fresh for up to 2 weeks. Just make sure to let them come to room temperature before serving for optimal flavor!
Can I freeze Magic Bars, and how do I do it?
Yes, you can absolutely freeze Magic Bars! Wrap each square tightly in plastic wrap to prevent freezer burn, then place them in a freezer-safe bag. This way, they can be kept for up to 3 months. When you’re ready to enjoy them, thaw them in the refrigerator overnight. For a comforting treat, warm them slightly in the microwave before indulging!
What if my Magic Bars turn out too crumbly?
Very! If your Magic Bars are crumbling, it could be due to not packing the graham cracker crust firmly enough. Next time, make sure to really press the crust into the pan, creating a solid base. Additionally, allowing them to cool completely before cutting can help maintain their structure. A sharp knife will also help achieve clean cuts without crumbliness.
Are Magic Bars safe for those with nut allergies?
For sure! To make allergen-friendly Magic Bars, simply omit the chopped pecans (or nuts of choice) from the recipe. The bars will still taste heavenly without them. However, always check labels to ensure that your chocolate chips and other ingredients haven’t been processed in facilities that handle nuts, as that could lead to cross-contamination.
Can I use alternative sweeteners in my Magic Bars?
You can, but keep in mind that sweetened condensed milk is a vital ingredient in Magic Bars, and it provides both sweetness and moisture. If you’re looking for a healthier option, try using unsweetened condensed coconut milk, but you may need to adjust the sugar levels in your other ingredients to achieve the desired sweetness.
Magic Bars Delight: Customizable Layers of Sweet Bliss
Ingredients
Equipment
Method
- Preheat your oven to 350°F (175°C). Line a 9x13 inch baking pan with parchment paper and lightly spray it with non-stick cooking spray.
- In a mixing bowl, combine melted salted butter with graham cracker crumbs and stir until evenly moistened. Press mixture firmly into the bottom of the prepared pan.
- Sprinkle semi-sweet chocolate chips evenly over the crust, followed by butterscotch chips, shredded coconut, and chopped pecans.
- Drizzle sweetened condensed milk evenly across the toppings and jiggle to ensure coverage.
- Bake for about 25 minutes until edges are golden brown and layers look set.
- Remove from oven and let cool completely in the pan, then lift out using the parchment and cut into squares.
- Store in an airtight container at room temperature for up to five days or refrigerate for longer freshness.
Leave a Reply