
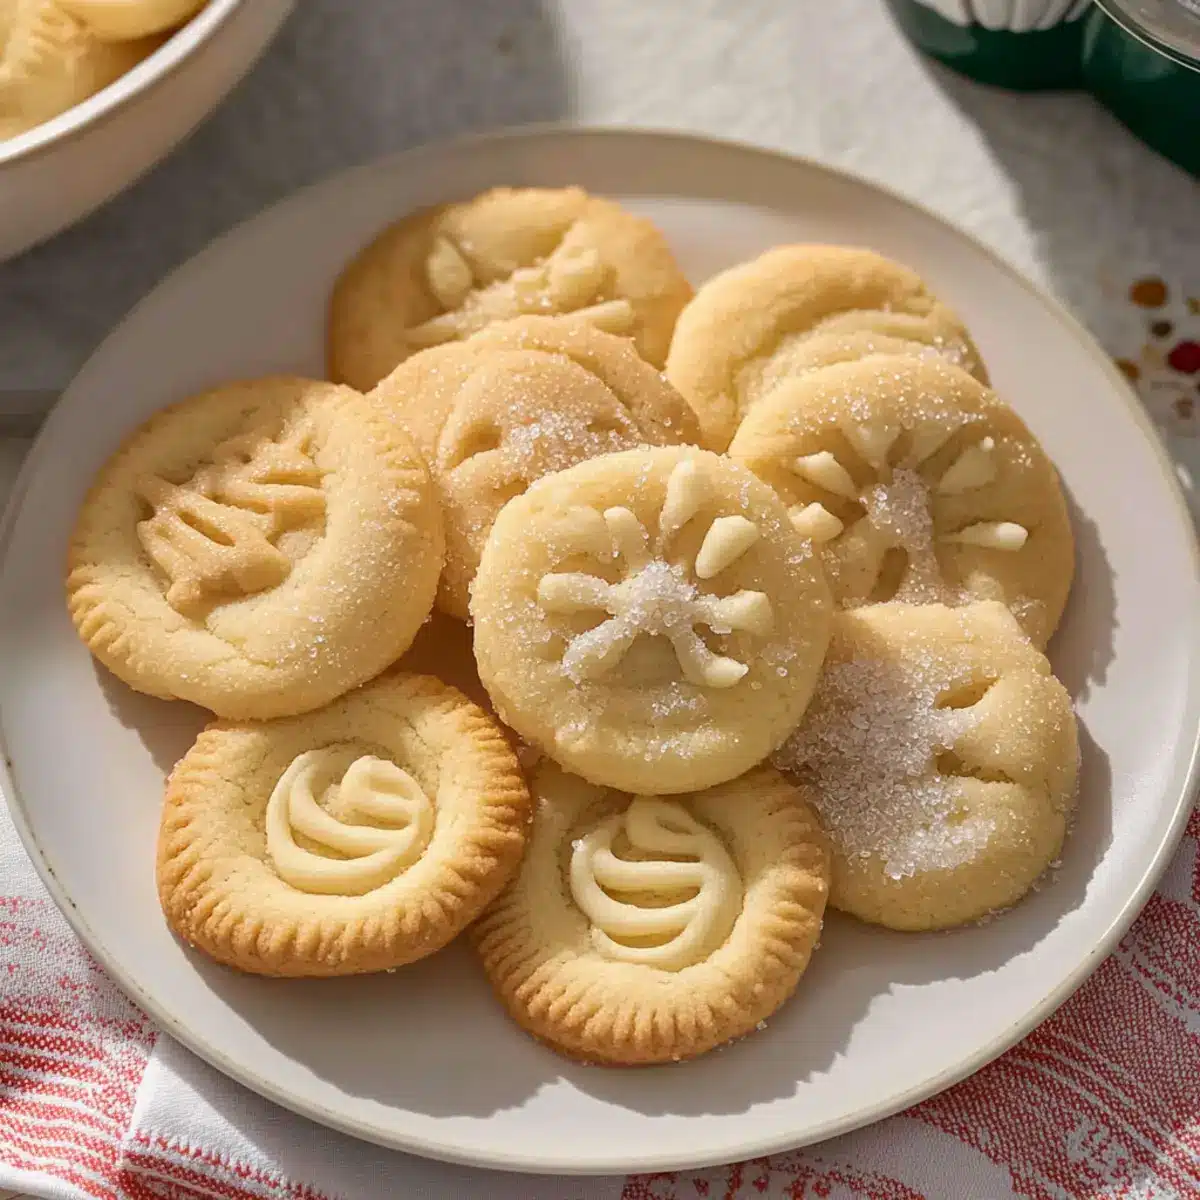
The aroma of freshly baked cookies has a way of weaving through time, transporting me back to cozy holiday gatherings. Today, I’m excited to share my recipe for melt-in-your-mouth Danish butter cookies, a true celebration of tradition and flavor. These delightful treats are not only incredibly simple to make but are also perfect for gifting during the festive season. With a buttery richness that’s perfectly balanced—not too sweet—they become a delightful addition to any dessert table or a comforting treat to enjoy with your favorite cup of tea. Plus, they can be easily stored for later, ensuring you have a homemade indulgence ready for unexpected guests. Are you ready to dive into the world of buttery bliss? Let’s get started!
Why are Danish Butter Cookies a must-try?
Melt-in-your-mouth goodness: These cookies deliver a delightful buttery richness that simply melts in your mouth.
Giftable treats: Perfect for holiday gifting, they not only look beautiful but taste amazing!
Quick prep: With just a handful of ingredients, you can whip up a batch in no time—ideal for busy bakers!
Endless variations: Customize them with chocolate drizzles or citrus zest for a unique twist. You can even use your leftovers to make a delicious Gooey Butter Pecan Cake.
Crowd-pleaser: These cookies will impress guests at gatherings and make everyone feel at home.
Danish Butter Cookies Ingredients
For the Cookie Dough
- European Salted Butter – Provides richness and flavor; use room temperature butter for proper mixing and easily substitutable with unsalted butter plus 1/4 tsp salt.
- Granulated Sugar – Adds sweetness and helps achieve a light texture; no substitutions recommended for that classic taste.
- Salt – Enhances flavor; decrease or omit if using salted butter.
- Egg Yolks – Contributes moisture and richness; use large eggs at room temperature to get that perfect melt-in-your-mouth texture.
- Vanilla Extract – Adds depth of flavor; you can substitute with almond extract if you’re feeling adventurous!
- Whole Milk – Helps soften the cookie dough for easier piping; add more if the dough is too thick for piping.
- All-Purpose Flour – Provides structure; you can substitute with more all-purpose flour if cake flour isn’t available.
- Cake Flour – Gives a tender texture that helps create the melt-in-your-mouth quality; can be fully replaced with more all-purpose flour (totaling 260g).
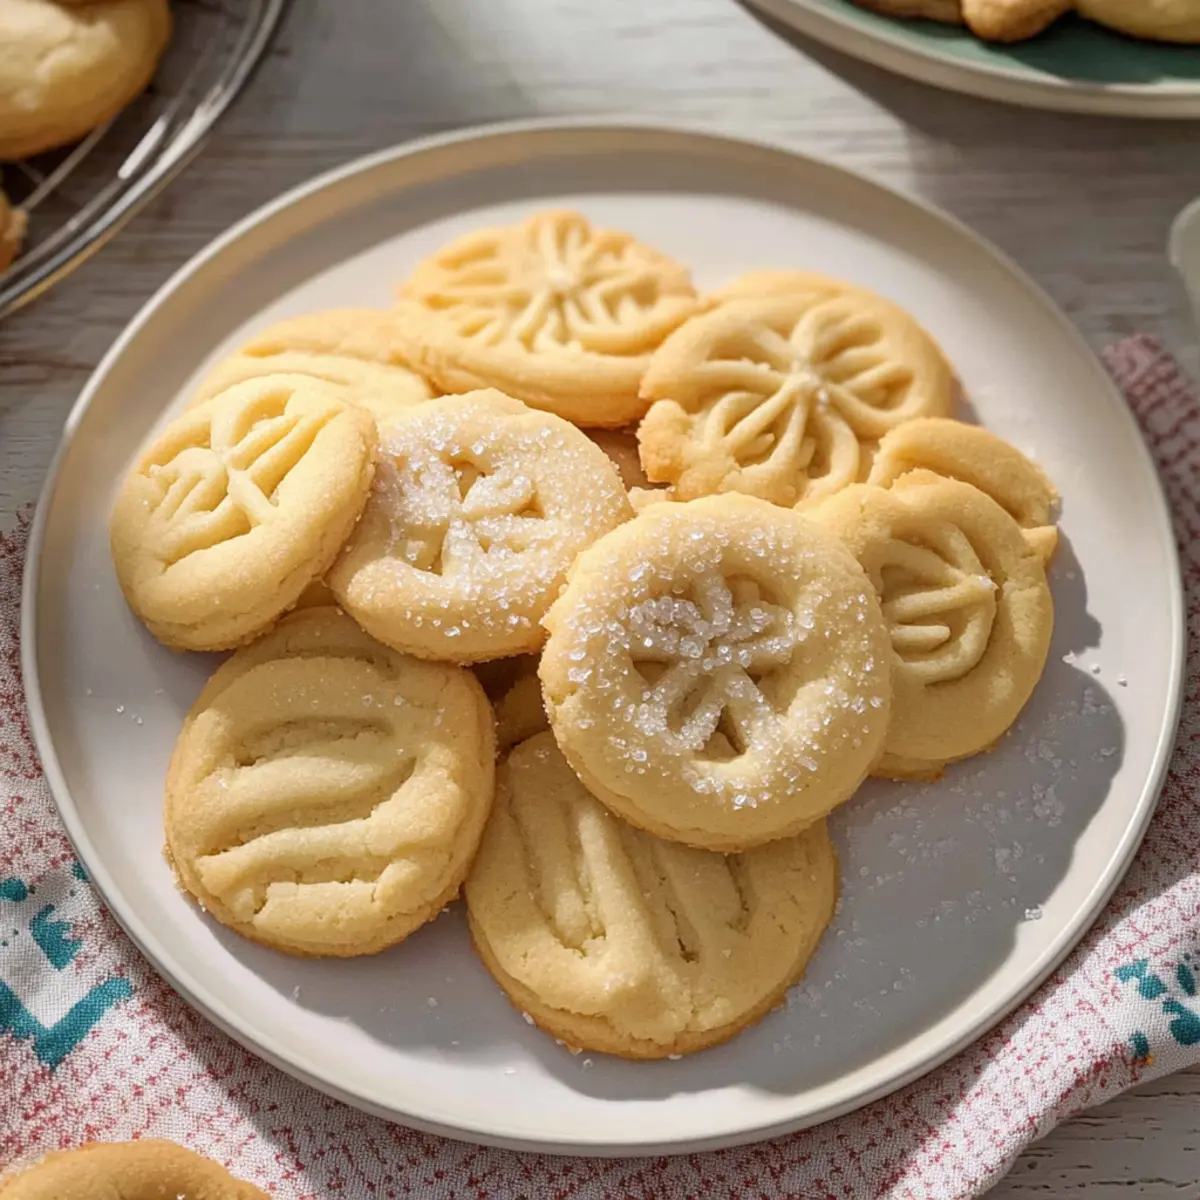
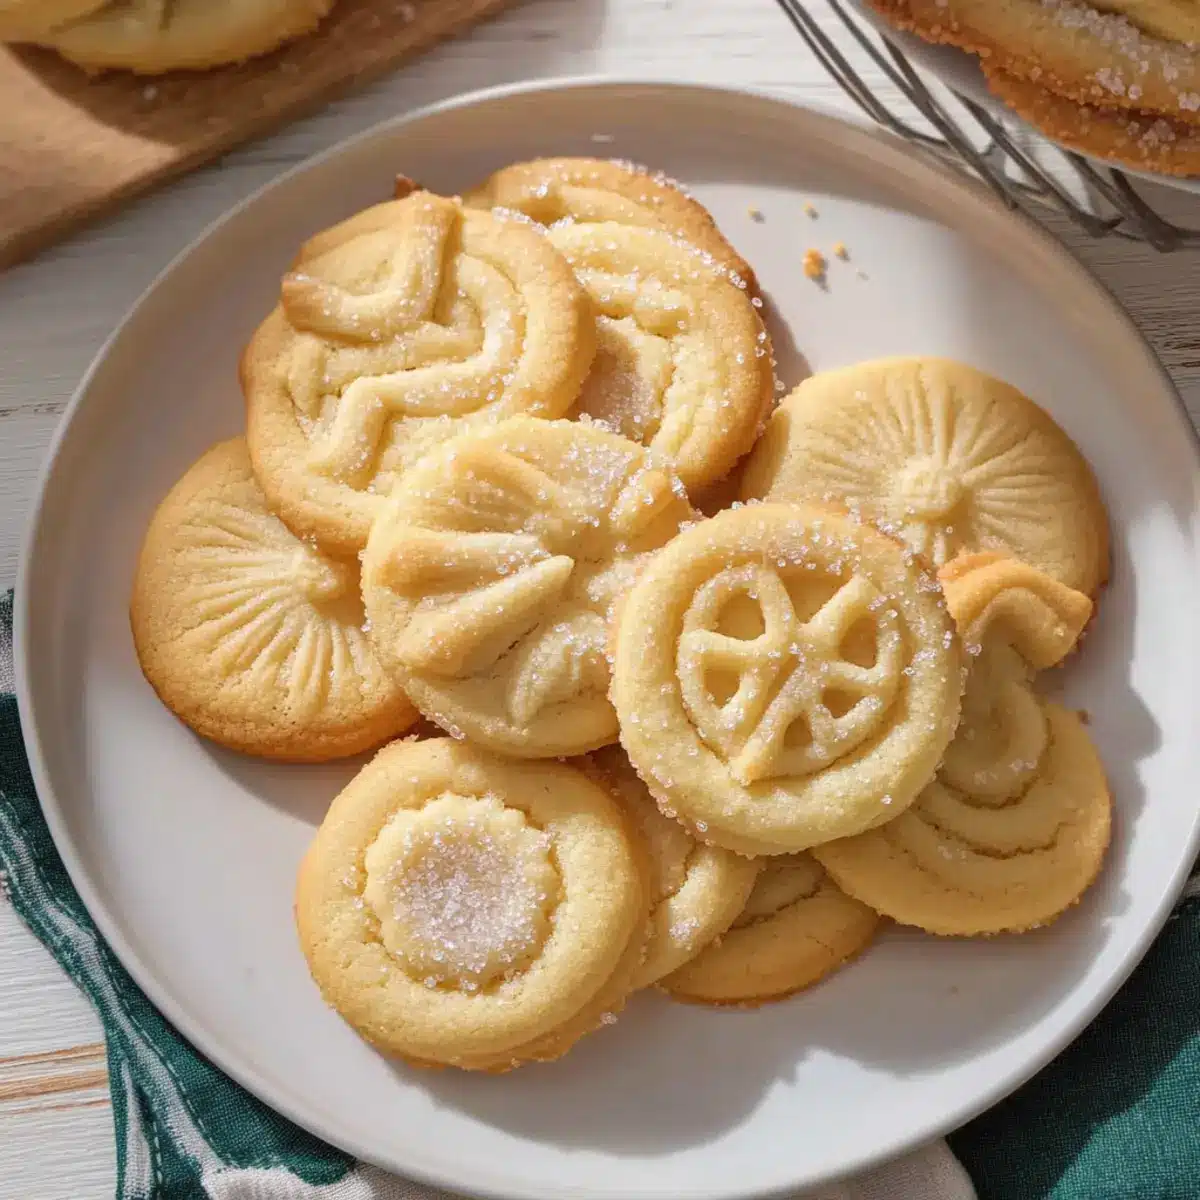
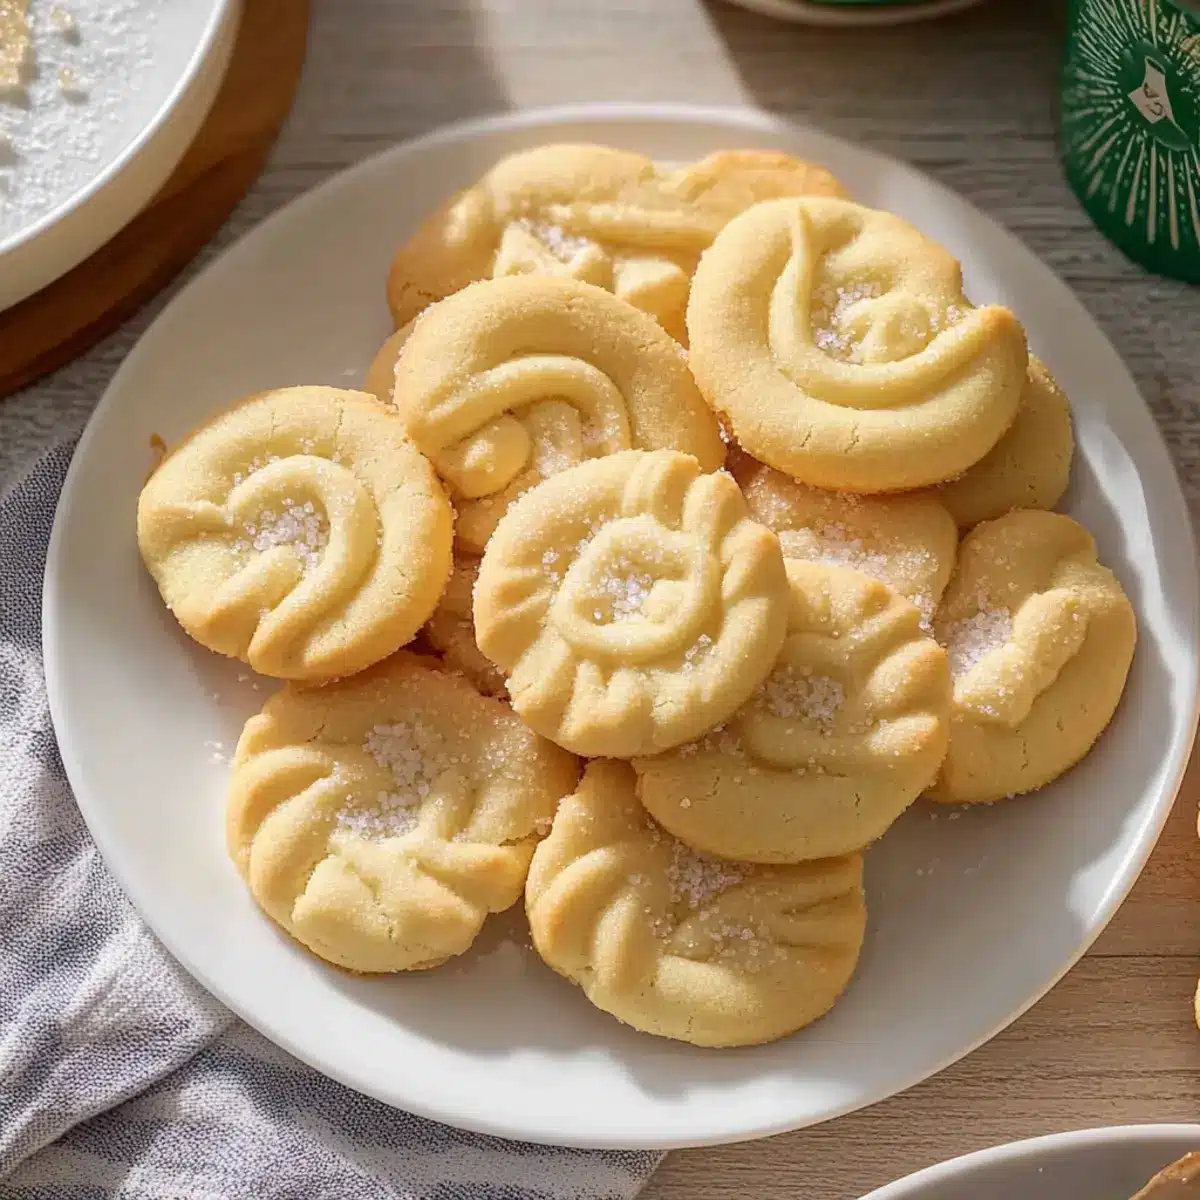
- Coarse Sugar – For decorating, adding a crunch and visual appeal, regular sugar works just fine if coarse sugar isn’t at hand.
For Decoration
- Coarse Sugar – Perfect for sprinkling on top, it adds a lovely crunch and sparkle to your Danish butter cookies; you can also use regular sugar if you must.
Step‑by‑Step Instructions for Melt-in-Your-Mouth Danish Butter Cookies
Step 1: Prep Your Baking Sheets
Begin by chilling your baking sheets in the refrigerator for about 10 minutes while you prepare. Line them with parchment paper or silicone mats to prevent sticking. This step ensures your Danish butter cookies maintain their shape during baking, making for a tidy presentation when they come out of the oven.
Step 2: Cream the Butter and Sugar
In a stand mixer, add your room temperature European salted butter and set it to medium speed. Gradually incorporate granulated sugar and salt, mixing until the mixture is light, fluffy, and pale in color, about 3-5 minutes. This aeration is key for achieving the melt-in-your-mouth texture characteristic of Danish butter cookies.
Step 3: Incorporate the Egg Yolks and Flavorings
Lower the mixer speed and gently add the egg yolks, vanilla extract, and whole milk. Mix until fully blended, which should take about 1-2 minutes. Ensuring these wet ingredients are well incorporated will result in a rich and moist cookie dough that bursts with flavor in every bite.
Step 4: Combine the Dry Ingredients
In a separate bowl, whisk together all-purpose flour and cake flour until evenly mixed. Gradually add the flour mixture to the buttery mixture, folding it together gently until just combined. Be careful not to overmix, as this could lead to tough cookies. Aim for a smooth but slightly sticky dough.
Step 5: Pipe the Cookie Shapes
Transfer the dough into a piping bag fitted with a star tip. Pipe 2-inch shapes onto the prepared baking sheets, leaving enough space between each cookie to allow for slight spreading. Chill the piped cookies in the refrigerator for 20-30 minutes to help them hold their shape in the oven.
Step 6: Bake the Cookies
Preheat your oven to 350°F (175°C) while the cookies chill. Once preheated, bake the Danish butter cookies for 10-15 minutes, or until their edges turn a light golden color. Monitor them closely, as baking time can vary. Once baked, let the cookies cool on the sheets for a few minutes before transferring them to a wire rack to cool completely.
Expert Tips for Danish Butter Cookies
-
Room Temperature Ingredients: Using room temperature butter and eggs is crucial for creating a smooth mixture that results in lighter, fluffier Danish butter cookies.
-
Don’t Overmix: Mix until just combined to prevent tough cookies—overmixing activates the gluten in the flour, leading to denser cookies.
-
Chill for Shape: Chilling your piped cookies before baking helps them maintain their shape. This prevents overspreading during baking, ensuring a beautiful presentation.
-
Watch Baking Time: Baking times can vary based on your oven and cookie size. Keep a close eye on the edges, aiming for a light golden hue while remaining soft in the center.
-
Decorate to Impress: For added flair, sprinkle coarse sugar or drizzle melted chocolate on top after baking to elevate the visual appeal and taste of your Danish butter cookies.
What to Serve with Melt-in-Your-Mouth Danish Butter Cookies?
Transform your delightful cookies into a full sensory experience with perfect pairings that complement their buttery goodness.
-
Rich Hot Chocolate: This warm, velvety drink enhances the cookies’ sweetness, creating a perfect cozy combination for a winter evening.
-
Herbal Tea: A soothing chamomile or peppermint tea balances the richness of the cookies while adding a refreshing element.
-
Fresh Berries: Serve with a medley of seasonal berries for a pop of color and freshness, contrasting beautifully with the buttery texture.
-
Vanilla Ice Cream: A scoop of creamy vanilla ice cream alongside these cookies creates a delightful melt-in-your-mouth moment that’s simply irresistible.
-
Lemonade or Iced Tea: The bright citrusy notes of lemonade or the refreshing taste of iced tea cut through the richness of the cookies, making for an invigorating contrast.
-
Chocolate Dipping Sauce: Drizzling these cookies with warm chocolate sauce adds a luscious contrast, turning a simple treat into an indulgent dessert experience.
-
Spiced Eggnog: During the holidays, serve these cookies with a glass of spiced eggnog for a festive twist that captures cozy winter vibes.
-
Cheese Platter: A selection of mild cheeses can provide a delightful balance, smoothing out the sweetness while adding a savory depth to your snack time.
Make Ahead Options
These melt-in-your-mouth Danish butter cookies are an excellent choice for meal prep, allowing you to savor the holiday spirit without the stress. You can chill the piped cookie shapes on a baking sheet in the refrigerator for up to 2 days before baking. Alternatively, freeze the unbaked dough for up to 3 months; just make sure to wrap it tightly in plastic wrap to maintain quality. When you’re ready to bake, simply thaw the dough overnight in the fridge or bake straight from frozen, adding a few extra minutes to the baking time. The result? Deliciously fresh cookies that are just as delightful as if made on the spot, saving you precious time during busy baking marathons!
How to Store and Freeze Danish Butter Cookies
Room Temperature: Store your Danish butter cookies in an airtight container at room temperature for up to 5 days to keep them fresh and delicious.
Freezer: For longer storage, freeze the cookies in a single layer on a baking sheet before transferring to a resealable bag or an airtight container. They can be kept for up to 3 months.
Make-Ahead: If you prefer, freeze unbaked dough in a piping bag for quick cookie prep; thaw in the fridge before baking when you have a craving.
Reheating: To rejuvenate cookies after freezing, let them thaw at room temperature and warm in the oven for a few minutes to regain that melt-in-your-mouth texture.
Danish Butter Cookies Variations & Substitutions
Feel free to sprinkle some creativity into your baking! These delightful tweaks will elevate your Danish butter cookies to new heights of flavor.
-
Chocolate Drizzle: Drizzle melted chocolate on top after cooling for a decadent touch. Perfect for chocolate lovers!
-
Nutty Additions: Fold in chopped nuts like pecans or almonds for added crunch and earthy appeal. The nutty flavor pairs beautifully with the buttery base.
-
Citrus Zest: Incorporate lemon or orange zest into the dough for a refreshing twist. It adds a bright note that lightens the richness of the cookies.
-
Almond Extract: If you’re looking for a unique flavor profile, substitute half the vanilla extract with almond extract. This will give your cookies a delightful and unexpected aroma.
-
Spice It Up: Add a pinch of cinnamon or cardamom into the flour mixture for a warm, fragrant spice note that complements the buttery richness.
-
Decorative Touch: Use colored coarse sugar for festive decorations. Different colors can make these cookies pop, especially for holiday gifting!
-
Dairy-Free Option: Swap European salted butter for a dairy-free butter alternative. These still yield a delightful cookie experience that’s accessible to everyone.
-
Chocolate Chip Variation: Mix in semi-sweet or dark chocolate chips into the dough for a delightful surprise in every bite. A perfect way to balance the buttery cookie texture.
Feel free to explore and create your personalized version of these cookies! And while you’re at it, consider enjoying them with a cup of freshly brewed tea or making a batch of Gooey Butter Cookies to complement the festive spirit.
Danish Butter Cookies Recipe FAQs
What type of butter is best for Danish butter cookies?
Using European salted butter is ideal as it provides the perfect richness and flavor. Ensure the butter is at room temperature for smooth mixing. If necessary, unsalted butter can be a substitute by adding 1/4 teaspoon of salt.
How should I store my Danish butter cookies?
Absolutely! Store your cookies in an airtight container at room temperature for up to 5 days to keep them fresh. If you want to extend their shelf life, freeze them by first laying them out on a baking sheet until firm, then transfer to a resealable bag or an airtight container. They can be frozen for up to 3 months!
Can I freeze the cookie dough? How?
Yes, of course! You can freeze unbaked dough for future indulgence. Place it in a piping bag, then freeze until solid. When you’re ready to bake, let it thaw in the refrigerator overnight before piping and baking as usual.
What should I do if my cookies spread too much during baking?
If your cookies spread too much, it could be due to warm dough or not chilling the piped shapes enough before baking. To avoid this, ensure your cookies are well-chilled for at least 20-30 minutes before they hit the oven. If they still spread, consider adding a bit more flour next time.
Are Danish butter cookies safe for pets or those with allergies?
Generally, Danish butter cookies are not safe for pets due to the ingredients like sugar and butter. As for allergies, these cookies contain common allergens such as eggs and dairy. Always be sure to check labels and avoid cross-contamination if you’re making them for someone with specific allergies.
Melt-in-Your-Mouth Danish Butter Cookies to Delight Everyone
Ingredients
Equipment
Method
- Chill your baking sheets in the refrigerator for about 10 minutes, then line them with parchment paper or silicone mats.
- In a stand mixer, cream the room temperature European salted butter, gradually incorporating granulated sugar and salt until light and fluffy.
- Add the egg yolks, vanilla extract, and whole milk, mixing until fully blended.
- In a separate bowl, whisk together all-purpose flour and cake flour, then gradually fold into the buttery mixture until just combined.
- Transfer the dough into a piping bag and pipe 2-inch shapes onto the prepared baking sheets, then chill for 20-30 minutes.
- Preheat your oven to 350°F (175°C) and bake the cookies for 10-15 minutes until the edges are light golden.
- Let the cookies cool on the sheets for a few minutes before transferring them to a wire rack.
Leave a Reply