
As I mixed the buttery dough and watched the pastel candies come to life within, an unexpected smile crept across my face. These Easter Bunny Button Cookies are the joyful little treats that transform the kitchen into a festive wonderland. Perfect for sharing at gatherings or giving as sweet gifts, these one-bite delights are a wonderful way to celebrate the season. The best part? They come together in no time and are simple enough for bakers of all levels to master. Who wouldn’t want to prepare a batch of cookies that radiate warmth and cheer? Join me as we create these colorful, candy-coated treats that are sure to bring smiles to everyone’s faces! Want to know the secret behind making these cookies extra special?

Why Are These Cookies So Special?
Joyful Celebration: The vibrant colors and playful design make these Easter Bunny Button Cookies a must-have for any festive gathering.
Quick & Easy: With just a few simple ingredients and straightforward steps, you’ll have these delightful treats ready in no time—perfect for busy bakers!
Gift-Worthy Treats: Package them up as charming homemade gifts, bringing smiles to loved ones and making every occasion feel a bit more special.
Versatile Fun: Feel free to swap the candy center for your favorite options. Just like my Chocolate Chip Cookies or Chewy Pumpkin Cookies, there are endless possibilities!
Crowd-Pleasing Delight: Their soft texture paired with a crunchy outer layer appeals to both kids and adults—watch them disappear at any gathering!
Easter Bunny Button Cookies Ingredients
• Get ready to bring joy with these delightful treats!
For the Cookie Dough
- Butter – Provides richness and moisture for a tender cookie. Ensure it’s softened for easier mixing.
- Sugar – Sweetens the dough; essential for texture. May use brown sugar for a hint of molasses flavor.
- Egg Yolks – Contributes fat for richness and acts as a binder. The whites are not used, leading to a denser cookie.
- Vanilla Extract – Adds warmth and depth of flavor. Almond extract can be used for a different essence.
- All-Purpose Flour – Provides structure to the cookie. Avoid over-mixing; this could lead to drier cookies.
For the Topping
- Sanding Sugar – Creates a sparkling coating and adds crunch. Pearl sugar or coarse sugar can work, but avoid granulated sugar as it melts during baking.
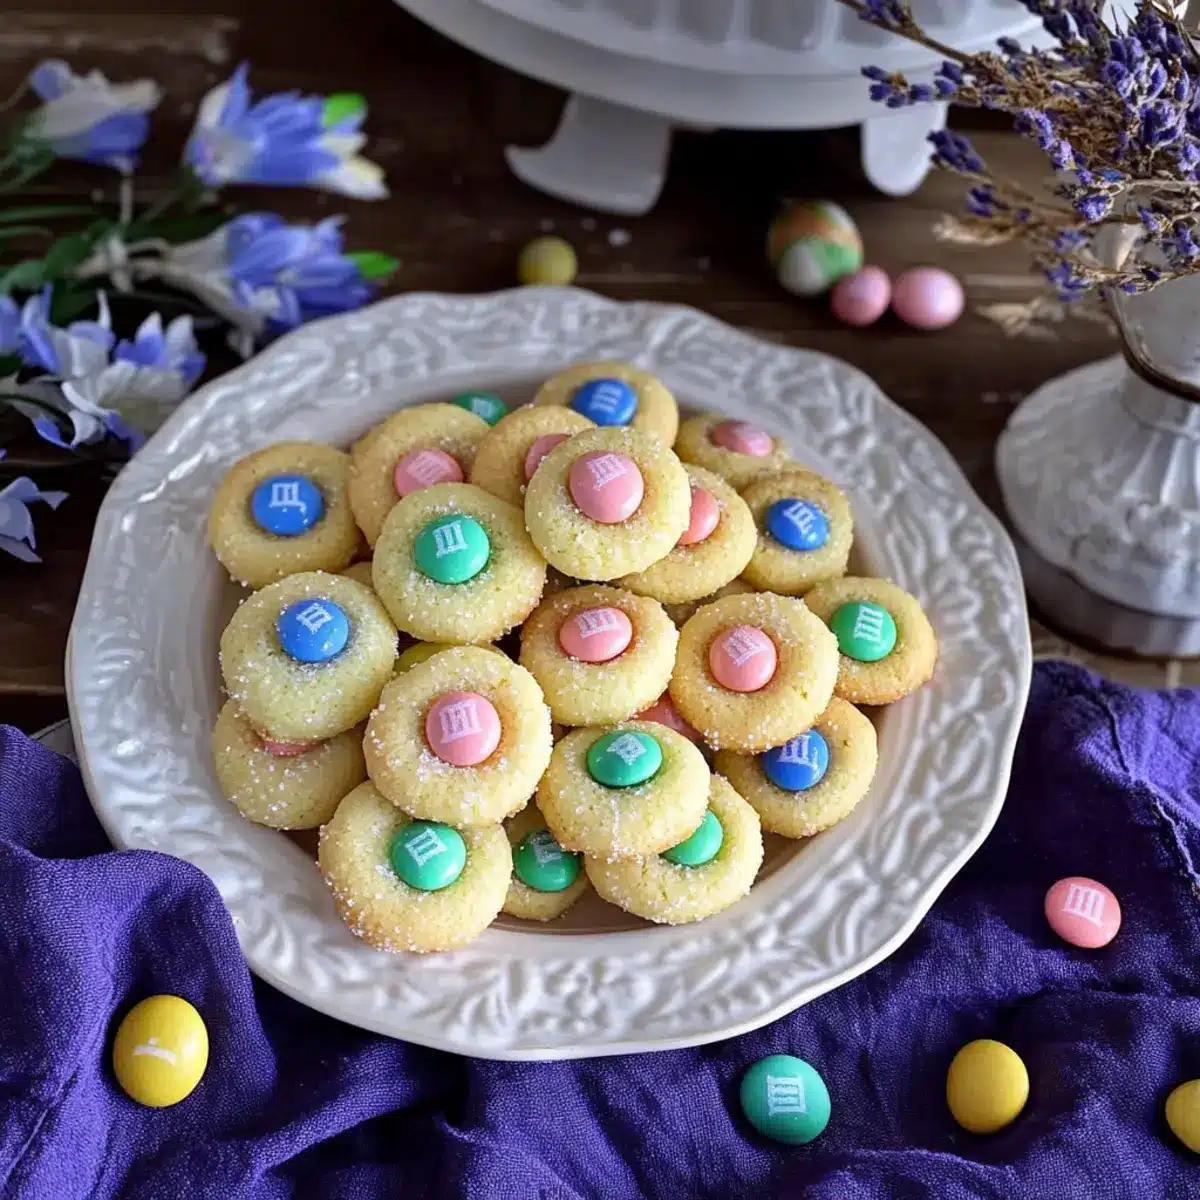
- Chocolate M&M Candy – Acts as a colorful decorative center and adds sweetness. Any candy-coated chocolate can be used; pastel colors are ideal for Easter.
Step‑by‑Step Instructions for Easter Bunny Button Cookies
Step 1: Preheat the Oven
Begin by preheating your oven to 350°F (175°C). While the oven warms up, prepare a baking sheet by lining it with parchment paper or a silicone mat. This ensures easy cleanup and prevents the cookies from sticking.
Step 2: Cream the Butter and Sugar
In a mixing bowl, use an electric mixer to beat the softened butter and sugar together until the mixture is light and fluffy, about 2-3 minutes. This step is crucial for incorporating air into the dough, contributing to the tender texture of the Easter Bunny Button Cookies.
Step 3: Add Egg Yolks and Vanilla
Once your butter and sugar are perfectly combined, mix in the egg yolks and vanilla extract. Beat until everything is well blended, which should take about 1-2 minutes. The rich flavors will start to meld, creating a sweetly aromatic base for your dough.
Step 4: Incorporate the Flour
Gradually add the all-purpose flour to the mixture, using a spatula or mixer on low speed. Blend until just combined, being careful not to over-mix. You want a smooth dough that holds together without becoming tough—this will keep your cookies delightfully tender.
Step 5: Shape the Cookie Dough
Use a teaspoon to portion the dough, rolling each piece into a ball. Aim for a uniform size to ensure even baking. Once shaped, roll each dough ball in coarse sanding sugar to give your Easter Bunny Button Cookies a sparkly, crunchy exterior that enhances their festive appeal.
Step 6: Press in the Chocolates
Place the sugar-coated dough balls onto your prepared baking sheet, spacing them about 2 inches apart. Gently press a chocolate M&M into the center of each cookie, ensuring it embeds slightly into the dough. This colorful touch not only adds sweetness but also makes them visually appealing.
Step 7: Bake the Cookies
Slide the baking sheet into your preheated oven and bake the cookies for approximately 10 minutes. Keep a close eye on them; they should be lightly golden around the edges while remaining soft in the center. This creates that perfect melt-in-your-mouth texture.
Step 8: Cool and Transfer
Once baked, remove the Easter Bunny Button Cookies from the oven and let them cool on the sheet for 3-5 minutes. This resting time allows them to set before transferring to a wire rack. Let them cool completely, and watch as the sanding sugar glistens in the light, adding to the festive atmosphere.

How to Store and Freeze Easter Bunny Button Cookies
Room Temperature: Store the cookies in an airtight container at room temperature for up to 3-5 days; they will stay delicious and fresh, perfect for snacking!
Fridge: If you prefer chilled cookies, keep them in the fridge in a sealed container for up to a week, but allow them to come to room temperature before enjoying for the best flavor.
Freezer: Freeze the cookies for up to 4 weeks. Place them in a freezer-safe container with parchment paper between layers to prevent sticking. Thaw at room temperature when ready to enjoy.
Reheating: If you like your cookies warm, pop them in a toaster oven for a few minutes to revive that freshly-baked taste before serving!
What to Serve with Easter Bunny Button Cookies?
These colorful treats invite a delightful celebration and become even more memorable when paired with complementary dishes.
- Milk: A classic pairing, a cold glass of milk enhances the sweetness of the cookies while providing a comforting balance.
- Fruit Platter: Fresh fruits like strawberries and pineapple offer a vibrant contrast, adding brightness to your dessert spread.
- Whipped Cream: A dollop of lightly sweetened whipped cream brings a creamy texture that complements the crunchy cookie exterior.
- Chocolate Fondue: Set up a miniature chocolate fountain for dipping the cookies, enhancing their sweetness and creating a fun experience for guests.
- Easter-Themed Cupcakes: Create a festive dessert table by serving colorful cupcakes decorated to match the delightful hues of the cookies.
- Lemonade: A chilled glass of lemonade introduces a zesty kick, offsetting the cookies’ sweetness with a refreshing tartness that guests will adore.
- Carrot Cake: Celebrate the holiday spirit with slices of moist carrot cake; its spiced flavor beautifully complements the buttery cookies.
- Coffee or Cappuccino: For adults, a rich coffee or frothy cappuccino offers a warm, comforting contrast, perfect for afternoon gatherings.
- Homemade Ice Cream: Serve with a scoop of vanilla or pastel-colored ice cream, introducing a creamy element that’s sure to please.
Pair these suggestions with your Easter Bunny Button Cookies to create a joyful, festive atmosphere filled with flavor and fun!
Expert Tips for Easter Bunny Button Cookies
-
Soften Butter Properly: Make sure the butter is at room temperature before mixing. This ensures a light and fluffy consistency in your dough.
-
Mind the Flour: Avoid over-mixing when incorporating the flour. This common mistake can lead to tough cookies instead of the tender texture you desire.
-
Gentle Pressing: When adding M&Ms, press them gently into the dough to prevent cracking during baking. This helps maintain the colorful candy center intact.
-
Use Coarse Sugar: Opt for coarse sanding sugar instead of granulated sugar for a sparkling, crunchy finish that won’t melt away in the oven.
-
Chill If Needed: If the dough feels too soft to handle, briefly chill it in the fridge. This will make rolling and shaping easier, ensuring your Easter Bunny Button Cookies turn out beautifully!
Easter Bunny Button Cookies Variations
Feel free to get creative with these delightful cookies and make them your own!
-
Chocolate Twist:
Add 2 tablespoons of cocoa powder to the flour mixture for a rich chocolatey base. The combination of flavors will have everyone coming back for seconds! -
Nutty Delight:
Mix in 1/2 cup of finely chopped nuts, like walnuts or pecans, for a crunchy contrast. This will add a wonderful texture and depth to your cookies. -
Dairy-Free:
Substitute the butter with coconut oil or vegan butter for a deliciously dairy-free option. They’ll still be just as creamy and tender! -
Fruit-Infused:
Add 1/2 cup of finely chopped dried fruit, such as cranberries or apricots, for a burst of natural sweetness. Each bite will surprise and delight with fruity flavors! -
Change the Candy:
Swap out M&Ms for pastel chocolate-covered almonds or even jelly beans for a fun twist. The colorful variety will brighten your cookie platter! -
Spiced Up:
Incorporate a teaspoon of cinnamon or nutmeg into the dough for a cozy, aromatic flavor. This will infuse your cookies with a delightful warmth, perfect for the season. -
Gluten-Free:
Use a cup-for-cup gluten-free flour blend instead of all-purpose flour. They’ll still come out tender and delicious, great for gluten-sensitive friends. -
Citrus Zing:
Add the zest of one lemon or orange to the dough for a refreshing twist. The zesty aroma will brighten your kitchen and add a lovely flavor contrast!
Using these variations, you can let your creativity run wild—simply like how you would with my Cranberry Orange Cookies or the delectable Chocolate Peppermint Cookies. Happy baking!
Make Ahead Options
These delightful Easter Bunny Button Cookies are perfect for meal prep enthusiasts! You can prepare the cookie dough and refrigerate it for up to 24 hours before baking; just ensure it’s tightly wrapped to prevent drying out. For even greater convenience, you can portion the dough into balls, roll them in sanding sugar, and place them in an airtight container in the refrigerator for the same timeframe. When you’re ready to bake, simply add the chocolate M&M centers and follow the baking instructions as directed. This way, you’ll have fresh, delicious cookies with minimal effort, making your busy holiday preparations a breeze!
Easter Bunny Button Cookies Recipe FAQs
What type of butter should I use?
Absolutely! For the best results, use unsalted butter that’s been softened to room temperature. This will help achieve a light and fluffy dough, creating those tender cookie delights.
How should I store leftover cookies?
Store your Easter Bunny Button Cookies in an airtight container at room temperature for up to 3-5 days. This keeps them fresh and perfect for snacking! If you prefer, you can also refrigerate them in a sealed container for up to a week; just let them come to room temperature for optimal flavor.
Can I freeze these cookies? What’s the best method?
Yes, you can freeze your cookies! Simply place them in a single layer on a baking sheet to freeze for about an hour. Once frozen, transfer them to a freezer-safe container with parchment paper between each layer to prevent sticking. They can be frozen for up to 4 weeks. When you’re ready to indulge, just let them thaw at room temperature.
What if my dough feels too soft to handle?
If your dough feels too soft, don’t worry! Simply pop it in the fridge for about 15-20 minutes. Chilling the dough will make it easier to roll and shape into balls without sticking to your hands, ensuring perfect Easter Bunny Button Cookies!
Can these cookies be made allergy-friendly?
Very! If you need to cater to dietary restrictions, consider using dairy-free butter for a vegan option or egg replacement solutions, such as flaxseed meal mixed with water. For nut allergies, ensure you use pure vanilla extract, as some flavored extracts can contain allergens. Just be sure to remember that these substitutions may affect the texture slightly, but they will still delight!
How do I know when the cookies are done baking?
Keep an eye on your cookies! They should look lightly golden around the edges but remain soft in the center. Baking takes about 10 minutes; if they start to brown too much, it might be time to take them out. Remember, they will continue to firm up as they cool!

Easter Bunny Button Cookies: Sweet Treats for Joyful Moments
Ingredients
Equipment
Method
- Preheat your oven to 350°F (175°C) and prepare a baking sheet.
- Beat the softened butter and sugar until light and fluffy.
- Mix in the egg yolks and vanilla extract.
- Gradually add the all-purpose flour until just combined.
- Shape the dough into balls and roll in sanding sugar.
- Place dough balls on baking sheet and press a chocolate M&M into each.
- Bake the cookies for approximately 10 minutes.
- Let the cookies cool on the baking sheet for 3-5 minutes before transferring them to a wire rack.
Leave a Reply