
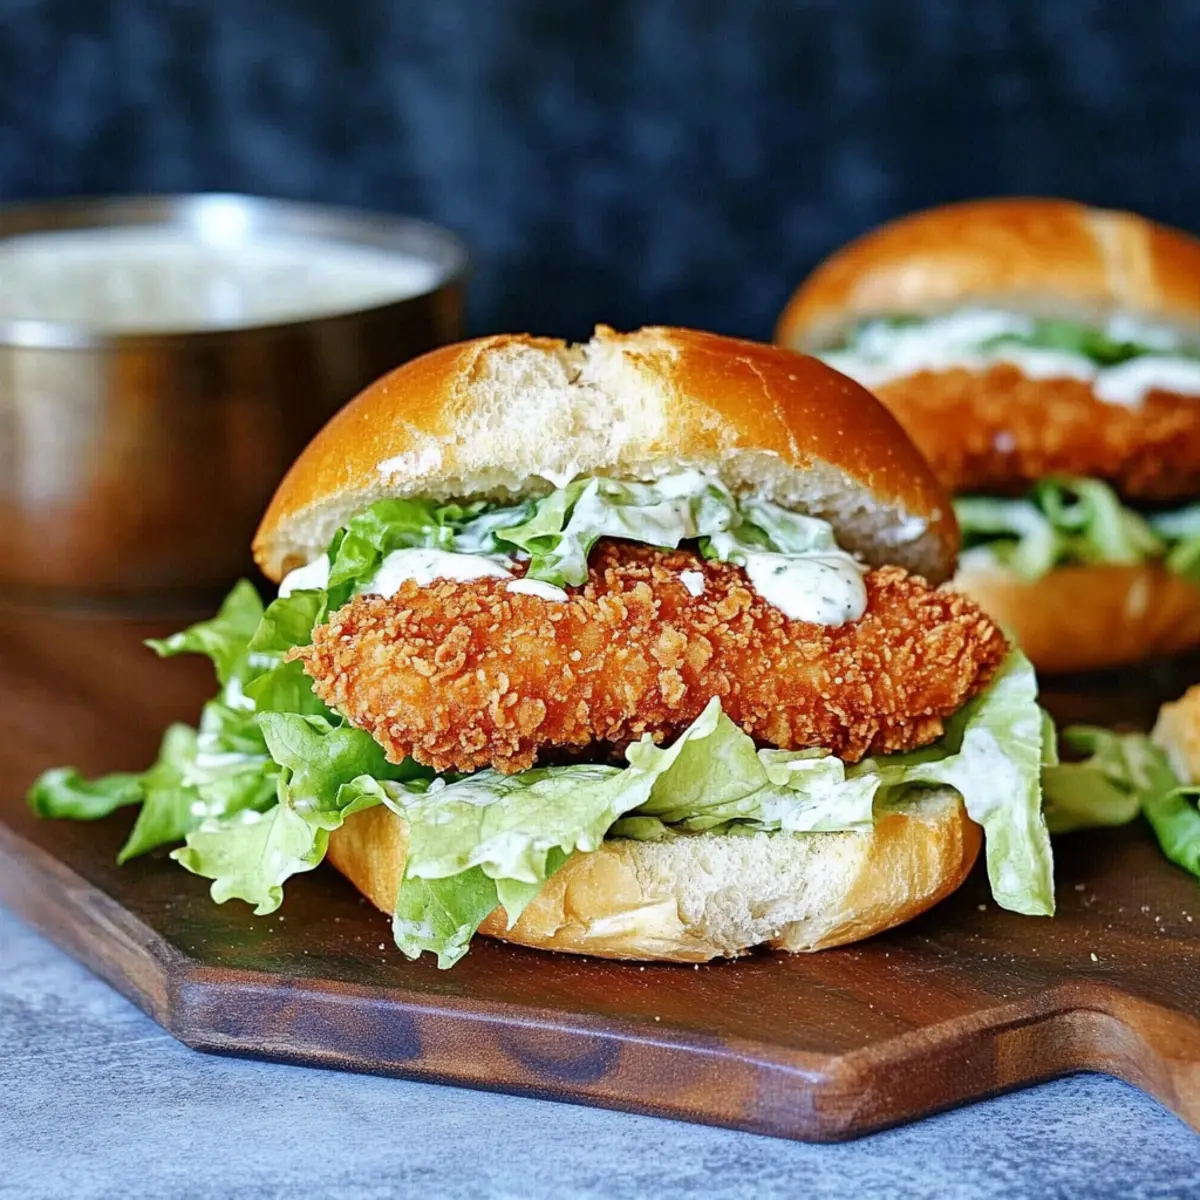
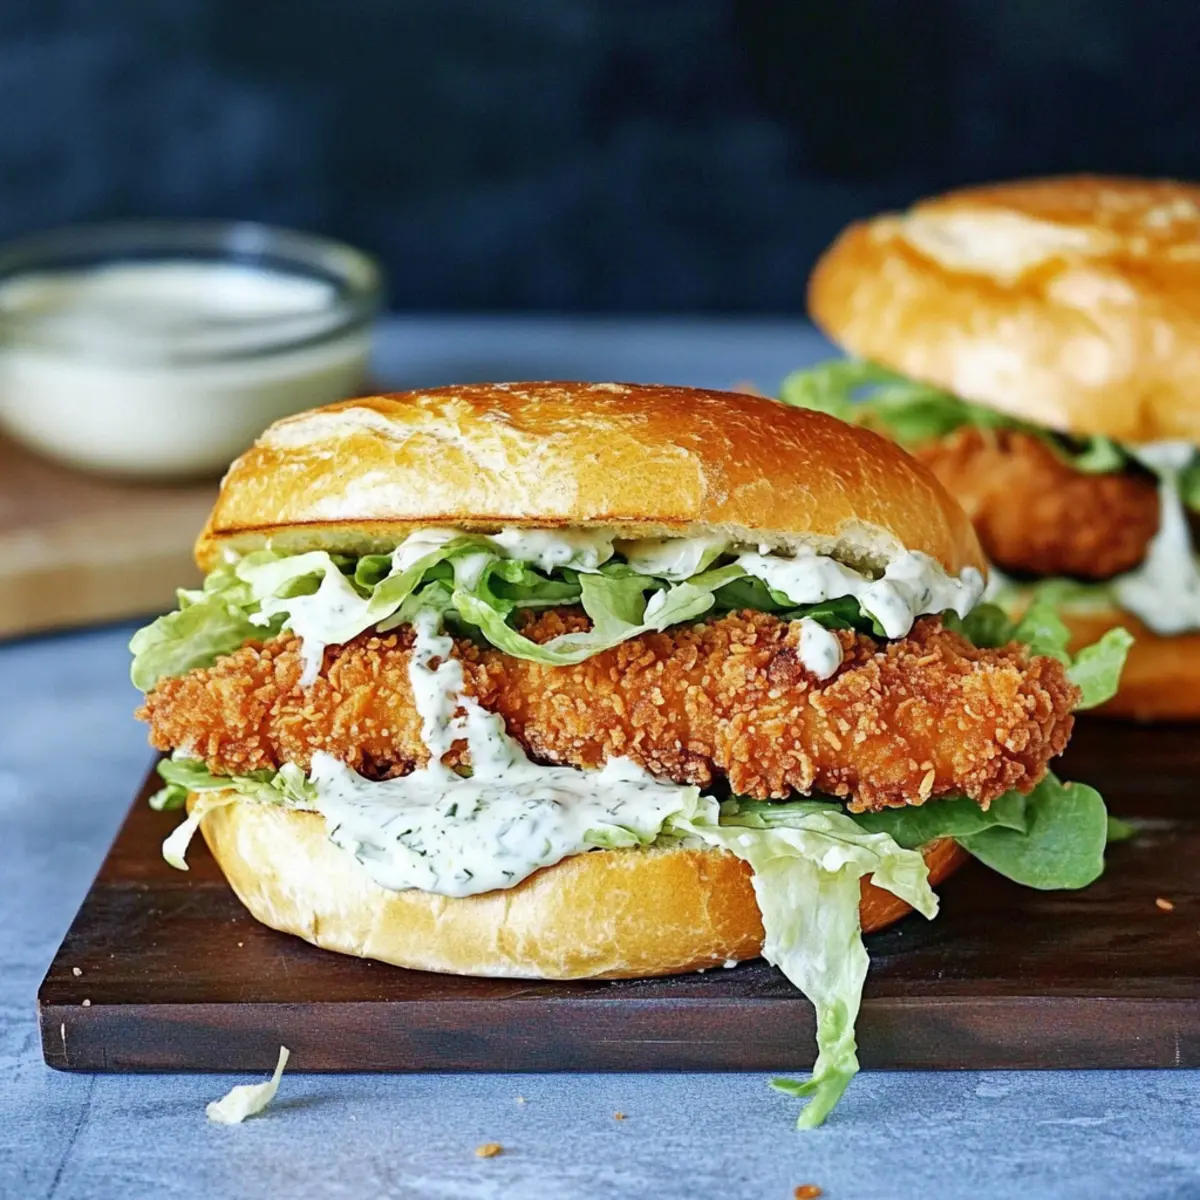
As I bit into this Crispy Chicken Caesar Sandwich, the sublime crunch immediately transported me to a sun-soaked picnic by the sea. Each layer of tender, crunchy chicken combined with crisp romaine and a luxuriously creamy homemade dressing creates a flavor fusion that’s nothing short of comfort food bliss. This sandwich takes the beloved elements of a classic Caesar salad and elevates it into an easy-to-handle delight, perfect for a quick meal that doesn’t compromise on taste. It’s the ultimate crowd-pleaser—customizable for dietary preferences and ready in a flash! Whether you’re cooking for yourself or sharing with a loved one, this recipe will easily find its way into your weeknight rotation. Curious about how to make this delectable creation your own? Let’s dive into the recipe!
Why is this Chicken Caesar Sandwich irresistible?
Crispy Perfection: Each bite is an explosion of crunch, thanks to perfectly fried chicken and the crusty baguette.
Homemade Goodness: Made with a creamy homemade dressing that can easily be adjusted to suit your taste, it’s fresher than any deli option.
Quick and Easy: This recipe can be on the table in under 30 minutes, making it a perfect weeknight meal.
Endless Customization: Switch the protein or bread type for a new twist, such as using crispy fried tofu or even a gluten-free baguette.
Crowd-Pleasing Delight: It’s not just a sandwich—it’s a meal that brings everyone together! Serve it up with sides like potato wedges or a light salad, and you’ve got a feast. If you’re looking for more sandwich ideas, check out my Chicken Avocado Melt or Chicken Pot Pie for variation!
Crispy Chicken Caesar Sandwich Ingredients
For the Caesar Dressing
• Full-Fat Mayonnaise – Adds a rich creaminess that ties all the flavors together.
• Greek Yogurt – Provides a tangy twist while keeping the calories in check.
• Dijon Mustard – Adds a hint of sharpness that enhances the dressing’s depth.
• Worcestershire Sauce – Gives a savory umami kick to the mix.
• Lemon Juice – Brightens the flavors and gives a fresh zing to your dressing.
• Freshly Grated Parmesan Cheese – Elevates the taste with nutty flavor notes.
• Minced Garlic – Infuses the dressing with aromatic qualities.
• Black Pepper – Adds subtle heat and flavor.
• Sea Salt – Enhances the overall flavor of your dressing.
For the Chicken
• Chicken Cutlets – The star of the dish; for even cooking, pound them to uniform thickness.
• Sea Salt – A simple yet necessary seasoning for flavor enhancement.
• Ground Black Pepper – Adds a bit of kick to the protein.
For the Breading
• All-Purpose Flour – Provides a base for the breading; substitute with gluten-free flour if preferred.
• Eggs – Binds the breading mixture to the chicken; egg substitutes are suitable for a vegan option.
• Panko Breadcrumbs – For unbeatable crispiness; can swap for gluten-free breadcrumbs if needed.
• Breadcrumbs – Adds texture and crunch; mix with panko for a perfect crust.
• Parmesan Cheese (for Breadcrumb Mixture) – Infuses more flavor into the crispy coating; try Grana Padano for a milder taste.
For the Sandwich
• Chopped Romaine Hearts – Adds a refreshing crunch and vibrant color to the sandwich.
• French Baguettes – The perfect vehicle for all delicious layers; try ciabatta or sourdough for variety.
Step‑by‑Step Instructions for Crispy Chicken Caesar Sandwich
Step 1: Prepare Caesar Dressing
In a mixing bowl, combine full-fat mayonnaise, Greek yogurt, Dijon mustard, Worcestershire sauce, lemon juice, freshly grated Parmesan cheese, minced garlic, black pepper, and sea salt. Whisk until smooth and creamy, and taste for seasoning. Reserve a couple of tablespoons of dressing for drizzling over the romaine lettuce later. Set the dressing aside as you move on to the chicken preparation.
Step 2: Season Chicken
Take your chicken cutlets and pound them to an even thickness (about 1/2 inch) using a meat mallet or rolling pin, which helps ensure they cook uniformly. Season both sides liberally with sea salt and ground black pepper, creating a savory base for your crispy chicken. Let them sit for a few minutes to absorb the flavors while you set up your breading station.
Step 3: Set Up Breading Station
On a clean countertop, arrange three shallow bowls. In the first bowl, add all-purpose flour seasoned with a pinch of salt. In the second bowl, crack and whisk together the eggs. In the third bowl, combine panko breadcrumbs, regular breadcrumbs, and additional Parmesan cheese for wonderful texture. This organized setup will make breading your chicken cutlets a breeze, ensuring an effortless transition between steps.
Step 4: Bread Chicken
Taking one seasoned chicken cutlet at a time, dredge it in the flour, coating both sides and shaking off the excess. Next, dip it into the egg mixture, allowing any excess to drip off, before pressing it into the breadcrumb mixture, ensuring an even coating that will turn golden and crispy while frying. Repeat this process for each cutlet, laying them out on a plate once breaded.
Step 5: Fry Chicken
In a large skillet, heat about 1/2 inch of oil over medium heat until it reaches 350°F (175°C). Carefully add the breaded chicken cutlets to the hot oil, frying them in batches if necessary to avoid overcrowding. Cook for 4-5 minutes on each side or until they are golden brown and crispy. Once done, transfer the fried cutlets to a wire rack to drain excess oil and maintain that delightful crunch.
Step 6: Assemble Sandwiches
Slice your crusty French baguettes in half, spreading a generous layer of homemade Caesar dressing on both sides to infuse flavor. Layer the bottom halves with crispy chicken cutlets and a heap of chopped romaine hearts, ensuring each sandwich is packed with freshness. Drizzle a little more dressing over the lettuce and sprinkle with additional Parmesan cheese before closing the sandwiches with the top halves of the baguettes.
Step 7: Serve Immediately
Your Crispy Chicken Caesar Sandwiches are now ready to be enjoyed! Serve them immediately for the best experience while the chicken is still warm and crunchy. Pair your sandwiches with crispy potato wedges or a light side salad for a complete meal. Enjoy the delightful crunch and creamy flavor in every bite!

How to Store and Freeze Crispy Chicken Caesar Sandwich
Fridge: Store any leftover assembled sandwiches in an airtight container for up to 2 days. To keep the bread from becoming soggy, consider keeping the components separate until you’re ready to eat.
Freezer: If you’ve prepared chicken cutlets ahead of time, freeze them in a single layer on a baking sheet, then transfer to a freezer bag. They can last for up to 3 months and be reheated in the oven for crispiness.
Reheating: To reheat, place frozen chicken cutlets in a preheated oven at 375°F (190°C) for 15-20 minutes until heated through. Assemble the sandwich with fresh ingredients just before serving for the best taste and texture.
Make-Ahead Tips: Prepare the Caesar dressing and breaded chicken in advance; store separately in the refrigerator for up to 3 days for quick assembly. Enjoy your homemade Crispy Chicken Caesar Sandwich fresh!
What to Serve with Crispy Chicken Caesar Sandwich
Create a delightful feast that perfectly complements the crunch and creaminess of your sandwich.
- French Fries: Crispy and salty, they are the classic side that pairs beautifully with the richness of the sandwich.
- Potato Wedges: Hearty and seasoned, these add a satisfying texture contrast with the soft interior of the sandwich.
- Light Salad: A refreshing side with mixed greens and a citrus vinaigrette balances out the richness and adds brightness to your meal.
A light caesar salad can echo the flavors of your sandwich while keeping things fresh and vibrant. Allow your palate to experience all the savory goodness!
- Coleslaw: Creamy and tangy, coleslaw provides a crunchy, refreshing side that complements the sandwich’s flavors.
- Iced Tea or Lemonade: A refreshing drink like iced tea or zesty lemonade enhances the meal’s comfort vibes and keeps it lively.
- Chocolate Chip Cookies: For a sweet finish, homemade cookies bring cozy nostalgia and satisfy that sweet tooth after your savory meal.
Make Ahead Options
These Crispy Chicken Caesar Sandwiches are perfect for meal prep! You can prepare the homemade Caesar dressing up to 3 days in advance, storing it in an airtight container in the refrigerator to keep it fresh and flavorful. Additionally, the chicken cutlets can be breaded and cooked up to 24 hours ahead—just fry them until golden brown and then reheat in a warm oven before assembly to maintain their crispiness. When you’re ready to serve, simply slice your baguettes, layer in the chicken, and top with fresh romaine and extra dressing. This way, you’ll enjoy a delicious sandwich with minimal effort on busy weeknights!
Crispy Chicken Caesar Sandwich Variations
Feel free to add your personal touch to this crispy delight for a meal that truly reflects your taste!
-
Dairy-Free: Replace Parmesan cheese with nutritional yeast or a vegan cheese alternative for a lactose-free option, while keeping that umami flavor intact.
-
Vegetarian Twist: Swap out chicken for crispy fried tofu or portobello mushrooms. The hearty texture complements the dressing beautifully and still satisfies.
-
Gluten-Free: Use gluten-free breadcrumbs and flour in the breading. Pair it with gluten-free baguettes for a deliciously safe option for celiacs.
-
Herbed Flavor: Add fresh herbs like basil or oregano to the breadcrumbs for an aromatic flavor burst that elevates each bite.
-
Spicy Kick: Incorporate crushed red pepper flakes into the breadcrumb mixture or drizzle sriracha into your dressing for a fiery kick.
-
Baking Method: For a healthier version, lightly oil the breaded chicken and bake at 400°F for around 20 minutes until crispy and cooked through, giving you that crunch without the frying.
-
Different Breads: Experiment with ciabatta or sourdough for a unique twist on the classic sandwich. The chewiness of these breads will elevate the overall texture and deliver a satisfying crunch.
-
Extra Crunch: Add crispy bacon bits to your sandwich for a smoky flavor and extra crunch that pairs perfectly with the creamy dressing.
If you’re enjoying the savory flavors of this delightful sandwich, you might also love my Thai Coconut Chicken or the comforting Gnocchi Chicken Pot. Happy cooking!
Expert Tips for the Best Crispy Chicken Caesar Sandwich
-
Oil Temperature Matters: Keep your oil at 175-180°C (350-360°F) for perfectly crispy chicken. Test with a breadcrumb for readiness—if it sizzles, you’re good to go!
-
Avoid Sogginess: Assemble your sandwich just before serving. Lightly toast the baguette to create a moisture barrier and maintain that delightful crunch.
-
Baking Alternative: For a healthier option, lightly oil the breaded chicken and bake or air fry at appropriate temperatures, adjusting cooking times as needed.
-
Custom Dressing: Feel free to adjust your homemade dressing to suit your taste. Add more garlic or lemon juice for extra flavor, and always save some for drizzling on the romaine!
-
Bread Choice: Experiment with different bread types to find your favorite match. Whole grain or gluten-free options can give your Crispy Chicken Caesar Sandwich a unique flair.
Crispy Chicken Caesar Sandwich Recipe FAQs
What type of chicken should I use for the sandwich?
Absolutely! For the best results, I recommend using chicken cutlets as they cook evenly and stay juicy. You can easily use whole chicken breasts; just pound them down to about half an inch thick to ensure even cooking.
How can I store leftover Crispy Chicken Caesar Sandwiches?
For sure! Store any leftover assembled sandwiches in an airtight container for up to 2 days. However, if you want to prevent the baguette from getting soggy, I suggest keeping all components separate until you’re ready to enjoy your meal.
Can I freeze the chicken cutlets for later use?
Yes, you can! Freeze your breaded chicken cutlets in a single layer on a baking sheet first. Once they’re frozen solid, transfer them to a freezer bag where they can stay for up to 3 months. When you’re ready to eat, bake them at 375°F (190°C) for about 15-20 minutes until heated through and crispy!
What’s the best way to avoid soggy bread in my sandwich?
To ensure that your delightful sandwich stays crunchy, assemble just before serving. Lightly toasting the bread helps create a moisture barrier, making sure every bite is as crispy as intended.
Can I make this sandwich gluten-free?
Very much so! You can substitute all-purpose flour and panko with gluten-free alternatives. Plus, select a gluten-free baguette or sourdough to keep all the flavors intact without compromising your dietary needs.
What should I do if the chicken isn’t crispy?
No worries! If your chicken isn’t crispy, it could be due to oil temperature. Always ensure that your oil is hot (around 175-180°C or 350-360°F) before adding the chicken. You can test the temperature by dropping in a small piece of breadcrumb—if it sizzles right away, you’re good to go!
Crispy Chicken Caesar Sandwich: A Crunchy Delight at Home
Ingredients
Equipment
Method
- In a mixing bowl, combine full-fat mayonnaise, Greek yogurt, Dijon mustard, Worcestershire sauce, lemon juice, freshly grated Parmesan cheese, minced garlic, black pepper, and sea salt. Whisk until smooth and creamy. Reserve a little dressing for drizzling over the romaine later.
- Pound chicken cutlets to an even thickness and season both sides with sea salt and black pepper. Let sit for a few minutes.
- Set up three shallow bowls: one with seasoned flour, one with whisked eggs, and one with a mixture of panko breadcrumbs, regular breadcrumbs, and Parmesan cheese.
- Dredge each seasoned chicken cutlet in flour, dip in egg, then coat with the breadcrumb mixture. Repeat for all cutlets.
- Heat oil in a skillet over medium heat. Fry chicken cutlets until golden brown and crispy, about 4-5 minutes on each side. Transfer to a wire rack to drain excess oil.
- Slice baguettes in half, spreading Caesar dressing on both sides. Layer with chicken cutlets and romaine, drizzle more dressing, and sprinkle additional Parmesan cheese before closing.
- Serve the sandwiches immediately with crispy potato wedges or a light side salad.
Leave a Reply