
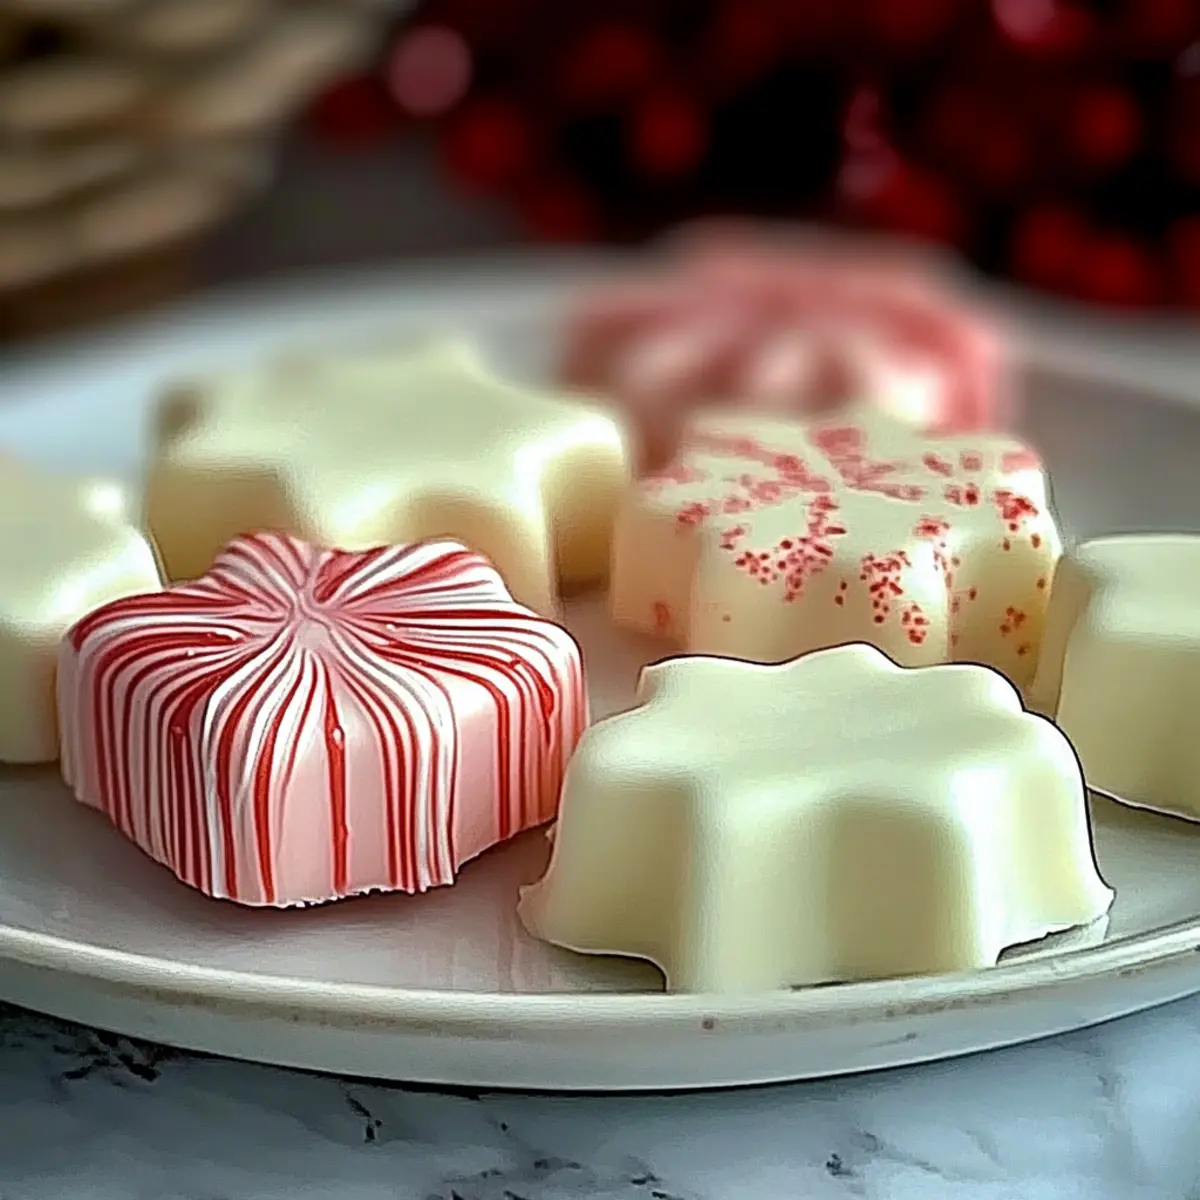
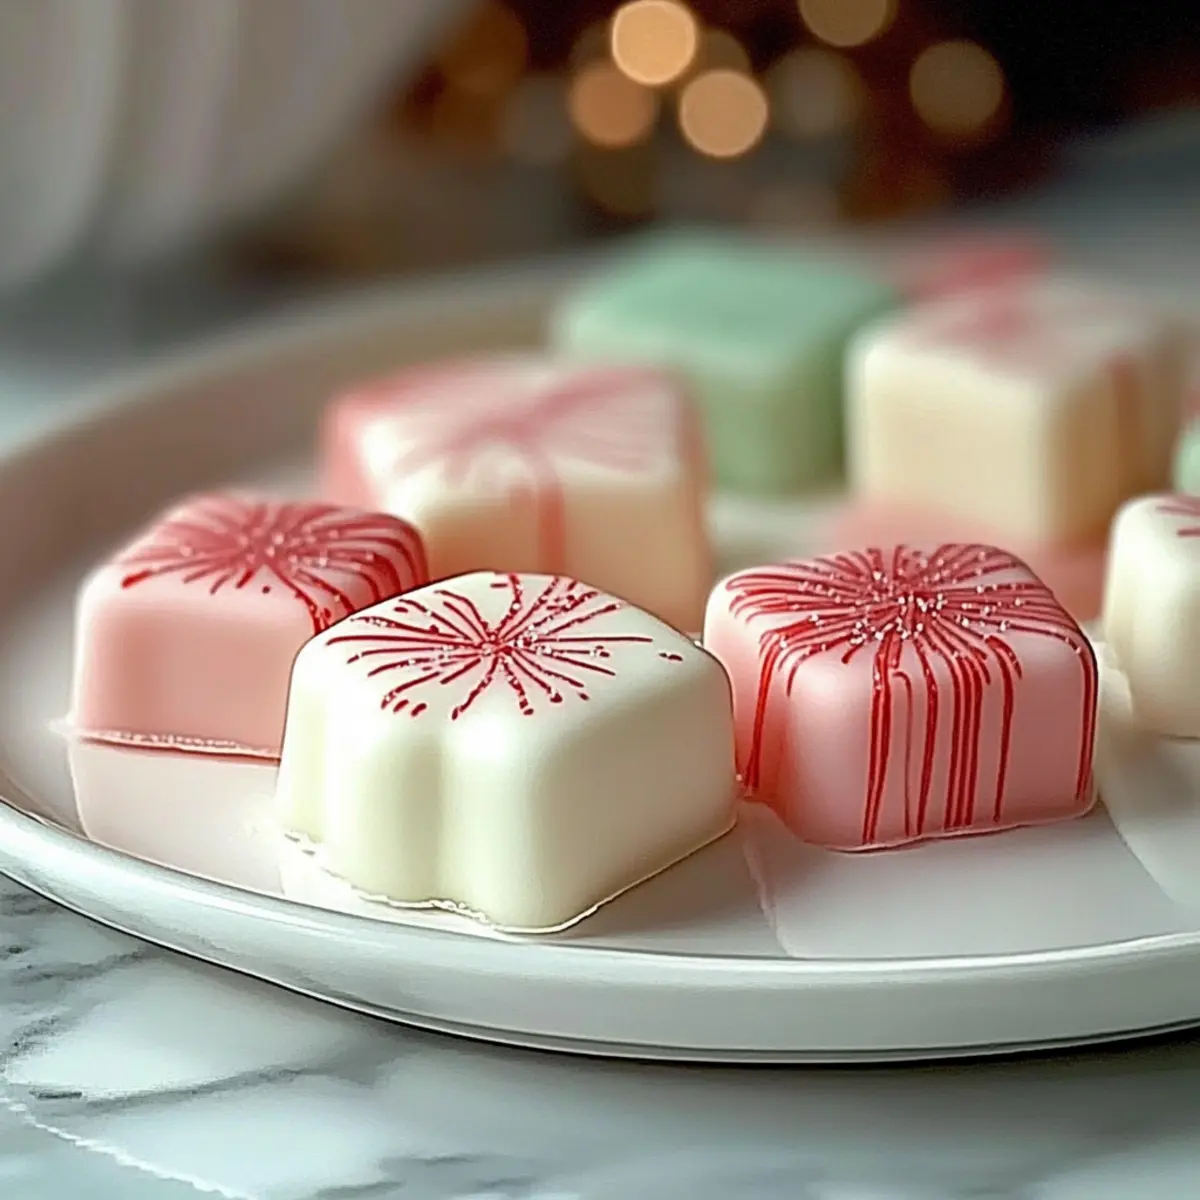
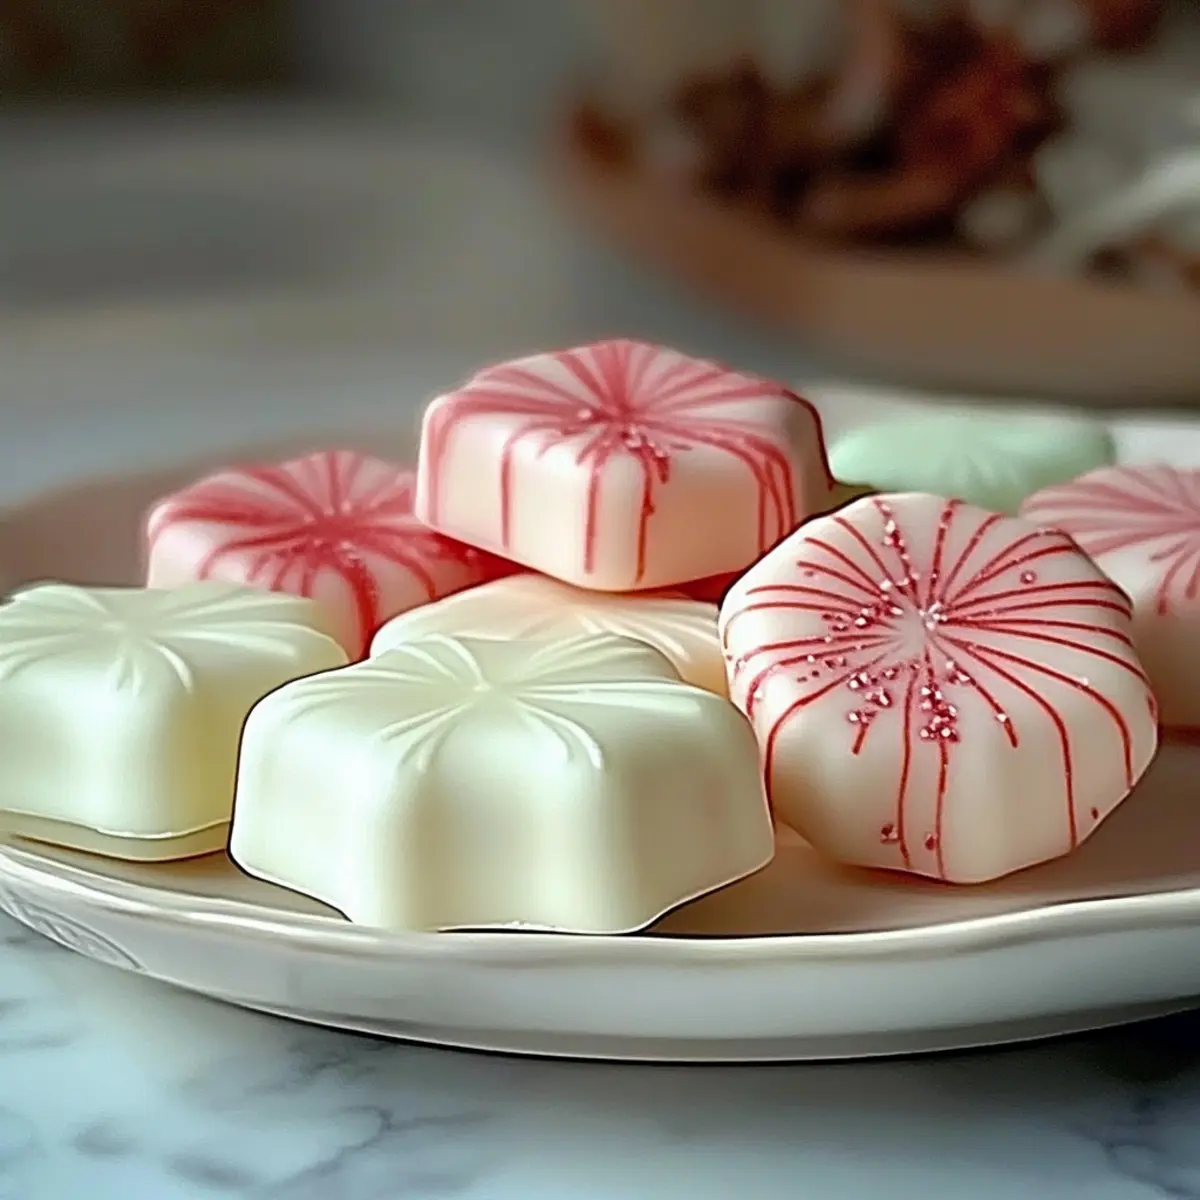
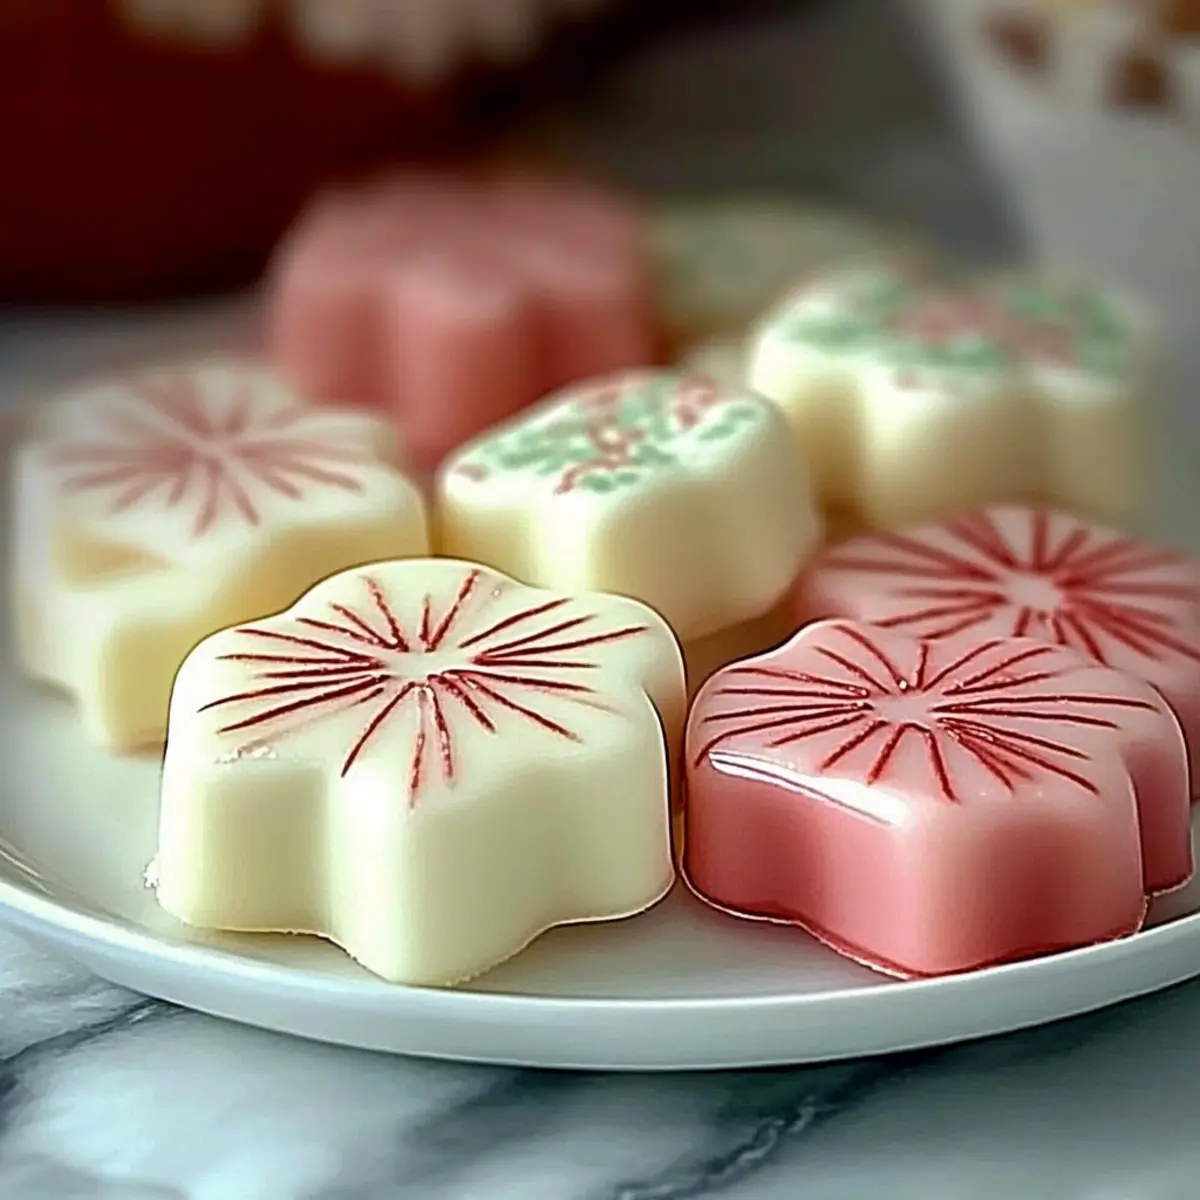
As I stirred the buttery mixture, the sweet aroma of peppermint wafted through the kitchen, transporting me back to joyful family gatherings filled with laughter and love. These Nostalgic No-Bake Old-Fashioned Butter Mints aren’t just a treat; they’re a delightful way to bring warmth to any occasion, from festive holiday parties to charming baby showers. With their creamy, melt-in-your-mouth texture and customizable hues, they are not only a breeze to whip up but also a guaranteed crowd-pleaser that keeps everyone coming back for more. Plus, they cater to a gluten-free audience without skimping on charm or flavor. Ready to create your own sweet memories? Let’s dive into the world of Butter Mints!
Why Are Butter Mints So Irresistible?
Nostalgic Flavors: These butter mints evoke delightful memories of family gatherings, making them a wonderful addition to holiday celebrations.
Customizable Goodness: With options to experiment with flavors like vanilla or lemon, you can easily tailor them to suit your tastes.
Effortless Preparation: No oven is required, so you can whip these up quickly and easily, making them a perfect last-minute treat.
Perfect for Gifting: Pack them in decorative jars for thoughtful and tasty gifts that friends and family will cherish.
Crowd-Pleasing Appeal: The smooth, creamy texture ensures that these mints will have everyone coming back for seconds! These shiny jewels of nostalgia are the perfect accompaniment to a festive platter or as standalone treats beside your Gooey Butter Pecan delights!
Butter Mints Ingredients
These delightful Butter Mints are simple yet full of flavor, making them perfect for gatherings.
For the Base
• Unsalted Butter – Provides a creamy foundation; always use at room temperature for the best outcome.
• Powdered Sugar – Sweetens and contributes to that signature melt-in-your-mouth texture; avoid granulated sugar for this recipe.
• Heavy Cream or Milk – Adds moisture to enhance the creamy consistency; it’s optional but definitely recommended.
For Flavoring
• Peppermint Extract – Offers the classic refreshing flavor; start with a small amount and adjust as you taste.
• Pinch of Salt – Elevates the overall flavor by balancing sweetness.
For Coloring (Optional)
• Gel Food Coloring – Use sparingly to add beautiful pastel shades without affecting the texture.
These Butter Mints are customizable and allow you to express your creativity with flavors and colors. Ready to dive into making these tasty treats?
Step‑by‑Step Instructions for Butter Mints
Step 1: Prepare the Base
Begin by softening 1 cup of unsalted butter in a large mixing bowl. Use an electric mixer to beat the butter on medium speed until it becomes creamy and fluffy, which should take about 1-2 minutes. This ensures that your Butter Mints will have that rich, buttery taste and smooth texture integral to the recipe.
Step 2: Incorporate Flavor
Next, add in 1 teaspoon of peppermint extract, a pinch of salt, and 2 tablespoons of heavy cream or milk. Mix on low speed until the ingredients are fully combined, ensuring the mint flavor shines through without overwhelming the buttery goodness. You’ll know it’s ready when the mixture is smooth and well-blended, about 1-2 minutes more.
Step 3: Add Sugar
Gradually sift in 4 cups of powdered sugar, starting on low speed to avoid a sugary cloud. Once incorporated, increase the mixer speed to medium and continue mixing until the dough thickens into a soft, pliable consistency, which should take around 3-4 minutes. This step is crucial for achieving that melt-in-your-mouth quality associated with Butter Mints.
Step 4: Color the Dough
If you wish to add color, divide the dough into smaller portions and knead in gel food coloring until achieving your desired pastel shades. Start with a small amount, as a little goes a long way. This will visually enhance the Butter Mints, making them even more appealing for special occasions like holidays or baby showers.
Step 5: Shape the Mints
Dust a clean surface with powdered sugar and take a portion of the dough. Roll it into thin ropes about 1/2 inch thick, then cut these ropes into bite-sized pieces. Each piece should be roughly 1 inch long. This shaping process allows you to create traditional Butter Mints that are both delightful to the eye and tasty.
Step 6: Dry the Mints
Finally, place the cut mints on parchment paper, ensuring they have some space between them. Let the Butter Mints air dry at room temperature for at least 8 hours or, ideally, overnight. This drying time is crucial for developing the perfect firm outer layer while keeping the inside soft and creamy, ensuring you achieve that quintessential Butter Mint texture.
How to Store and Freeze Butter Mints
Room Temperature: Store Butter Mints in an airtight container in a cool, dry place for up to 2 weeks to maintain their delightful texture.
Fridge: If you prefer a longer shelf life, refrigerate the mints in an airtight container for up to 1 month, which will keep them fresh and flavorful.
Freezer: For extended storage, freeze the Butter Mints in a single layer on a baking sheet, then transfer to a freezer-safe container or bag for up to 3 months.
Thawing: To enjoy, simply thaw at room temperature for about 1 hour before serving, allowing them to return to their perfect melt-in-your-mouth state.
Butter Mints Variations & Substitutions
Feel free to let your creativity shine by customizing these delightful Butter Mints to match your personal taste and festive occasions!
- Flavor Infusion: Try using vanilla or almond extract instead of peppermint for a unique twist. You’ll create a different aromatic experience that can be just as delightful.
- Color Play: Use natural food coloring like beet juice or turmeric to achieve beautiful pastel shades while keeping it wholesome. Nature has a way of brightening things up!
- Chocolate Lovers: Add cocoa powder (about 1/4 cup) to the dough for a rich chocolate version. Pair these with some peppermint for a delicious minty chocolate treat!
- Citrus Zing: Incorporate a tiny splash of lemon or orange zest for a refreshing citrus note that pairs beautifully with the creamy base. It’s a sunny surprise!
- Nutty Touch: Mix in finely chopped nuts like pecans or almonds for added texture and flavor. The crunch complements the smooth mints perfectly.
- Minty Heat: For a kick, blend in a pinch of cayenne pepper. The heat adds an unexpected depth to the sweet and creamy mints—perfect for adventurous eaters!
- Smoky Flavor: Experiment with a hint of smoked sea salt instead of regular salt for a sophisticated, complex twist. It beautifully enhances the buttery goodness.
- Fruit Essence: Use extracts like raspberry or strawberry for a fruity take on classic Butter Mints. Dip them in chocolate for an extravagantly sweet treat!
These variations allow you to elevate your Butter Mints, making them your own and a joy to share. They’ll be a charming addition alongside other favorites like Baked Lemon Butter or as a sweet gift to accompany Buttery Pecan Snowball treats. Happy mint-making!
Make Ahead Options
These delightful Butter Mints are perfect for busy home cooks looking to save time without sacrificing taste! You can make the entire mint mixture up to 24 hours in advance. Simply prepare the mints as directed until you reach the shaping stage, then tightly cover the dough and refrigerate it. This keeps the mixture fresh and allows the flavors to meld beautifully. When you’re ready to serve, shape the mints and pop them on parchment paper to dry for at least 8 hours or overnight for the best texture. Just remember, well-stored mints maintain their creamy softness and delicious peppermint flavor, so your homemade Butter Mints will be just as delightful as if made that day!
What to Serve with Nostalgic No-Bake Old-Fashioned Butter Mints
Elevate your gatherings and treat yourself to delightful flavor pairings that complement these creamy, melt-in-your-mouth treasures.
- Creamy Hot Cocoa: A warm, chocolatey beverage enhances the minty freshness, providing a cozy indulgence perfect for chilly evenings.
- Fresh Fruit Salad: The vibrant colors and natural sweetness of a mixed fruit salad balance the rich butter mints, adding a refreshing contrast.
- Chocolate-Covered Pretzels: The salty crunch of pretzels paired with the sweetness of chocolate creates a delightful snack mix that keeps guests nibbling.
- Elegant Tea Selection: A fragrant peppermint or chamomile tea offers a calming backdrop that perfectly complements the buttery flavor of the mints.
- Mini Cupcakes: Sweet little cupcakes in various flavors can harmonize with your Butter Mints’ refreshing notes, making every bite a celebration of flavor.
- Classic Lemonade: The tart brightness of a homemade lemonade provides a zesty counterbalance, rekindling memories of sunny days spent with family.
- Sparkling Water with Lime: Keep it light and bubbly to cleanse the palate between bites, enhancing the overall experience of sweet and refreshing treats.
- Gluten-Free Brownies: Rich and fudgy brownies cater to the dessert lovers, making these mints a perfect post-dinner treat alongside their indulgent chocolate counterpart.
With these pairings, your Butter Mints will shine, ushering in nostalgia and delightful flavor at every gathering!
Expert Tips for Perfect Butter Mints
- Butter Quality: Use unsalted butter to keep control over the flavor balance; it’s key to achieving the richness of your Butter Mints.
- Sift the Sugar: Sifting the powdered sugar helps avoid lumps, resulting in a smoother texture for your mints.
- Drying Time is Essential: Allow the mints to dry for at least 8 hours, ideally overnight, to enhance their firm outer layer while preserving creaminess inside.
- Knead with Care: If your dough is too sticky, gently knead in more powdered sugar instead of flour to maintain that delightful melt-in-your-mouth consistency.
- Experiment with Flavors: Don’t be afraid to try different extracts like vanilla or almond; customizing your Butter Mints can lead to unique and tasty surprises!
Butter Mints Recipe FAQs
What is the best way to select ripe ingredients for Butter Mints?
Absolutely! When choosing unsalted butter, look for a creamy texture and a fresh smell, avoiding any that have discoloration or a rancid odor. The butter should be at room temperature, which means it should yield slightly when pressed but not be overly soft. If you’re using heavy cream or milk, select the freshest options available to keep your Butter Mints tasting their best.
How should I store leftover Butter Mints, and how long will they last?
Store your Butter Mints in an airtight container at room temperature in a cool, dry place for up to 2 weeks. If you’d like to extend their shelf life, pop them in the refrigerator, where they’ll stay fresh for up to 1 month. Just make sure they’re in a sealed container to prevent any moisture from ruining that delightful texture!
Can I freeze Butter Mints, and what’s the best method for doing so?
Definitely! To freeze your Butter Mints, arrange them in a single layer on a baking sheet and place the sheet in the freezer for about 1-2 hours until they’re firm. Then transfer the mints to a freezer-safe container or bag, layering parchment paper between each layer to prevent sticking. They can be frozen for up to 3 months. When you’re ready to enjoy them, thaw the mints at room temperature for about 1 hour before serving.
My Butter Mint dough is too sticky. What should I do?
Very common! If your dough feels too sticky while shaping, simply sprinkle in a little more powdered sugar as you knead it. This will help achieve that desired soft, pliable consistency. Remember not to use flour, as it can change the texture and interfere with that melt-in-your-mouth quality that makes Butter Mints so special.
Are Butter Mints suitable for those with dietary restrictions?
Yes, you bet! Butter Mints are naturally gluten-free, making them a wonderful treat for guests with dietary needs. However, it’s crucial to double-check the ingredients of any extracts you use, especially if you’re accommodating allergies. If you’re making them for pets, it’s best to keep these sugary treats away, as chocolate and certain sweeteners aren’t safe for them. Always consult your vet before introducing new foods!
Delightful Homemade Butter Mints for Sweet Nostalgia
Ingredients
Equipment
Method
- Soften 1 cup of unsalted butter in a large mixing bowl and beat until creamy and fluffy, about 1-2 minutes.
- Add 1 teaspoon of peppermint extract, a pinch of salt, and 2 tablespoons of heavy cream or milk. Mix on low speed until combined, about 1-2 minutes.
- Gradually sift in 4 cups of powdered sugar, starting on low speed. Increase speed to medium and mix until the dough thickens, about 3-4 minutes.
- Optionally, to add color, divide dough and knead in gel food coloring until achieving desired shades.
- Dust a clean surface with powdered sugar and roll portions of the dough into thin ropes, cut into 1-inch pieces.
- Place cut mints on parchment paper and let air dry for at least 8 hours or overnight.
Leave a Reply