
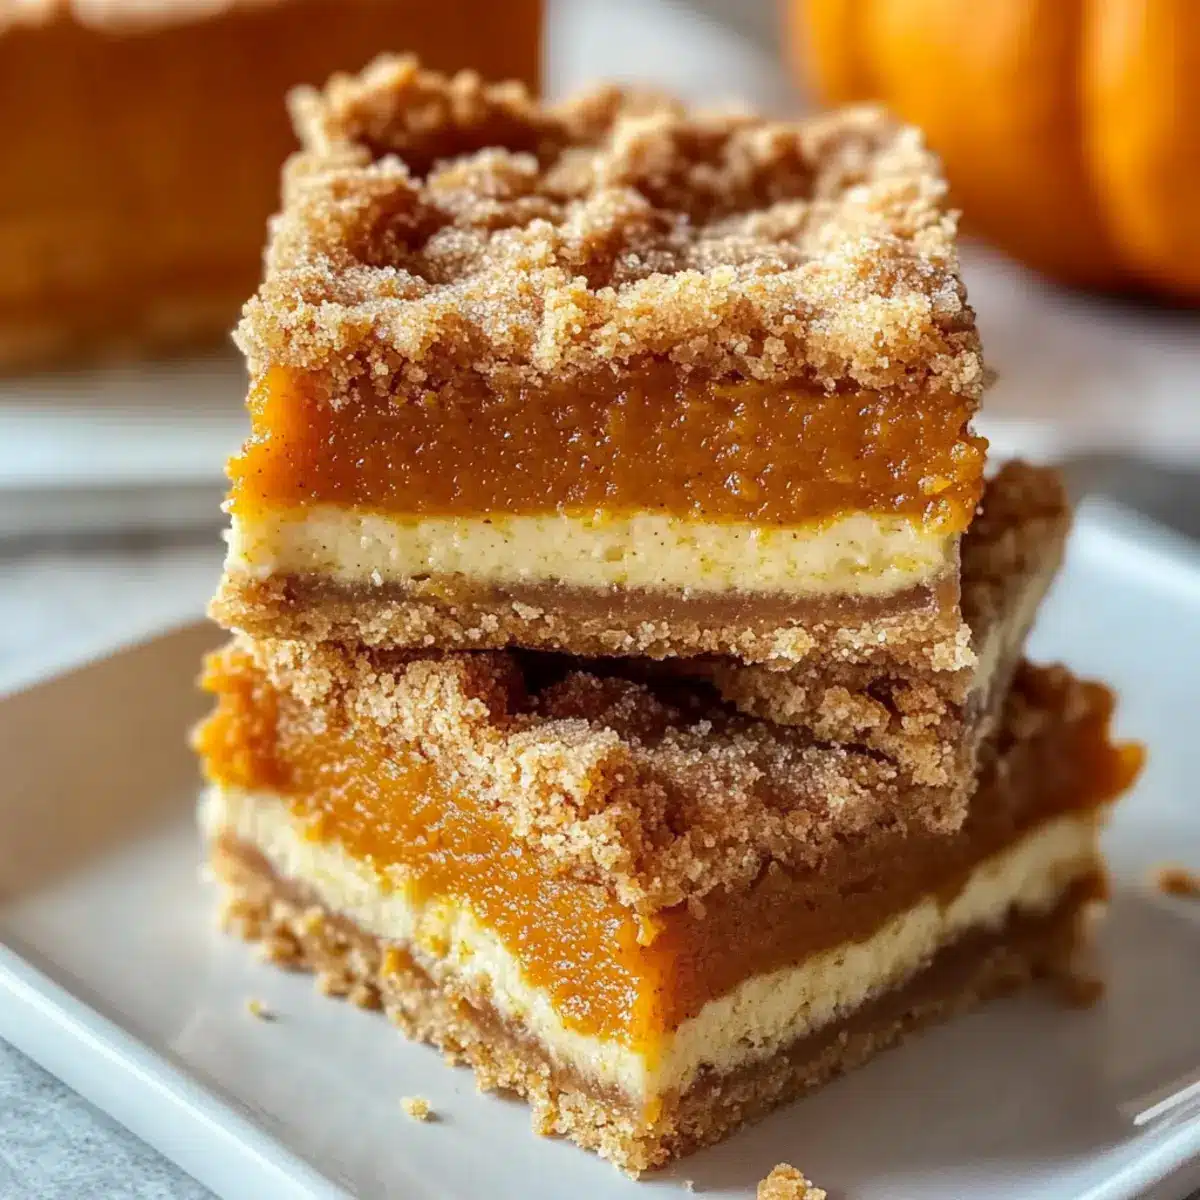
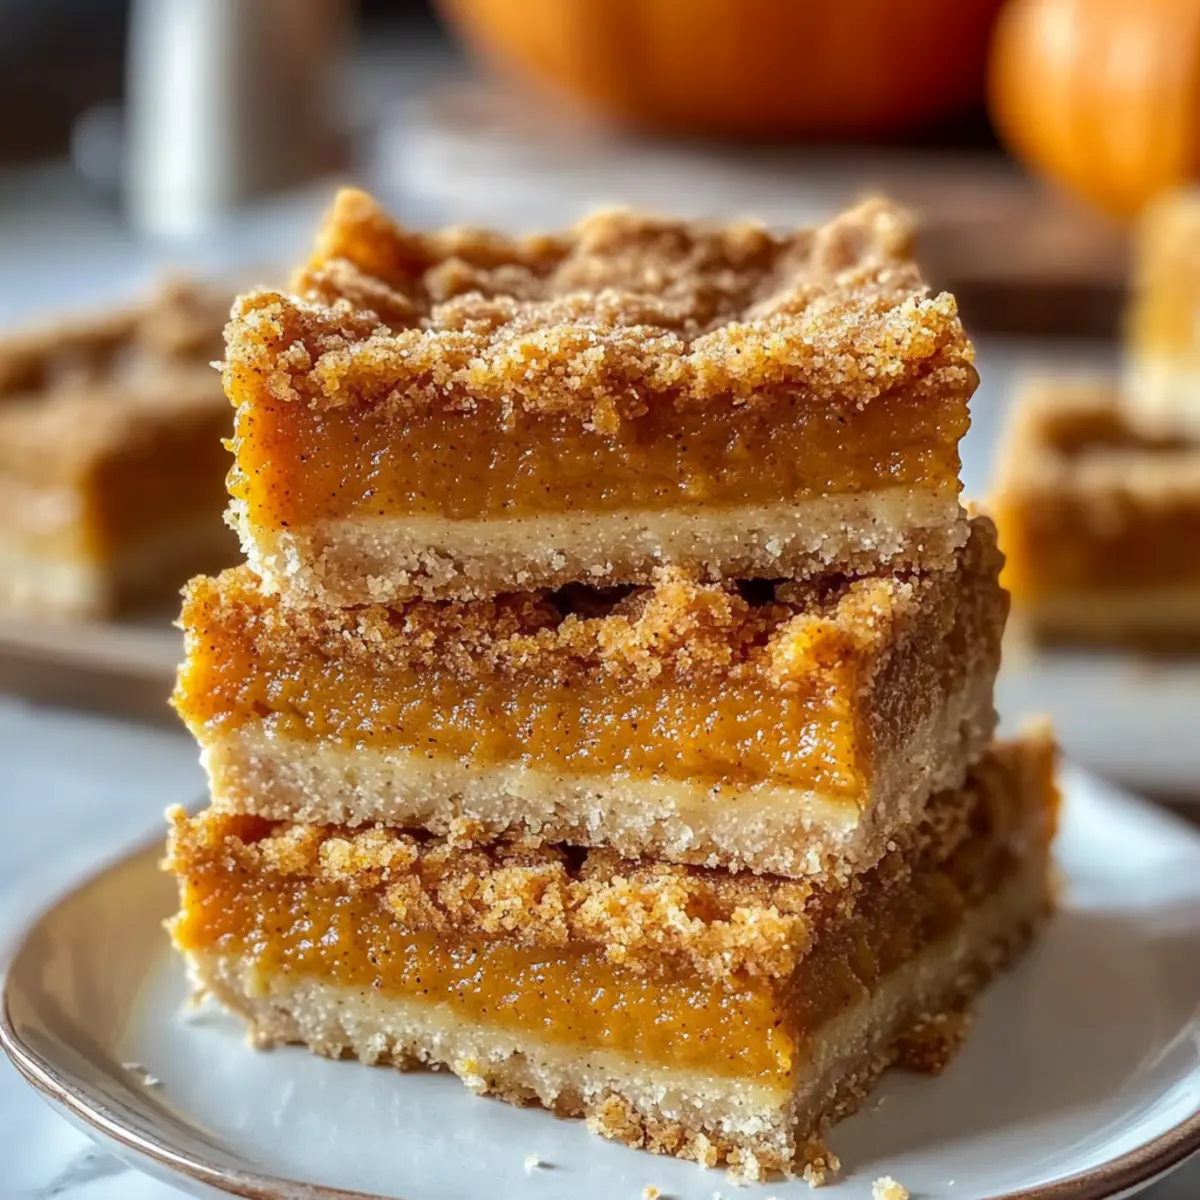
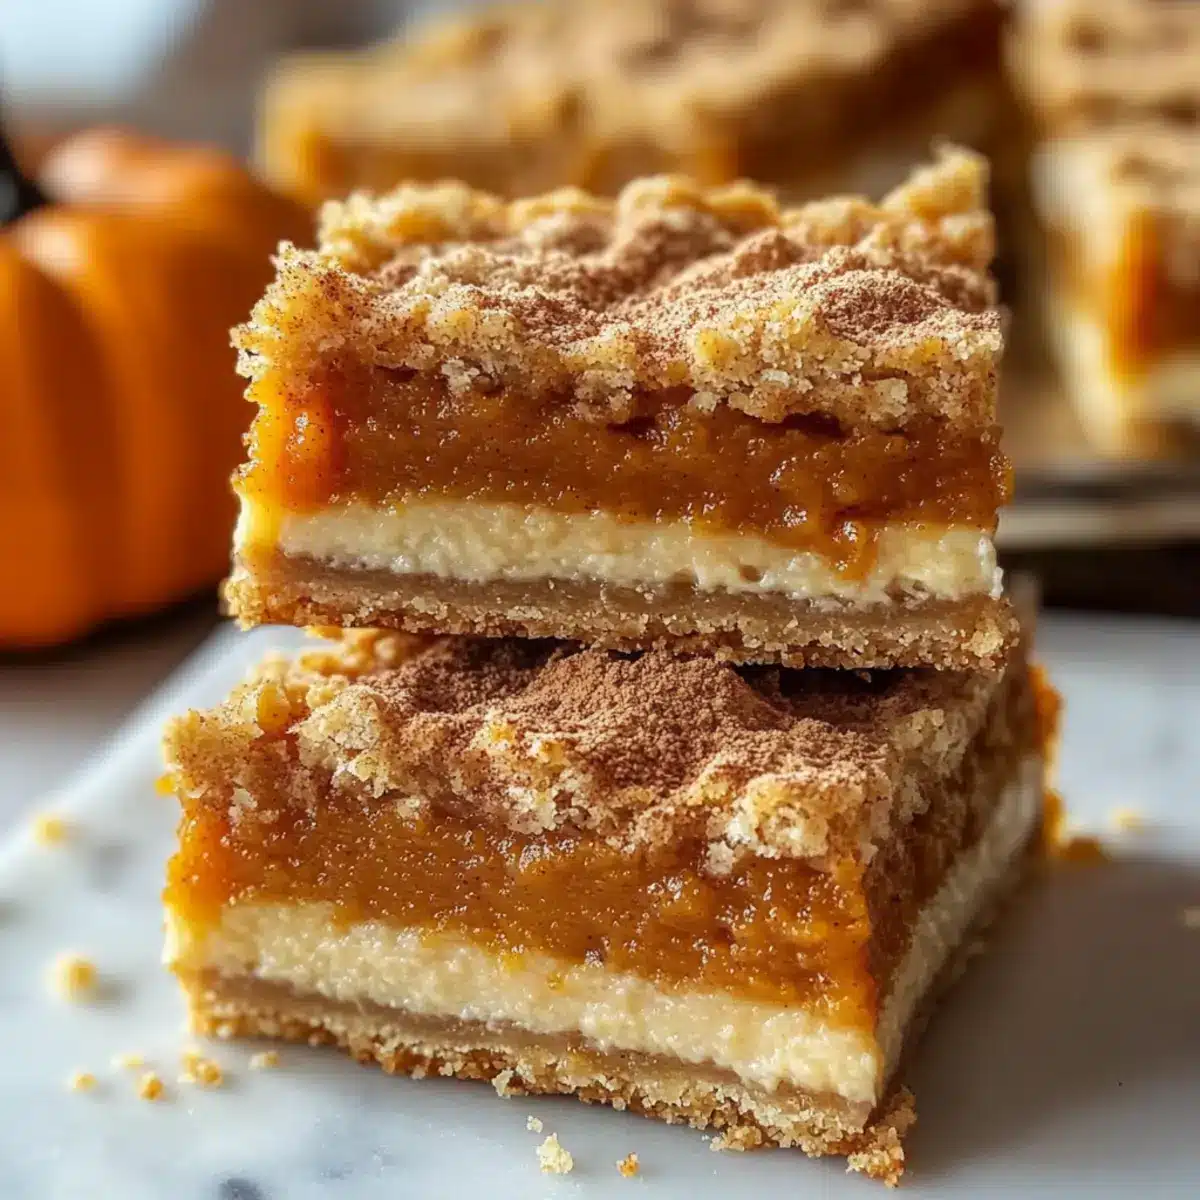
As the days grow shorter and the leaves turn golden, there’s something magical about bringing the essence of autumn into my kitchen. One bite of these Gluten-Free Pumpkin Pie Bars, with their creamy, spiced pumpkin filling nestled atop a buttery, crumbly crust, transports me straight to a cozy gathering among friends. The best part? They’re incredibly easy to whip up, making them a perfect dessert for any occasion, whether you’re feeding a crowd or treating yourself on a chilly evening. Plus, these bars are a crowd-pleaser, satisfying both gluten-free and non-gluten-free guests alike. Are you ready to embrace the flavors of fall with me? Let’s dive into this scrumptious recipe!
Why Are These Pumpkin Pie Bars Irresistible?
Rich, Creamy Filling: The velvety pumpkin filling is infused with warm spices, delivering the ultimate autumn experience.
Easy to Make: With simple ingredients and straightforward instructions, these bars come together in no time – perfect for busy fall schedules!
Multiple Variations: Whether you prefer classic flavors or want to add some chocolate chips or nuts for a twist, the possibilities are endless! Try your hand at making these alongside other seasonal treats like Chewy Pumpkin Cookies or Chocolate Cheesecake Bars.
Crowd-Pleaser: Ideal for gatherings, these bars cater to both gluten-free diets and regular palates—everyone will be asking for seconds!
Portable Dessert: Easily cut into squares, they’re perfect for potlucks or outdoor events, bringing convenience without compromising flavor.
Deliciously Comforting: Each bite of these bars is like wrapping yourself in a warm, cozy blanket—perfect for those crisp fall evenings!
Gluten-Free Pumpkin Pie Bars Ingredients
• Embrace the taste of autumn with these delicious ingredients.
For the Crust
- Gluten-Free Flour – Provides structure for the crust; almond flour can be used for a unique texture.
- Sugar – Adds sweetness to both the crust and filling; try coconut sugar for a lower glycemic option.
- Salt – Enhances flavor and balances sweetness in the crust.
- Cold Butter – Adds richness and helps create a buttery crumb; consider using vegan butter for a dairy-free alternative.
- Egg – Binds the crust ingredients together; a flax egg works great for vegan diets.
For the Filling
- Pumpkin Puree – The main star of the bars, bringing moisture and flavor; choose organic for the best taste.
- Brown Sugar – Adds deep, caramel-like sweetness to the filling.
- Evaporated Milk – Ensures a creamy consistency; coconut milk makes a fantastic dairy-free substitute.
- Vanilla – Brings depth and warmth to the filling.
- Pumpkin Pie Spice – A special blend of spices that enhances pumpkin’s rich flavors.
Optional Add-ins
- Nuts/Chocolate Chips – Add these for extra texture and flavor; sprinkle on top for a delightful twist!
With these Gluten-Free Pumpkin Pie Bars ingredients, you’re one step closer to creating a comforting, festive treat that everyone will love. Happy baking!
Step‑by‑Step Instructions for Irresistible Gluten-Free Pumpkin Pie Bars
Step 1: Preheat the Oven
Begin by preheating your oven to 350°F (175°C). While the oven heats up, line an 8×8-inch baking pan with parchment paper, allowing some overhang for easy removal later. This step is essential to ensure that your gluten-free pumpkin pie bars bake evenly and release effortlessly once set.
Step 2: Prepare the Crust
In a mixing bowl, combine gluten-free flour, sugar, and salt, stirring them together for a balanced flavor. Cut in cold butter using a pastry cutter or fork until the mixture resembles coarse crumbs. Next, add the egg and mix until a dough forms. Press this dough evenly into the bottom of the prepared pan, creating a solid foundation for your pumpkin pie bars.
Step 3: Make the Filling
In a separate mixing bowl, whisk together the pumpkin puree, brown sugar, eggs, evaporated milk, vanilla, and pumpkin pie spice until you achieve a smooth, creamy consistency. This mixture is the heart of your gluten-free pumpkin pie bars, packed with the flavors of autumn. Ensure there are no lumps so every bite is delightfully silky.
Step 4: Bake the Bars
Pour the prepared filling over the crust in the baking pan, gently tapping the pan on the counter to release any air bubbles. Place the pan in the preheated oven and bake for 40-45 minutes. The edges should set nicely while the center remains slightly jiggly, signaling that the bars will firm up upon cooling.
Step 5: Cool & Serve
Once they are done baking, remove the pan from the oven and allow your gluten-free pumpkin pie bars to cool completely on a wire rack. This cooling time helps the bars set up properly. After cooling, lift the bars out using the parchment overhang, and cut them into squares for serving.
Make Ahead Options
These Irresistible Gluten-Free Pumpkin Pie Bars are perfect for busy cooks looking to save time without sacrificing flavor! You can prepare the crust and filling up to 24 hours in advance by making the crust and pressing it into the pan, then refrigerating it. Additionally, the filling can be made and stored in an airtight container in the fridge for easy assembly later. When you’re ready to bake, simply pour the chilled filling over the crust, bake as directed, and enjoy bars that are just as delicious as when made fresh. Remember to let them cool completely before cutting to ensure perfect squares and maintain their creamy texture!
What to Serve with Irresistible Gluten-Free Pumpkin Pie Bars
As you prepare to share these delightful bars, let’s explore some delicious pairings that will elevate your autumn experience.
-
Whipped Cream: A dollop of freshly whipped cream adds a luxurious touch, perfectly complementing the creamy pumpkin filling. This classic pairing enhances the dessert’s comforting appeal.
-
Vanilla Ice Cream: Top your warm bars with a scoop of velvety vanilla ice cream for a delightful contrast of temperatures and flavors, creating an indulgent sweet treat that everyone will love.
-
Caramel Sauce: Drizzling caramel sauce over the bars adds a rich, buttery sweetness that harmonizes beautifully with the spiced filling, making every bite feel like a cozy hug.
-
Chai Tea: The warm, spiced essence of chai tea echoes the fall flavors in your pumpkin pie bars, offering a fragrant and comforting beverage that enhances the festive mood.
-
Candied Pecans: Adding crunchy candied pecans on the side not only provides a satisfying texture but also brings an additional layer of sweetness and nuttiness that pairs wonderfully with pumpkin.
-
Coffee: A warm cup of coffee pairs beautifully with the rich flavors of pumpkin pie bars, while its slight bitterness balances out the dessert’s sweetness perfectly.
-
Fall Fruit Salad: A fresh fruit salad with apples, pears, and pomegranates offers a refreshing contrast to the dense sweetness of the bars, brightening your dessert table with seasonal colors and flavors.
-
Chocolate Drizzle: A touch of dark chocolate drizzled atop the bars brings a delightful richness, appealing to chocolate lovers and making your dessert even more decadent.
Storage Tips for Gluten-Free Pumpkin Pie Bars
Fridge: Store your gluten-free pumpkin pie bars in an airtight container in the fridge for up to 2 days to retain their flavor and texture.
Freezer: For longer storage, freeze the bars wrapped tightly in plastic wrap or in an airtight container for up to 3 months.
Reheating: To enjoy a warm treat, thaw in the fridge overnight, then reheat in the microwave for 15-20 seconds.
Chilling Enhances Flavor: Allow the bars to cool completely before refrigerating; chilling them overnight helps the flavors meld beautifully!
Expert Tips for Perfect Gluten-Free Pumpkin Pie Bars
-
Parchment Paper: Always line your baking pan with parchment paper for easy removal. It saves time on cleanup and keeps your bars intact.
-
Check for Doneness: Avoid overbaking! Look for firm edges with a slightly jiggly center. It’ll continue to set as it cools.
-
Chill for Flavor: After cooling, refrigerate the bars for a few hours to enhance the flavors and make them even creamier.
-
Double the Recipe: For larger gatherings, consider doubling the ingredients and using a 9×13-inch pan. Just adjust the baking time to ensure they’re cooked through.
-
Experiment with Variations: Don’t hesitate to try different add-ins like chocolate chips or nuts. These tweaks can elevate your gluten-free pumpkin pie bars to a whole new level!
Gluten-Free Pumpkin Pie Bars Variations
Feel free to unleash your creativity and customize these bars to suit your taste, making them uniquely yours!
- Chocolate Chip: Mix in semi-sweet chocolate chips for a delightful contrast to the spiced pumpkin filling. It’s like adding a bit of indulgence to comfort!
- Nutty Crunch: Throw in chopped walnuts or pecans for an extra crunchy texture; the nuts will also complement the spices beautifully. Each bite becomes a flavor adventure!
- Fresh Pumpkin Puree: Use roasted fresh pumpkin instead of canned for a more vibrant taste; it’s a wonderful way to celebrate autumn’s bounty. Plus, it adds a homemade touch!
- Coconut Alternative: Substitute with coconut milk for the filling instead of evaporated milk to give a tropical flair; it brings an unexpected twist to your pie bars.
- Spice it Up: Want to heat things up? Add a pinch of cayenne pepper for a surprising kick that contrasts nicely with the sweet filling. Perfect for those who love a little heat!
- Ginger Snap Crust: Swap out the gluten-free flour for crushed ginger snap cookies for a zesty, fragrant base that pairs perfectly with pumpkin. It’s the ultimate flavor combination!
- Larger Servings: Use a 9×13-inch pan for a larger batch, just keep an eye on baking time; these bars are sure to impress at gatherings!
- Seasonal Swirl: Swirl in some homemade caramel or maple syrup into the filling before baking for an indulgent touch; who can resist that sweet surprise?
Feel inspired? Pair these gluten-free pumpkin pie bars with a scoop of vanilla ice cream or serve alongside some delicious Mini Pumpkin Pies to create an autumn dessert spread everyone will adore!

Gluten-Free Pumpkin Pie Bars Recipe FAQs
What type of gluten-free flour should I use for the crust?
Absolutely! A good option is a gluten-free all-purpose flour blend, which often contains xanthan gum that helps with texture. I’ve had success using almond flour for a nuttier flavor, but keep in mind it may change the texture slightly. Always check that your flour is certified gluten-free.
How should I store leftover pumpkin pie bars?
Very! To keep your gluten-free pumpkin pie bars fresh, store them in an airtight container in the fridge for up to 2 days. If you want to keep them longer, wrap them tightly in plastic wrap and place in an airtight container – they’ll last in the freezer for up to 3 months. Just remember to defrost them in the fridge overnight before enjoying!
Can I freeze gluten-free pumpkin pie bars?
Yes, you can! To freeze your bars, allow them to cool completely and then cut them into squares. Wrap each piece individually in plastic wrap, then place them in a freezer-safe container. They will be delightful up to 3 months later! To enjoy, let them thaw in the fridge for several hours and then warm them up in the microwave for about 15-20 seconds if desired.
What should I do if the filling is too thin?
If your filling doesn’t seem thick enough, it may be due to overmixing or not allowing the eggs to become fully incorporated. A great fix is to add a tablespoon of cornstarch or gluten-free flour to the filling to help thicken it before baking. Mix until well incorporated and texture looks smooth. It’s an easy way to ensure your bars firm up perfectly!
Are there any dietary considerations I should be aware of?
Absolutely! If you’re making these gluten-free pumpkin pie bars for others, ensure that none of the ingredients pose allergy risks. For instance, use dairy-free options for those with lactose intolerance, like coconut milk and vegan butter. Also, look out for any nut allergies if you’re adding nuts or chocolate chips as a topping. Safety first in the kitchen!
Decadent Gluten-Free Pumpkin Pie Bars for Cozy Fall Gatherings
Ingredients
Equipment
Method
- Preheat the oven to 350°F (175°C) and line an 8x8-inch baking pan with parchment paper.
- In a mixing bowl, combine gluten-free flour, sugar, and salt. Cut in cold butter until resembling coarse crumbs. Add the egg and mix until a dough forms. Press this dough into the bottom of the pan.
- In a separate bowl, whisk together pumpkin puree, brown sugar, eggs, evaporated milk, vanilla, and pumpkin pie spice until smooth.
- Pour the filling over the crust and tap the pan to release air bubbles. Bake for 40-45 minutes, or until the edges are set and the center is slightly jiggly.
- Allow the bars to cool completely on a wire rack, then lift out using the parchment overhang and cut into squares for serving.
Leave a Reply