
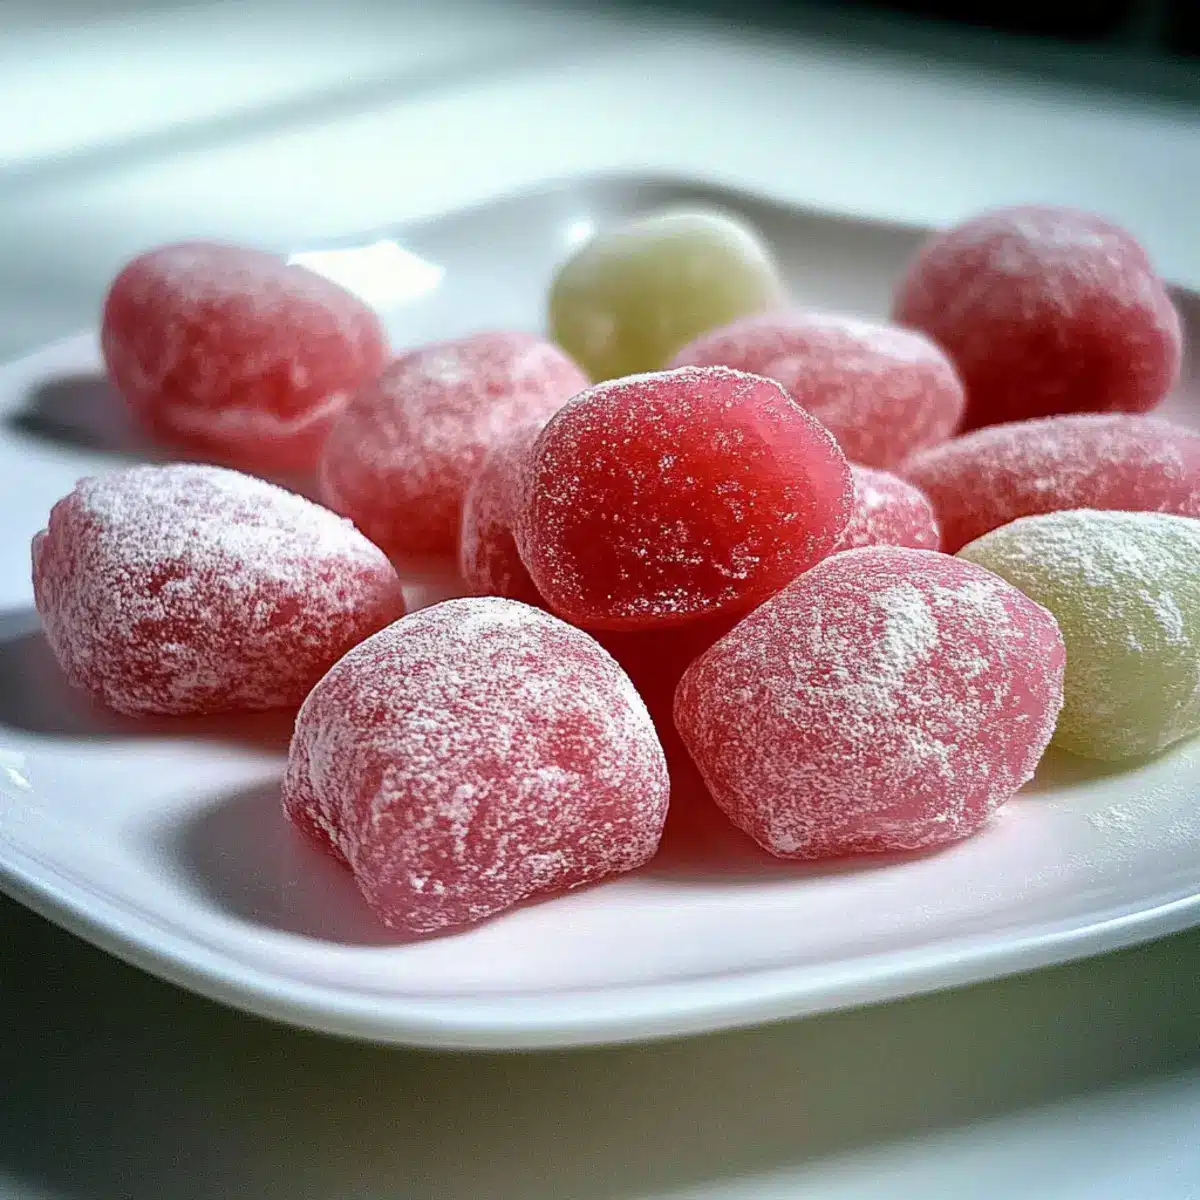
Have you ever stumbled upon a sweet creation that instantly transports you to another world? That’s exactly the experience I had when I first tried Jello Mochi—a vibrant dance of flavors that bridges traditional Japanese treats with a modern twist. These delightful chewy gems are not only a feast for the eyes but also a breeze to whip up in your kitchen. With just a few ingredients, including glutinous rice flour and your favorite jello flavor, you can create a customizable dessert that’s gluten-free and perfect for any occasion. Whip them up in just minutes, and you’ll impress friends and family alike with your creativity! Are you ready to take your taste buds on a joyful adventure? Let’s dive into making these irresistible Jello Mochi together!
Why is Jello Mochi a Must-Try?
Customizable Flavors: Experiment with various jello flavors, from classic strawberry to exotic blue raspberry, tailoring each batch to your taste.
Quick and Easy: This recipe comes together in minutes, perfect for last-minute dessert cravings or spontaneous gatherings.
Gluten-Free Delight: Made with mochiko, these chewy treats are safe for gluten-sensitive friends, ensuring everyone can enjoy them.
Visual Appeal: With their glossy sheen and vibrant colors, Jello Mochi is sure to steal the spotlight on any dessert table while impressing guests.
Fun to Make: Get the family involved! Shaping and dusting the mochi with cornstarch is a great way to bond and enjoy a hands-on cooking experience. For more enticing desserts, check out our easy dessert recipes.
Jello Mochi Ingredients
• Dive into creating your own colorful Jello Mochi masterpiece with these simple ingredients!
For the Mochi Mixture
- Mochiko – This glutinous rice flour gives the Jello Mochi its signature chewy texture; ensure you use mochiko for the best results!
- Jello – Any flavor you desire adds sweetness and vibrant color to your mochi; feel free to get creative with flavor combinations.
- Sugar – Balances the sweetness of the jello, enhancing the overall flavor profile.
- Hot Water – Activates the mochi mixture; make sure it’s hot enough to blend everything smoothly.
For Flavor Enhancement
- Flavor Extract (Optional) – Flavor options like lemon or vanilla can elevate your mochi’s taste, adding a personal touch to your treat.
For Dusting
- Cornstarch – Essential for dusting and preventing your mochi from sticking during shaping; this keeps the treats looking perfect.
Now that you have your ingredients ready, you’re just moments away from a delightful journey into the world of Jello Mochi!
Step‑by‑Step Instructions for Jello Mochi
Step 1: Mix the Dry Ingredients
In a microwave-safe bowl, sift together 1 cup of mochiko, 1 cup of your chosen jello flavor, and 1 tablespoon of sugar until they are thoroughly combined. This mixture will form the base of your Jello Mochi, providing that delightful chewiness and vibrant color. Take a moment to ensure there are no lumps, as this will make for a smoother texture later.
Step 2: Add Hot Water
Carefully add 1 cup of hot water to the dry mixture in the bowl. Using a whisk, stir the ingredients together until the mixture is smooth and well combined. The consistency should be a bit runny but cohesive. Ensure the water is hot enough to activate the mochiko and dissolve the jello fully, creating a luscious base for your chewy treats.
Step 3: Microwave the Mixture
Place the bowl in the microwave and heat on high in one-minute intervals. After each minute, carefully stir the mixture to promote even cooking, watching as it begins to thicken. Continue this process until the mochi mixture is solidified, which should take about 5-6 minutes total. You’ll know it’s ready when it looks slightly transparent and no liquid is visible.
Step 4: Prepare the Work Surface
Once cooked, lightly dust a clean surface with cornstarch to prevent sticking. Pour the thickened Jello Mochi mixture onto the dusted surface, spreading it evenly. Allow it to cool for a few minutes until it’s comfortable to touch, ensuring it won’t burn your fingers as you shape it into delightful pieces.
Step 5: Cut the Mochi
Using a knife dusted with cornstarch, cut the mochi mixture into equal-sized squares, about 16 pieces. This is where your colorful Jello Mochi really starts to take shape! If the knife sticks, simply re-dust it with cornstarch to ensure smooth cutting. The pieces should be soft yet firm enough to hold their shape.
Step 6: Shape the Pieces
Gently take each square in your hands and shape them into cute little balls or retain the square form. Be sure to dust your hands with cornstarch to avoid sticky fingers. This step allows for a fun, hands-on experience while ensuring the Jello Mochi remains intact and aesthetically pleasing.
Step 7: Final Dusting and Cooling
After shaping, dust each piece with more cornstarch to prevent them from sticking together. Place the shaped Jello Mochi on a clean plate or tray and let them cool completely at room temperature. This final step ensures the mochi firms up nicely, ready for serving as a unique and colorful treat!

Storage Tips for Jello Mochi
Fridge: Store your Jello Mochi in an airtight container in the refrigerator for up to one week, ensuring they stay fresh and chewy.
Dusting: Before storing, dust each piece lightly with cornstarch to prevent them from sticking together, which helps maintain their delightful texture.
Freezer: If you’d like to keep the mochi for longer, you can freeze them for up to three months. Just ensure they are sealed tightly in a freezer-safe container.
Reheating: When you’re ready to enjoy your frozen Jello Mochi, let them thaw in the fridge overnight or at room temperature for about 30 minutes before serving.
Expert Tips for Jello Mochi
-
Use Proper Flour: Ensure you use mochiko, the glutinous rice flour, as regular rice flour will not yield the desired chewy texture in your Jello Mochi.
-
Hot Water Temperature: Make sure your water is hot enough to blend smoothly with the ingredients; if it’s not hot enough, the jello may not dissolve fully.
-
Stir Between Intervals: Stir the mixture well after each microwave interval to promote even cooking, preventing any undercooked spots in your mochi.
-
Dusting Techniques: Dust hands and tools with cornstarch generously while shaping the pieces to keep them from sticking together, ensuring a clean appearance.
-
Cooling Time: Allow your Jello Mochi to cool completely at room temperature before serving; this helps them achieve the perfect chewy consistency.
What to Serve with Easy Japanese Jello Mochi
Indulge your taste buds and elevate your dessert experience with delightful accompaniments that beautifully complement this colorful treat.
-
Refreshing Green Tea: The subtle bitterness of green tea balances the sweetness of the mochi, creating a harmonious flavor duo that’s popular in Japanese cuisine.
-
Fresh Fruit Platter: Slices of juicy strawberries, kiwis, or mangoes add a refreshing crunch and vibrant color to your dessert spread. This pairing introduces a delightful contrast to the chewy mochi.
-
Matcha Ice Cream: Creamy and slightly bitter, matcha ice cream enhances the mochi’s sweetness while offering a rich texture that pairs perfectly with the lightness of the Jello.
-
Coconut Milk Sauce: Drizzle this rich and creamy sauce over the mochi for a tropical twist. The coconut flavor brings a subtle sweetness that complements the fruity jello.
-
Chocolate Dipping Sauce: A melted chocolate dip creates a playful contrast of textures and flavors. Surprise your guests by serving the mochi with a side of indulgent chocolate for dipping!
-
Honey or Maple Syrup: A light drizzle of honey or maple syrup adds a natural sweetness. It provides a lovely stickiness that pairs beautifully with the chewiness of the mochi.
-
Sparkling Water with Citrus: Offer refreshing sparkling water with lemon or lime wedges. This bubbly drink cleanses the palate between bites of your sweet treat, keeping the flavor experience fresh and exciting.
Jello Mochi Variations & Substitutions
Feel free to mix things up and tailor your Jello Mochi to match your taste and preference!
-
Flavor Fusion: Try mixing two jello flavors together, such as raspberry and orange, for a fun twist that’s bursting with flavor. This combination creates an unexpected but delightful taste sensation, elevating your mochi game to a new level.
-
Dairy-Free Delight: Swap traditional jello for a plant-based gelatin alternative to keep your Jello Mochi completely dairy-free and vegan-friendly. This adjustment makes it easy for everyone to enjoy these treats without compromising flavor or texture.
-
Soothing Herbal: Add a teaspoon of green tea powder, or matcha, to your mixture for an earthy taste that pairs beautifully with fruity jello flavors. The subtle flavor of matcha enhances the sweetness, creating a serene and delightful flavor profile.
-
Fruit Frenzy: Toss in small bits of fresh fruit or fruit puree for added texture and flavor. Think juicy strawberries or tangy mango—these fruity additions will make your Jello Mochi visually appealing and bursting with natural sweetness.
-
Chocolate Drizzle: For a decadent finish, drizzle melted chocolate on top of your Jello Mochi before serving. This indulgent addition contrasts beautifully with the chewy texture, offering a sweet surprise with every bite.
-
Spicy Surprise: If you’re feeling adventurous, add a pinch of cayenne pepper or chili powder to your mochi batter for a surprising kick. Pairing sweet and spicy flavors can be an exciting culinary experience that tantalizes the taste buds.
-
Layered Appeal: Create a layered effect by pouring different colored and flavored mochi mixtures into the same dish before microwaving. After cooling, cut them into squares to reveal a beautiful, colorful pattern. The visual treat will impress guests just as much as the taste!
-
Matcha Mochi: Replace jello entirely with matcha powder, sugar, and hot water for a unique green tea version. This twist delivers a refined taste that matches well with a cup of green tea—perfect for a light and sophisticated dessert.
Why not embrace the flexibility of this recipe? You can explore these variations to make Jello Mochi not just a treat, but a reflection of your personal culinary style. For more delectable ideas, you might also enjoy our delightful collection of easy dessert recipes.
Make Ahead Options
These Jello Mochi are perfect for meal prep and can save you valuable time on busy days! You can prepare the mochi mixture up to 24 hours in advance, simply following the initial steps and then refrigerating it in an airtight container. To maintain their delightful texture, be sure to dust the pieces with cornstarch before storing them, which prevents sticking. When you’re ready to serve, just remove the mochi from the fridge, let them come to room temperature for a few minutes, and enjoy their chewy, sweet goodness! With this make-ahead option, you can delight your family with these colorful treats without any last-minute rush.
Jello Mochi Recipe FAQs
What kind of mochiko should I use for Jello Mochi?
Absolutely use mochiko, which is glutinous rice flour specifically designed for this type of dessert. Regular rice flour lacks the gluten necessary for that chewy texture, making it essential to stick with mochiko for the best outcome.
How should I store leftover Jello Mochi?
Store your Jello Mochi in an airtight container in the refrigerator for up to one week. It’s a good idea to dust each piece lightly with cornstarch before storing to prevent them from sticking together, ensuring they retain their delightful chewiness.
Can I freeze Jello Mochi?
Yes, you can freeze Jello Mochi to extend their shelf life! Place them in a single layer on a baking sheet to prevent sticking and freeze until solid. Once frozen, transfer them to a freezer-safe container or bag, where they will stay good for up to three months. When you’re ready to enjoy, let them thaw in the fridge overnight or at room temperature for about 30 minutes.
Why is my Jello Mochi too sticky?
If your Jello Mochi ends up too sticky, it may be due to not using enough cornstarch during shaping, or perhaps the microwave didn’t fully cook the mixture. To fix this, ensure you dust your hands and work surfaces generously with cornstarch next time. Make sure to also stir the mixture thoroughly during microwave intervals to prevent any undercooked spots.
Can dogs eat Jello Mochi?
It’s best to avoid giving Jello Mochi to dogs as the sugar and certain ingredients may not be safe for them. If you wish to share a treat with your furry friend, consider making a dog-friendly version using ingredients safe for pets, like pureed fruits and oats, instead of sugar and gelatin.
Delicious Jello Mochi: Easy Sweet Treats You’ll Love
Ingredients
Equipment
Method
- Mix the dry ingredients: Sift together mochiko, jello, and sugar until combined.
- Add hot water: Carefully stir in hot water until mixture is smooth.
- Microwave the mixture: Heat in 1-minute intervals, stirring until solidified (5-6 minutes total).
- Prepare the work surface: Dust with cornstarch and pour the mixture onto it to cool.
- Cut the mochi: Use a cornstarch-dusted knife to cut into squares (16 pieces).
- Shape the pieces: Mold squares into balls or retain square form, dusting hands with cornstarch.
- Final dusting and cooling: Dust each piece with cornstarch and allow to cool completely.
Leave a Reply