
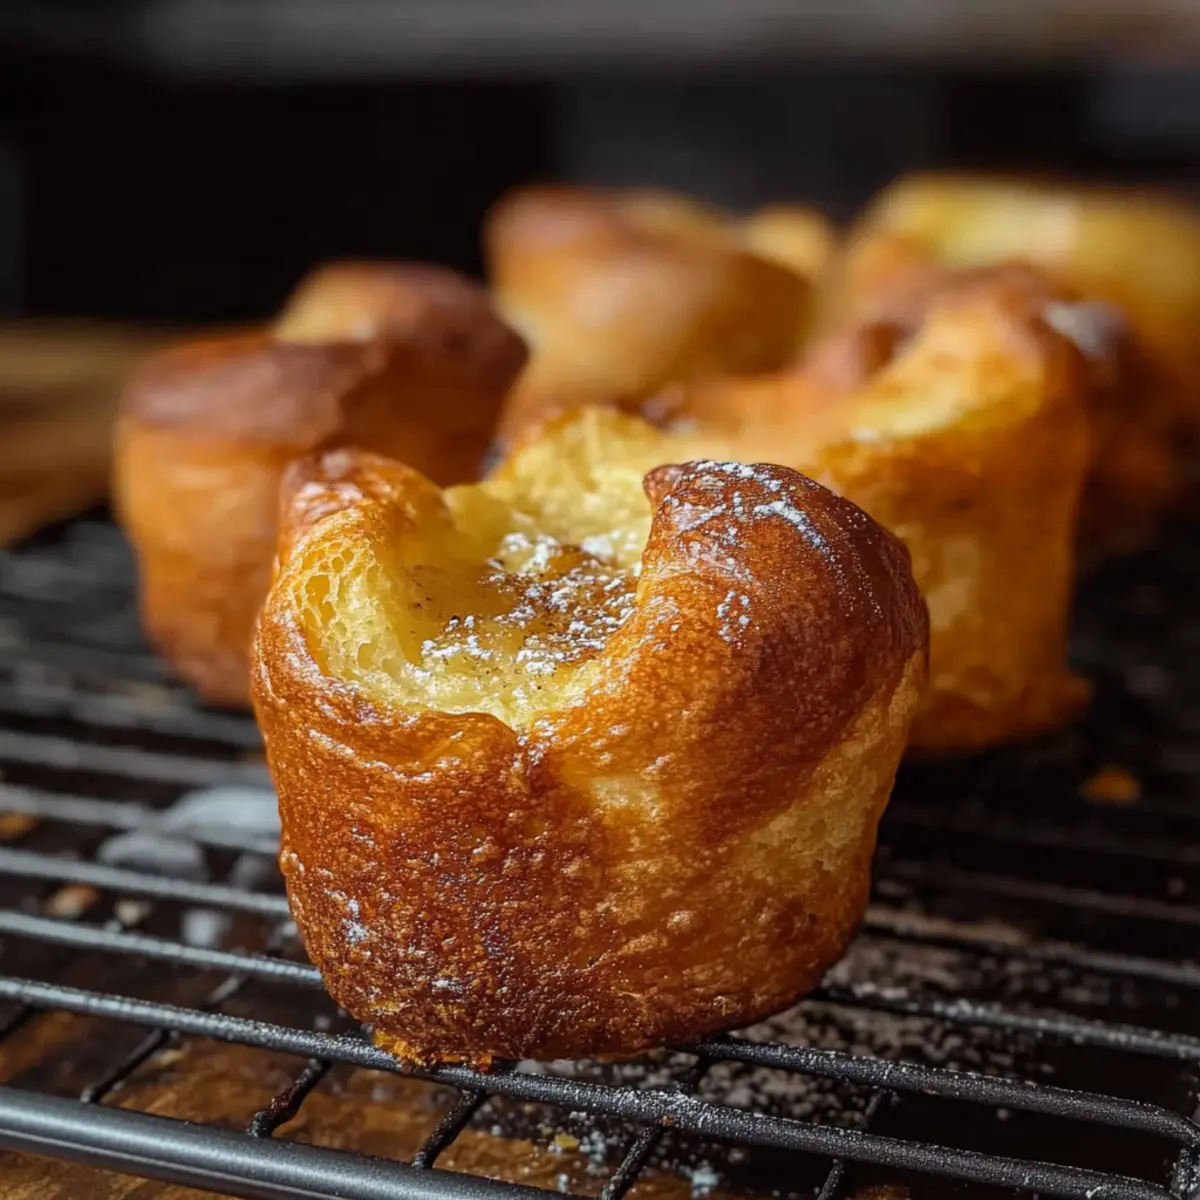
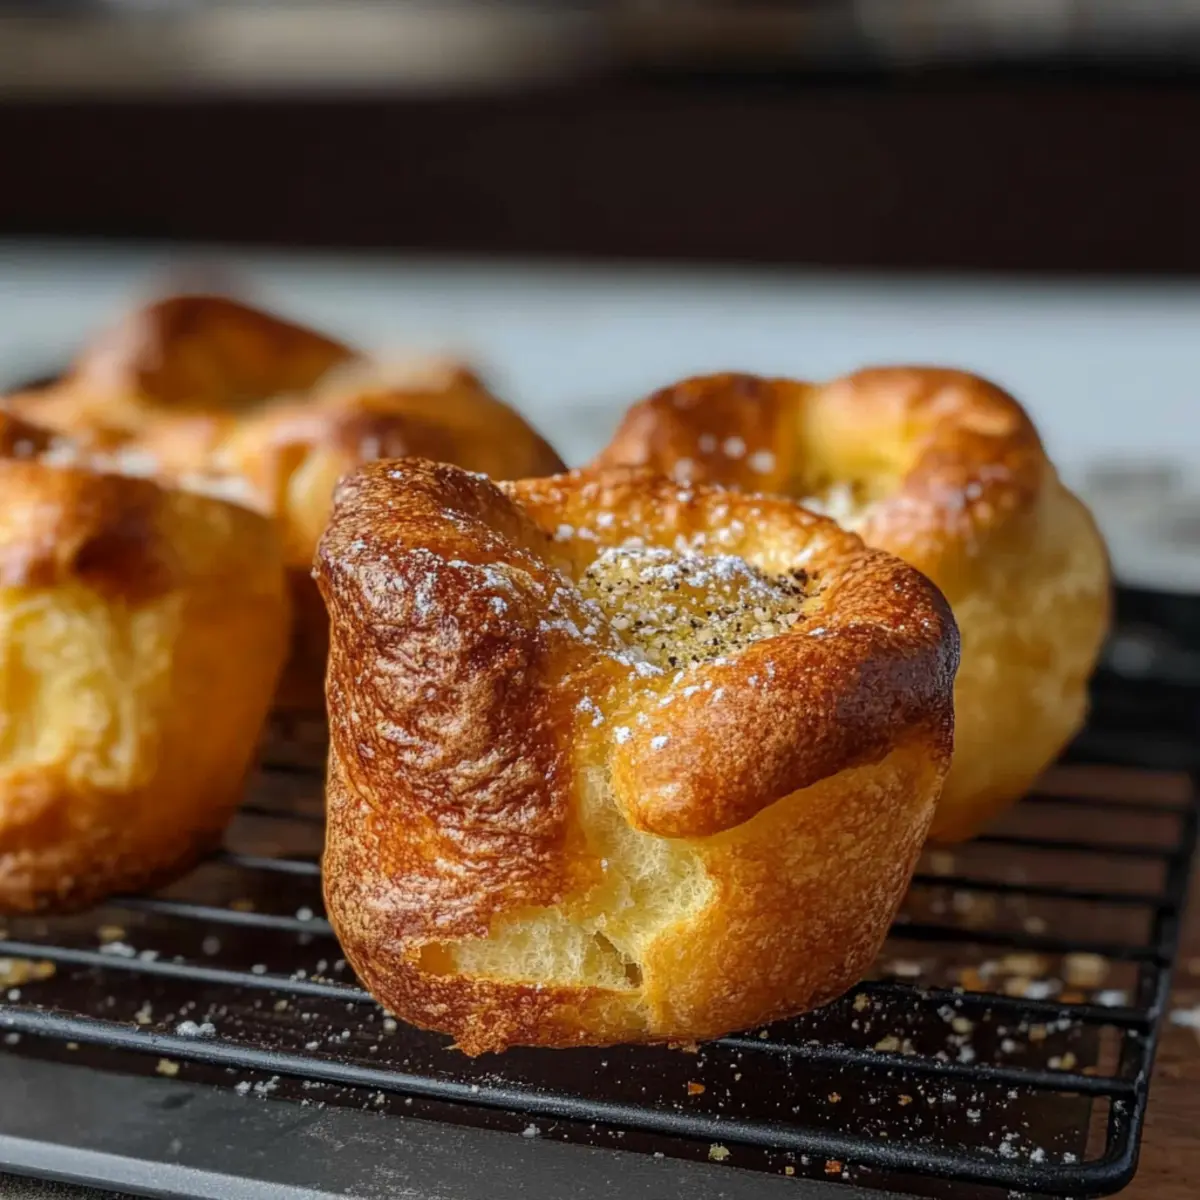
As the warm aroma of freshly baked popovers wafts through my kitchen, I can’t help but smile at the comforting memories they stir up. These gluten-free popovers, a delightful twist on the classic Yorkshire pudding, are perfect for transforming sourdough discard into something incredibly airy and delicious. Each popover features a crisp exterior that gives way to a soft, hollow center—ideal for stuffing with your favorite fillings or drizzling with sweet toppings. Not only are they quick to whip up, but they also fit seamlessly into any meal, whether you’re serving them alongside a savory roast or enjoying them as a sweet breakfast treat. Have you ever thought of using sourdough discard in a way that elevates your baking game? Let me show you how!

Why are Gluten Free Popovers a must-try?
Unique twist: These popovers creatively use sourdough discard, turning what could be waste into a delightful dish.
Quick & easy: With minimal ingredients and simple steps, you’ll be enjoying fresh popovers in no time.
Fluffy texture: Their light and airy interior is a dream, perfect for any filling or topping.
Versatility galore: Serve them savory or sweet—the flavor possibilities are endless.
Crowd-pleaser: Whether at a cozy brunch or a family dinner, everyone will love these! Add them to your next meal and impress family and friends with homemade goodness.
Gluten Free Popovers Ingredients
For the Batter
• Large Eggs – Essential for structure and leavening; make sure they’re at room temperature for optimal mixing.
• Low-Fat Milk (1%) – Adds moisture and richness; can substitute with your favorite dairy-free milk if needed.
• Gluten Free Sourdough Discard – Introduces delicious flavor and extra rise; replace with a mix of gluten-free flour and additional milk if unavailable.
• Cornstarch – Helps achieve a lighter texture and amazing browning; critical for the airy quality of popovers.
• Tapioca Starch – Improves moisture retention and overall texture; arrowroot starch can work as a substitute if necessary.
• Kosher Salt – Elevates flavor; adjust the amount based on the brand of salt you’re using.
• Seasoning of Choice – Customize the taste—think garlic powder for warmth or dried herbs for an aromatic touch.
• Vegetable Oil – Used for greasing the pan; ensure it’s preheated in the oven for the best results.
Embrace the joy of making gluten-free popovers that are not only good for you but also bursting with flavor!
Step‑by‑Step Instructions for Gluten Free Popovers
Step 1: Prepare the Dry Ingredients
In a small bowl, combine the cornstarch, tapioca starch, kosher salt, and any chosen seasonings like garlic powder or dried herbs. Whisk these dry ingredients together until well blended to ensure even distribution of flavors. Set this mixture aside, as it will be incorporated into the batter later to create delightful gluten-free popovers.
Step 2: Whisk the Eggs and Milk
In a large mixing bowl, whisk together the room-temperature large eggs until they become airy and frothy, which should take about 2-3 minutes. Gradually add the warm low-fat milk to the egg mixture, whisking continuously until fully incorporated and the mixture becomes a light froth. This step is crucial for creating the perfect airy texture in your gluten-free popovers.
Step 3: Mix in the Sourdough Discard
Once the egg and milk mixture is fluffy, gently fold in your room-temperature gluten-free sourdough discard. This will add a unique depth of flavor to your gluten-free popovers. Make sure the discard is well blended with the liquids, creating a cohesive mixture that will help the popovers rise beautifully in the oven.
Step 4: Combine Wet and Dry Ingredients
Slowly incorporate the dry ingredient blend into the wet mixture. Use a spatula or whisk to mix until a smooth batter forms, ensuring there are no lumps. This step is essential for achieving that airy, light texture characteristic of gluten-free popovers. Set the batter aside to rest for about 25-30 minutes, allowing the flavors to meld while preheating your oven to 450°F.
Step 5: Preheat the Popover Pan
As the batter rests, preheat your popover pan by adding vegetable oil to each cavity and placing it in the oven for about 5-10 minutes. The oil should be hot and shimmering, which helps create the required crispness on the outside of each gluten-free popover. This step is key to achieving that gorgeous rise and golden color.
Step 6: Fill the Pan and Bake
Once the oil is hot, carefully remove the popover pan from the oven. Fill each cavity with the batter, filling only halfway to allow for rising. Return the filled pan to the oven and immediately bake at 450°F for 15 minutes. The high temperature at the start is vital for getting those popovers to rise dramatically.
Step 7: Adjust the Temperature
Without opening the oven door, reduce the temperature to 400°F and bake for an additional 12 minutes. After that, reduce the temperature again to 350°F, allowing the popovers to bake for another 10 minutes. This gradual reduction in temperature prevents the popovers from collapsing while ensuring they cook evenly.
Step 8: Release Steam and Finish Baking
After a total baking time of about 37 minutes, carefully poke each popover with a skewer to release any trapped steam, which helps maintain their structure. Return to the oven and bake for an additional 2-3 minutes until the gluten-free popovers achieve a deep golden-brown color, indicating they are fully baked and ready to enjoy.
Step 9: Cool Before Serving
Once baked, remove the popovers from the oven and let them sit in the pan for a few minutes. This resting period helps them set further before serving. For the best texture and flavor, serve the gluten-free popovers warm, allowing everyone to savor their delightful lightness and airy interiors!

Expert Tips for Gluten Free Popovers
-
Room Temperature Ingredients: Ensure all ingredients are at room temperature to enhance rising and create that desired airy texture in your gluten free popovers.
-
Avoid Oven Peeking: Resist the urge to open the oven while baking. Opening the door allows steam to escape and can cause your popovers to deflate.
-
Hot Pan Necessary: Preheat your popover pan with oil for maximum puff. A hot pan is critical for creating beautifully risen popovers.
-
Proper Greasing: Skip using melted butter for greasing the pan; the water content can make the popovers soggy. Stick to vegetable oil for the best results.
-
Measuring by Weight: Weighing your ingredients in grams is the most accurate method, especially for gluten free baking. This helps avoid common mistakes and ensures consistent results.
Gluten Free Popovers: Simple Twists
Feel free to get creative and make these popovers your own with delightful variations that will surprise your palate!
- Dairy-Free: Swap in your favorite plant-based milk for a delightful, lactose-free version.
- Cheesy Touch: Add grated cheese, like cheddar or parmesan, to the batter for a savory, cheesy delight.
- Herb-Infused: Mix in fresh herbs, such as basil or dill, to elevate the flavor profile for a unique twist.
- Spice it Up: A pinch of chili powder or cayenne can add a clever kick for those who enjoy heat in their dishes.
- Sweet Citrus: Infuse the batter with a splash of lemon or orange juice for a zesty summery popover.
- Nutty Flavor: Incorporate nut flour or ground flaxseed for added depth and a rustic touch; both options add nutrition and flavor.
- Stuffed Surprise: Bake them hollow and fill with your favorite sweet or savory filling, creating a delightful surprise with each bite.
- Festive Faves: Sprinkle in holiday spices like nutmeg or cinnamon for a cozy seasonal spin, perfect for winter celebrations.
Don’t hesitate to experiment! Whether you’re in the mood for something savory or sweet, these sourdough discard recipes can guide your creativity.
How to Store and Freeze Gluten Free Popovers
Best Served Warm: Gluten free popovers are best enjoyed fresh out of the oven. They taste amazing right away and are at their fluffiest!
Room Temperature: If you have leftovers, store them in an airtight container at room temperature for up to 2 days. This helps maintain their texture.
Freezer: For longer storage, freeze cooled popovers in a single layer on a baking sheet until solid, then transfer to a freezer bag. They can be stored for up to 1 month.
Reheating: To reheat, simply warm them in a preheated oven at 350°F for about 10-15 minutes until heated through. This helps restore that delightful crispiness!
What to Serve with Gluten Free Popovers
The light and airy nature of these popovers invites countless delightful pairings, creating the perfect meal experience.
- Savory Herb Butter: Spread this infused butter for added depth; it complements the delicate flavors of the popovers beautifully.
- Roast Chicken: Pairing with juicy roast chicken makes for a comforting and fulfilling meal, perfect for a family gathering.
- Creamy Tomato Soup: Dip these fluffy popovers in rich tomato soup for a warm, cozy lunch that sparks nostalgia.
- Spinach Salad: A fresh spinach salad with a tangy vinaigrette adds a crisp contrast to the warm popovers, balancing flavors harmoniously.
- Honey and Cinnamon Sugar: Drizzle these sweet toppings on warm popovers for a delectable dessert twist that’s sure to impress.
- Prosecco or Sparkling Wine: A glass of bubbly enhances the celebratory feel of enjoying fresh popovers, making any meal feel special.
- Herbed Goat Cheese: Spreading herbed goat cheese transforms your popovers into a delightful appetizer, bursting with flavor and sophistication.
- Fresh Fruit Compote: A sweet fruit compote provides a refreshing accompaniment, making the popovers a delightful option for brunch or dessert.
- Caramelized Onions: The rich sweetness of caramelized onions offers a savory bite, enhancing the popovers’ airy texture for an upscale touch.
- Vanilla Bean Ice Cream: For an unexpected dessert, top these warm popovers with a scoop of vanilla bean ice cream—pure bliss!
Make Ahead Options
These Gluten Free Popovers are perfect for busy home cooks looking to save time! You can prepare the batter up to 24 hours in advance. Simply mix the dry ingredients together and whisk the eggs, milk, and sourdough discard as directed, then combine and store the mixed batter in an airtight container in the refrigerator. This allows the flavors to meld beautifully while ensuring your popovers are just as airy and delicious when baked. When you’re ready to bake, just preheat your popover pan and pour the chilled batter into the cavities, then follow the baking instructions as usual for fresh, fluffy popovers! Enjoy the convenience of meal prep without sacrificing quality.
Gluten Free Popovers Recipe FAQs
What type of eggs should I use for gluten-free popovers?
Absolutely, using large eggs at room temperature is crucial for achieving the best structure and leavening. They whisk up better, creating that airy texture we all love!
How should I store leftover popovers?
To keep your gluten free popovers at their best, store them in an airtight container at room temperature for up to 2 days. They are best enjoyed fresh and warm, so if you have any left over, try to eat them sooner rather than later.
Can I freeze gluten free popovers?
Yes, you can! To freeze, allow the popovers to cool completely. Place them on a baking sheet in a single layer until frozen solid, then transfer them to a freezer bag. They can stay frozen for up to 1 month. To reheat, warm them in a preheated oven at 350°F for about 10-15 minutes.
What to do if my popovers didn’t rise?
If your gluten free popovers didn’t rise, a common culprit might be the oven temperature. Make sure you preheat your popover pan with oil until it’s hot before adding the batter—this step is key! Also, ensure your ingredients, especially eggs and milk, are at room temperature. Avoid peeking into the oven while they’re baking as this can release steam and lead to collapsing.
Can I substitute the gluten-free sourdough discard?
Very! If you don’t have sourdough discard, you can replace it with a mixture of 40 grams gluten-free flour and 40 grams additional low-fat milk. While it won’t have the same depth of flavor, it will still yield delicious results!
Are these gluten free popovers suitable for people with dairy allergies?
Indeed! You can substitute the low-fat milk with any dairy-free milk option of your choice. Just be aware that results may vary slightly depending on which milk you use, but I recommend almond or oat milk for the best consistency!
Gluten Free Popovers: Light, Airy, and Full of Flavor
Ingredients
Equipment
Method
- Prepare the Dry Ingredients by whisking together cornstarch, tapioca starch, kosher salt, and any chosen seasonings. Set aside.
- Whisk the room-temperature eggs until frothy, then gradually add warm milk while whisking until well combined.
- Gently fold in the sourdough discard, mixing until well blended.
- Combine the dry ingredients into the wet mix until smooth, then set aside for 25-30 minutes.
- Preheat the popover pan with oil in each cavity for 5-10 minutes until hot.
- Fill each cavity halfway with batter and bake at 450°F for 15 minutes.
- Reduce the oven temperature to 400°F and bake for an additional 12 minutes, then reduce to 350°F for 10 minutes.
- Poke each popover with a skewer to release steam, bake for an additional 2-3 minutes until golden brown.
- Cool briefly in the pan before serving warm for best texture.
Leave a Reply