
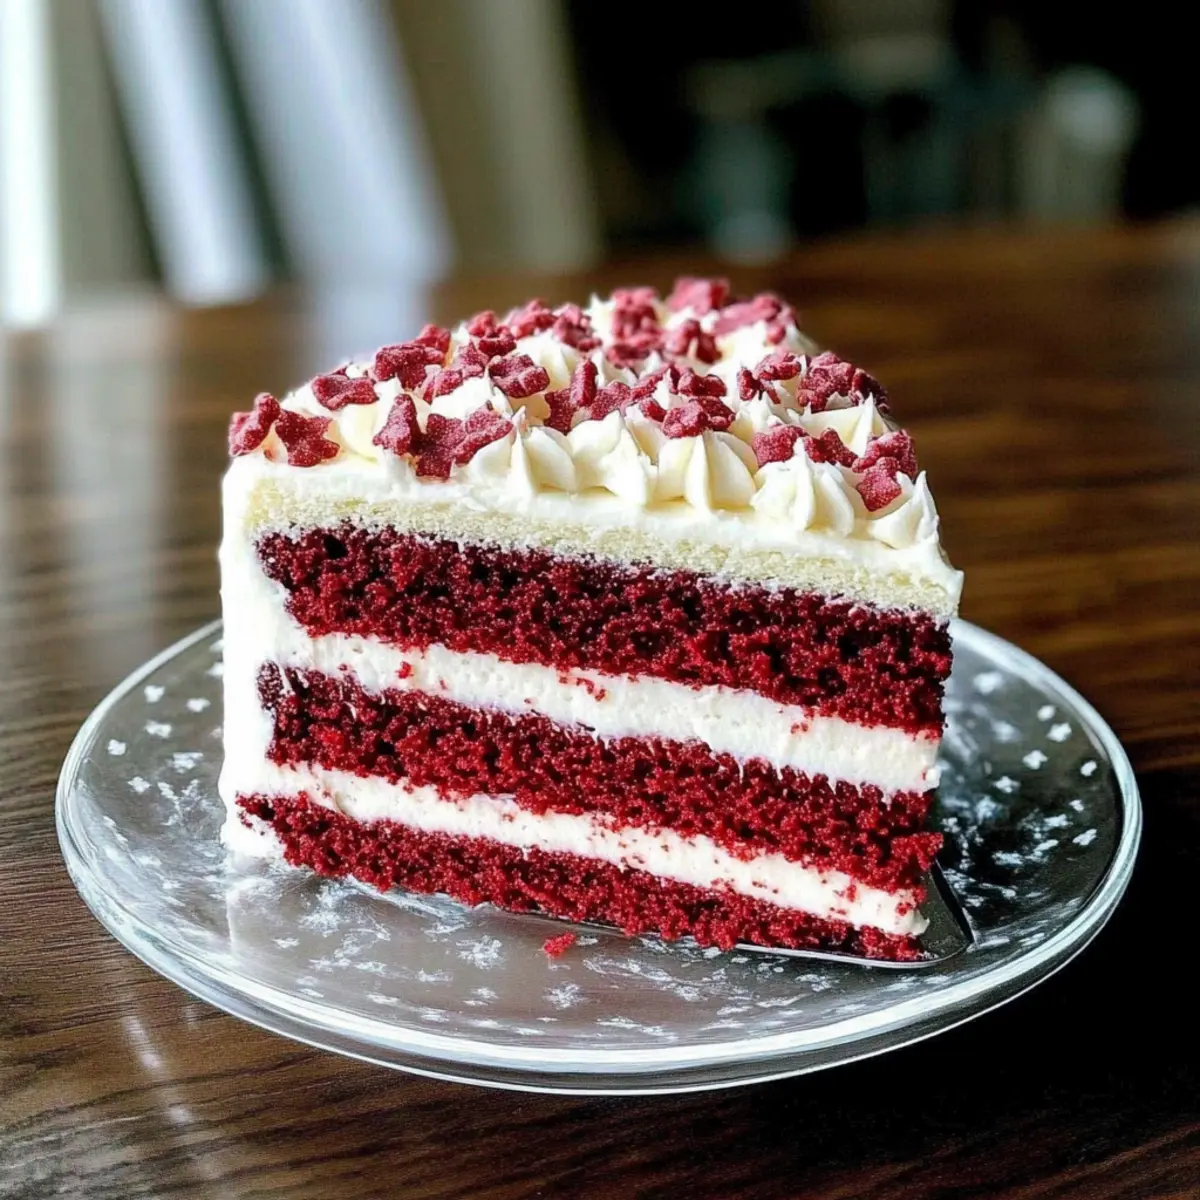
As I stood in my kitchen, the aroma of vanilla and buttercream danced around me, instantly transporting me to summer celebrations filled with laughter and joy. This Easy Canada Day Layered Cake is my way of celebrating—combining the rich allure of red velvet and the classic charm of white cake. It’s not just a dessert; it’s a centerpiece that sparks conversation and admiration. Each layer, fluffy and inviting, is enveloped in sweet, creamy buttercream icing, making it a delightful treat while keeping preparation effortless. This cake is perfect for busy bakers who want to impress without spending all day in the kitchen. Are you ready to create something truly festive and delicious? Let’s dive into this simple recipe and set the stage for your Canada Day festivities!
Why is this Canada Day Cake a Must-Try?
Festive Fun: This cake combines festive red velvet and classic white cake, making it a stunning centerpiece for your celebration.
Effortless Preparation: With cake mixes, you can whip this up in no time, perfect for those busy summer days.
Deliciously Decadent: The fluffy buttercream icing complements the moist cake layers beautifully—every bite is a sweet treat!
Versatile Variations: Feel free to adjust flavors or colors to suit any occasion—like trying out a chocolate cake mix for a twist.
Eye-Catching Design: Chocolate Cherry Cake or Blueberry Coffee Cake lovers will appreciate how this vibrant dessert catches everyone’s eye.
Crowd-Pleasing Appeal: Whether at a family gathering or a potluck, everyone will rave about this delightful cake!
Simple Canada Day Cake Ingredients
• For the Cake Layers
- White Cake Mix – A classic base for this festive cake; feel free to substitute with any vanilla cake mix for a similar flavor.
- Red Velvet Cake Mix – Adds a delightful color and richness; chocolate cake mix can be used for a fun alternative.
• For the Buttercream Icing
- Best Buttercream Icing – This creamy frosting enhances both flavor and decoration; use store-bought for a quicker option if needed.
- Icing Tips (Wilton size 18, 17) – Essential for creating that beautiful finish; alternative tips can be explored, but these offer the best results.
- Icing Bags (Disposable) – Perfect for easy piping of your icing; reusable bags work just as well if you prefer to use them.
• For Baking
- 9” Cake Pans (2) – Necessary for baking your cake layers; ensure they are of equal size for even stacking.
Embrace your inner baker with this Simple Canada Day Cake and get ready to dazzle your guests!
Step‑by‑Step Instructions for Simple Canada Day Cake
Step 1: Bake Cakes
Preheat your oven to 350°F (175°C). Prepare both the white and red velvet cake mixes according to the package instructions, ensuring even mixing to avoid lumps. Divide the batter evenly between two 9” cake pans. Bake for 25-30 minutes or until a toothpick inserted in the center comes out clean. Allow the cakes to cool in the pans for about 10 minutes before transferring them to wire racks.
Step 2: Freeze Layers
Once the cakes have cooled completely, wrap each layer tightly in plastic wrap. Placing them in the freezer for at least 1 hour makes stacking and icing easier, as the frozen texture provides stability. This step is crucial to simplify the later stages of your Simple Canada Day Cake construction.
Step 3: Prepare Icing
While the cake layers are chilling, make two batches of buttercream icing. Beat softened butter with powdered sugar and a splash of milk until smooth and creamy, adjusting the consistency as desired. You can add vanilla extract for extra flavor. Set aside some white icing for the decorative piping later, and tint the remainder with red food coloring for that festive finishing touch.
Step 4: Layer Cakes
With the cake layers now frozen solid, it’s time to assemble your Simple Canada Day Cake. Place one layer on a serving plate, and spread an even layer of buttercream icing on top, smoothing it out. Carefully add the second layer on top, making sure to alternate colors for visual appeal. Press down gently to ensure stability as you continue layering.
Step 5: Trim Edges
If necessary, level out the edges of the cake with a serrated knife to create an even surface. This step is essential for a professional-looking finish. Trimming may be needed if the layers have domed while baking; a flat top is key for even icing application.
Step 6: Crumb Coat
Apply a thin layer of buttercream icing to the entire cake, sealing in any crumbs. This crumb coat helps create a smooth outer layer and prevents crumbs from disrupting the final decorative icing. Once coated, place the cake back in the freezer for approximately 20 minutes to firm up the icing.
Step 7: Pipe Icing Decoration
Remove the cake from the freezer and prepare to decorate. Using your piping bags fitted with Wilton tips, start by applying the red and white buttercream icing in your desired pattern. Whether you pipe swirls or rosettes, be creative and have fun with the design on your Simple Canada Day Cake!
Step 8: Finish
Continue decorating until you achieve your desired look, adding final touches such as sprinkles or edible decorations if desired. Once ready, slice and serve your festive cake, celebrating Canada Day with every delightful bite!
Make Ahead Options
These Simple Canada Day Cakes are perfect for meal prep enthusiasts! You can bake and freeze the layers up to 3 days ahead of your celebration; just wrap the cooled cakes tightly in plastic wrap and place them in the freezer. This not only saves time but helps maintain their moisture. You can also prepare the buttercream icing 1 day in advance; store it in an airtight container in the refrigerator. When you’re ready to assemble your cake, simply let the layers thaw at room temperature for about 1 hour, layer them with icing, and decorate as desired. You’ll have a stunning centerpiece ready with minimal effort, just as delicious as if made fresh!
Expert Tips for Your Simple Canada Day Cake
-
Crumb Coating Importance: Always apply a crumb coat to trap crumbs in the icing. This prevents a messy outer layer and gives a neat finish.
-
Icing Consistency: Make sure your buttercream is creamy but not too soft. If it’s too runny, it won’t hold its shape well during decoration.
-
Layer Stability: Freezing the cake layers is vital for stability. This ensures the layers stack evenly without sliding apart when stacked.
-
Piping Practice: Don’t worry if your first pipes aren’t perfect! Grab a practice sheet of parchment paper to refine your piping before tackling the main cake.
-
Check Bake Time: Ovens can vary! Always check your cakes a few minutes earlier than the packaging suggests to avoid overbaking.
-
Coloring Trick: For vibrant red icing, use no-taste red food coloring. This ensures your icing stays sweet without any unwanted flavors, making your Simple Canada Day Cake even more delightful!
How to Store and Freeze Simple Canada Day Cake
Room Temperature: Store the cake in an airtight container at room temperature for up to 3 days to maintain its freshness and flavor.
Fridge: If you prefer, refrigerate the cake for up to a week. Cover it with plastic wrap to prevent drying out and preserve its delicious buttercream.
Freezer: For longer storage, you can freeze the assembled cake. Wrap it tightly in plastic wrap, then in aluminum foil. It can be kept in the freezer for up to 2 months.
Reheating: To enjoy your Simple Canada Day Cake after freezing, thaw it overnight in the fridge, and let it sit at room temperature before serving for the best texture.
What to Serve With Simple Canada Day Cake?
As you prepare your vibrant cake, consider these delicious additions to elevate your Canada Day celebration.
-
Fresh Berries: The sweetness of strawberries and blueberries brings a refreshing contrast to the rich cake flavors, celebrating the holiday colors.
-
Vanilla Ice Cream: A scoop of creamy vanilla ice cream perfectly complements the moist layers, creating a delightful harmony of temperatures and textures.
-
Sparkling Lemonade: Enjoy a fizzy, citrusy drink that balances the cake’s sweetness, making it an ideal refreshing sip on a warm summer day.
-
Grilled Veggie Skewers: Their smoky flavors provide a savory pivot, making each slice of cake even more indulgent and fun when shared at a BBQ.
-
Cheese Platter: A selection of cheeses adds a savory touch, inviting guests to wander between sweet and savory flavors—perfect for casual gatherings.
-
Chocolate Dipped Strawberries: Glossy and sweet, they make a lovely treat that adds elegance alongside your cake while maintaining a festive element.
-
Coffee or Tea: A warm cup balances the dessert’s sweetness and creates a cozy atmosphere, inviting guests to linger and savor every bite.
-
Summer Fruit Salad: A chilled fruit medley offers a refreshing touch, bursting with juice and brightness that brightens your festive meal.
Celebrate with these delightful pairings, and enjoy a joyful feast that lingers on the palate and in your heart!
Simple Canada Day Cake Variations
Feel free to have some fun with this recipe and make it your own! You’ll love how easy it is to adapt.
-
Chocolate Velvet: Use chocolate cake mix instead of red velvet for a rich, decadent twist. This change adds a beautiful layer of depth to your cake’s flavor.
-
Fruit-Filled Layers: Incorporate slices of fresh strawberries or raspberries between the cake layers. This will not only add a burst of flavor but offer a delightful contrast in textures.
-
Colorful Icing: Try using blue and white icing along with the red for an even more vibrant cake, perfect for any celebration beyond Canada Day.
-
Nutty Crunch: Add crushed nuts or sprinkles to the buttercream for a lovely crunch that elevates your cake’s texture. The added bite pairs wonderfully with the soft cake layers.
-
Citrus Zing: Mix in some zest from oranges or lemons into the buttercream for a refreshing citrus twist. Pairing this with the sweet frosting balances the cake’s overall flavor profile.
-
Miniature Version: Create cupcakes instead of a layered cake using the same batters. These bite-sized treats are perfect for sharing and make for delightful picnic snacks.
-
No Bake Option: For a simpler alternative, layer the cake ingredients in a trifle bowl with whipped cream, fruits, and icing, resembling a cake parfait that requires no baking.
For more ideas on festive desserts, consider checking out these delectable recipes: Eggnog Cupcakes Nutmeg and Chocolate Cherry Cake. Let your creativity flow, and enjoy baking!
Simple Canada Day Cake Recipe FAQs
What kind of cake mixes can I use for this recipe?
You can use any white or vanilla cake mix for the white layer of the Simple Canada Day Cake. For the red layer, a red velvet mix is traditional, but a chocolate cake mix would also work wonderfully if you’re looking for a different twist in flavor.
How should I store the cake to keep it fresh?
Store the cake in an airtight container at room temperature for up to 3 days. If you’d like to keep it longer, you can refrigerate it for up to a week by covering it securely with plastic wrap to avoid drying out.
Can I freeze the Simple Canada Day Cake?
Absolutely! To freeze your cake, wrap it tightly in plastic wrap followed by aluminum foil. It can safely stay in the freezer for up to 2 months. When you’re ready to enjoy it, simply thaw it overnight in the fridge and let it come to room temperature before serving.
How do I ensure my buttercream icing holds its shape?
Make sure your buttercream has the right consistency—smooth and creamy, but not too soft. If it’s too runny, try adding more powdered sugar until it thickens. Also, chilling the cake layers before icing significantly helps keep everything stable while you decorate.
What do I do if my cake layers have domed tops?
If your layers have domed tops after baking, you can use a serrated knife to carefully trim them for an even stacking surface. This will create a more professional-looking finish and help your icing layer stay even as well.
Are there any allergens to consider with this recipe?
This Simple Canada Day Cake contains gluten and dairy due to the cake mixes and butter in the frosting. If you’re baking for someone with allergies, consider using gluten-free cake mixes and a dairy-free butter alternative for the icing. Always double-check your ingredient labels!
Celebrate with a Simple Canada Day Cake That Dazzles!
Ingredients
Equipment
Method
- Preheat your oven to 350°F (175°C). Prepare both cake mixes according to package instructions. Divide batter evenly between two 9” cake pans. Bake for 25-30 minutes or until a toothpick comes out clean. Cool for 10 minutes before transferring to wire racks.
- Wrap each layer tightly in plastic wrap and freeze each for at least 1 hour.
- While the layers are chilling, beat softened butter with powdered sugar and a splash of milk until smooth to make buttercream icing. Set aside white icing for decorative piping and tint the rest with red food coloring.
- Layer one frozen cake on a serving plate, spreading an even layer of buttercream icing on top. Add the second layer, alternating colors for visual appeal.
- Level the edges if necessary with a serrated knife for an even surface.
- Apply a thin crumb coat to the entire cake and freeze for approximately 20 minutes.
- Remove from freezer and decorate with red and white buttercream icing using piping bags fitted with Wilton tips.
- Continue decorating until the desired look is achieved. Slice and serve.
Leave a Reply