
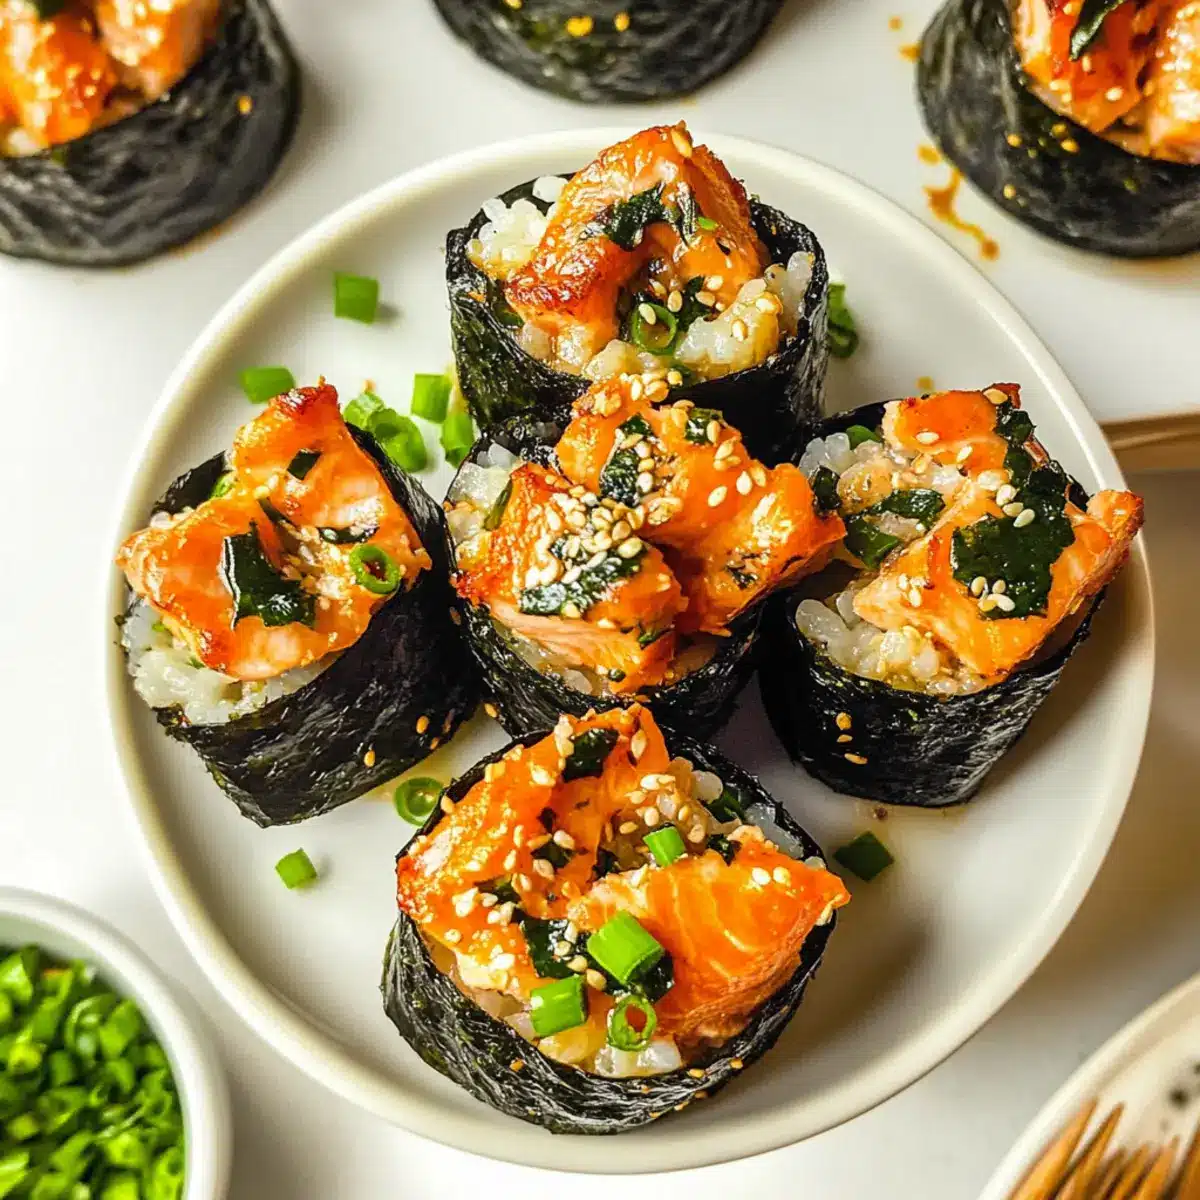
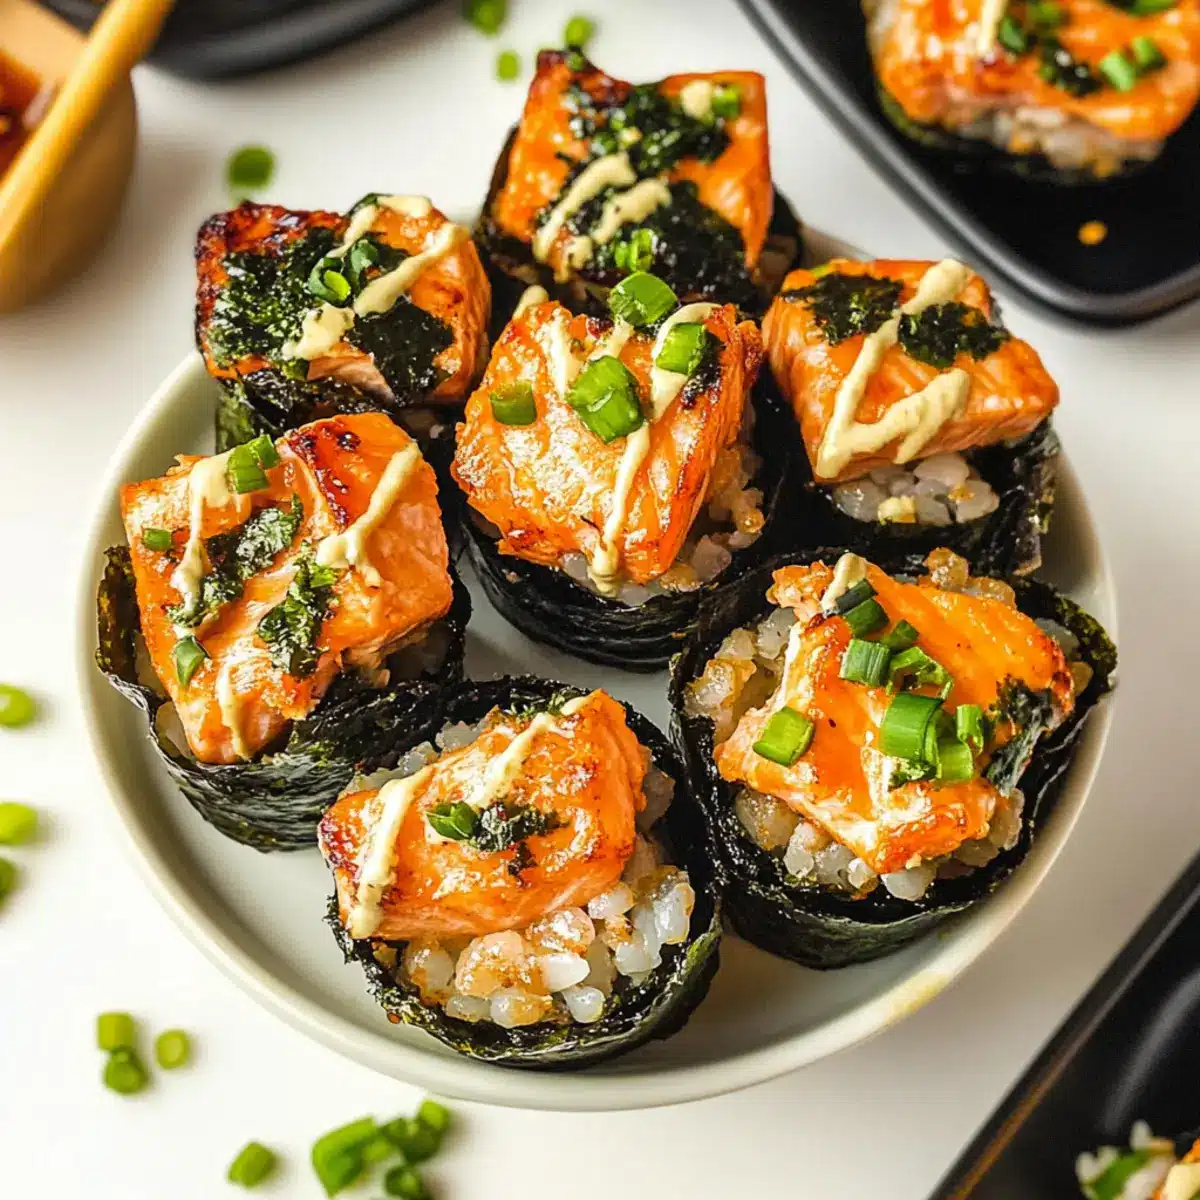
Sitting around the kitchen island with friends, can you hear the laughter and sizzling of something delicious in the oven? Those moments of connection are what inspired me to create these Easy Baked Salmon Sushi Cups. Offering an imaginative twist on classic sushi, this crowd-pleaser combines tender salmon, fluffy sushi rice, and nori sheets into delightful bite-sized wonders. Perfectly suited for casual gatherings or as a flavorful appetizer, these irresistible cups can be made in a flash, letting you spend more time enjoying the company of loved ones. Topped with spicy mayo and crisp green onions, they take the beloved flavors of sushi to a fun, deconstructed level. Curious about how to whip up this viral TikTok sensation in your own kitchen? Let’s dive in!
Why You’ll Crave These Sushi Cups?
Simplicity in Assembly: With just a few steps, you can create these easy baked salmon sushi cups that require minimal cooking skills.
Flavorful Fusion: The blend of fresh salmon, creamy Kewpie mayo, and spicy sriracha brings a delightful taste explosion that will impress your guests.
Crowd-Pleasing Appeal: Perfect for parties, these fun bites are sure to become a hit, just like my beloved Smoked Salmon Crostini.
Quick Cooking Time: Bake them in just 15 minutes for a delicious treat without the wait, making them a great option for busy weeknights.
Versatile Options: Feel free to experiment with proteins or toppings like furikake and avocado, allowing you to customize based on preferences.
Guilt-Free Indulgence: Enjoy a gluten-free option with nori sheets that keeps the flavors rich while remaining health-conscious.
Easy Baked Salmon Sushi Cups Ingredients
For the Salmon Filling
- Salmon – Cubed, provides protein and rich flavor; fresh or frozen can be used.
- Light Soy Sauce – Adds umami and saltiness; substitute with tamari for a gluten-free option.
- Kewpie Mayo – Provides creaminess and a hint of sweetness; can be replaced with regular mayonnaise for a milder flavor.
- Sriracha – Offers heat and zest; adjust to taste or swap with your favorite hot sauce.
- Sesame Oil – Adds a nutty flavor; use olive oil as a substitute, but it will change the taste profile.
For the Sushi Rice Base
- Sushi Rice – The base for structure; if unavailable, regular short-grain rice will work too.
- Rice Vinegar – Balances the rice’s flavor; apple cider vinegar may be used as an alternative.
- White Sugar – Sweetens and tempers acidity; can replace with honey if desired.
For the Nori Cups
- Nori Sheets – Essential for wrapping sushi cups, bringing classic sushi flavor; easily found in most grocery stores.
- Cooking Spray – Prevents sticking in the muffin tin; any cooking oil could serve as a substitute.
For the Garnish
- Furikake – Optional garnish for an added umami boost; you can replace it with sesame seeds if necessary.
- Green Onion – Adds freshness and crunch; chives can be used as an alternative for a similar flavor.
Curious how these ingredients come together in delicious bites? Let’s get cooking!
Step‑by‑Step Instructions for Easy Baked Salmon Sushi Cups
Step 1: Prepare the Sushi Rice
Begin by cooking sushi rice according to the package instructions, typically around 20 minutes. Once cooked, transfer it to a large bowl and gently mix with a mixture of warmed rice vinegar and white sugar. Stir until the sugar dissolves, allowing the rice to absorb the flavors. Set the seasoned rice aside to cool while you preheat the oven.
Step 2: Preheat Your Oven
Preheat your oven to 400°F (200°C). This step is crucial, as a hot oven will yield beautifully baked salmon sushi cups. While the oven heats up, take a moment to gather your muffin tin, ensuring it’s ready for the nori cups that will hold your delicious filling.
Step 3: Combine the Salmon Filling
In a medium bowl, combine cubed salmon, light soy sauce, Kewpie mayo, sriracha, and sesame oil. Mix well until the salmon is evenly coated. The combination of bold flavors will enhance the filling for your Easy Baked Salmon Sushi Cups and provide that mouthwatering taste everyone loves.
Step 4: Prepare the Nori Sheets
Cut your nori sheets into rectangles that will fit into the muffin tin cups. Lightly coat each nori piece with cooking spray to prevent sticking while baking. This will ensure that your nori stays crisp and delicious when holding the savory salmon filling.
Step 5: Layer the Sushi Rice
Take a spoonful of the seasoned sushi rice and press it into the base of each nori-lined muffin tin cup. Make sure to pack it tightly to provide structural support for your Easy Baked Salmon Sushi Cups. This step sets the perfect foundation for the salmon layer.
Step 6: Add the Salmon Mixture
Spoon the salmon mixture on top of the pressed sushi rice in each muffin cup, filling them generously. Aim for an even layer to ensure that each cup gets a delightful burst of flavor when baked. The pretty pink salmon will also create a visually appealing presentation.
Step 7: Bake the Sushi Cups
Place the muffin tin in your preheated oven and bake for about 15 minutes, or until the salmon is cooked through and the tops are golden brown. Keep an eye on the cups during baking to ensure the perfect visual doneness, with crispy edges and tender filling.
Step 8: Add Final Touches
Once baked, remove the sushi cups from the oven and allow them to cool slightly for a few minutes. Drizzle additional sriracha or spicy mayo over the tops, then sprinkle furikake and chopped green onions for garnish. These accents enhance both flavor and presentation, making your Easy Baked Salmon Sushi Cups irresistible!

Expert Tips for Easy Baked Salmon Sushi Cups
- Perfect Salmon Cubes: Make sure to finely cube the salmon to allow for even cooking, ensuring each bite is tender and flavorful.
- Nori Preparation: Lightly spray the nori sheets to prevent them from sticking to the muffin tin; this keeps your cups intact for easy serving.
- Cool Before Serving: Allow the sushi cups to cool for a few minutes after baking. This helps prevent burns from the hot fillings and lets flavors settle.
- Serve Fresh: For the best texture and taste, enjoy your Easy Baked Salmon Sushi Cups straight from the oven. Storing can lead to sogginess.
- Feel Free to Customize: Experiment with ingredients! Substitute proteins or toppings to create your unique twist while keeping the sushi cup vibes alive.
Easy Baked Salmon Sushi Cups Variations
Elevate your culinary experience by customizing these delightful sushi cups with your personal touch or dietary needs!
-
Gluten-Free: Use tamari instead of light soy sauce to create a gluten-free option that doesn’t compromise on flavor. Your guests will love this accommodating twist.
-
Vegetarian: Swap salmon for mixed vegetables like bell peppers, carrots, and avocados for a fresh and colorful vegetarian version. These vibrant cups will be as appealing as they are tasty.
-
Spicy Kick: Add some chopped jalapeños into the salmon mixture or top each cup with a dollop of your favorite hot sauce for an extra spicy flavor explosion.
-
Different Proteins: Try using cooked tuna or crab meat instead of salmon for a unique taste experience. The outcome will still bring the joy of traditional sushi in a fun package!
-
Herb-Infused: Incorporate fresh herbs like cilantro or basil into the salmon filling for a refreshing pop of flavor. These fragrant additions will elevate your finished cups.
-
Creamy Avocado: Top your sushi cups with slices of creamy avocado before adding garnishes for an indulgent touch. The buttery smoothness complements the flavors beautifully!
-
Fusion Twist: Give a nod to Mexican cuisine by mixing some diced jalapeños or corn into the filling. This remix might just become your new favorite way to enjoy sushi cups!
-
For Crunch Lovers: Add a handful of crushed tempura flakes on top for an irresistible crunch. It’s an unexpected twist that enhances everyone’s favorite sushi experience.
Looking for some other delicious flavor ideas? You can also try serving these with a side of refreshing cucumber salad for a perfect pairing, like my beloved Baked Cod in Coconut Lemon Cream or brighten your table with Sprinkle Cookie Cups for dessert!
What to Serve with Baked Salmon Sushi Cups?
Enjoy these delightful, bite-sized treats by pairing them with various sides and drinks that elevate your dining experience.
-
Cucumber Salad:
A refreshing cucumber salad dressed in rice vinegar enhances the sushi cups, balancing flavors with a crisp, tangy crunch. -
Egg Drop Soup:
Warm and silky, this comforting soup provides a gentle contrast, complementing the savory salmon with its delicate flavors. -
Miso Soup:
Rich in umami, miso soup offers depth to the meal, enhancing the Japanese theme while inviting warmth and familiarity. -
Steamed Edamame:
Lightly salted edamame pods add a satisfying bite. Their vibrant green hue and texture contrast beautifully with the sushi cups. -
Soy Sauce Dipping Sauce:
For an extra burst of flavor, have soy sauce on hand. Just a drizzle adds a delicious umami punch to every bite. -
Chilled Sake or Green Tea:
Pair with chilled sake for an authentic experience. Alternatively, a soothing cup of green tea provides a refreshing palate cleanser. -
Mochi Ice Cream:
Finish your meal with the sweet, chewy delight of mochi ice cream. It’s the perfect sweet note to balance the savory sushi cups.
Storage Tips for Easy Baked Salmon Sushi Cups
Fridge: Store leftover sushi cups in an airtight container for up to 3 days. This keeps them fresh while preserving their flavor and texture.
Freezer: For longer storage, freeze the sushi cups in a single layer on a baking sheet before transferring to an airtight freezer bag. Enjoy within 1 month for best quality.
Reheating: Reheat in a preheated oven at 350°F for about 10 minutes, or until warmed through. Avoid microwaving, as it may lead to sogginess, diminishing the delightful texture of your Easy Baked Salmon Sushi Cups.
Serving: For optimal taste and texture, enjoy the sushi cups immediately after baking. If you must store them, ensure they’re kept in suitable conditions as described.
Make Ahead Options
These Easy Baked Salmon Sushi Cups are a great choice for meal prep! You can prepare the sushi rice and salmon filling up to 24 hours in advance. Simply cook the sushi rice and mix it with the rice vinegar and sugar, allowing it to cool before covering it tightly in the refrigerator. For the salmon mixture, combine the cubed salmon with soy sauce, mayo, sriracha, and sesame oil, then store in an airtight container. When ready to bake, preheat your oven and layer the cold sushi rice and salmon mixture into the nori cups as directed. Bake as usual for delicious results that are just as flavorful and satisfying!

Easy Baked Salmon Sushi Cups Recipe FAQs
How do I choose the best salmon for this recipe?
Absolutely! When selecting salmon, look for fresh, vibrant colors with a slight sheen that indicates quality. Avoid any fillets with dull coloring or dark spots, which can indicate spoilage. If using frozen salmon, ensure it’s properly thawed and has been handled safely. Fresh salmon provides the best flavor, but frozen can also yield tasty results!
How should I store leftovers of Baked Salmon Sushi Cups?
Leftover sushi cups should be stored in an airtight container in the refrigerator for up to 3 days. This method helps to preserve their flavor and freshness. I often recommend lining the bottom of the container with paper towels to soak up excess moisture, which keeps them from becoming soggy.
Can I freeze Easy Baked Salmon Sushi Cups?
Certainly! To freeze, lay the sushi cups in a single layer on a baking sheet and place them in the freezer until solid. Once firm, transfer them to an airtight freezer bag, ensuring you remove as much air as possible. Enjoy these cups within 1 month for the best quality. To reheat, bake them directly from frozen at 350°F for about 15-20 minutes.
What if my sushi rice doesn’t turn out sticky enough?
If your sushi rice isn’t sticky, it might not have been rinsed thoroughly or cooked long enough. Make sure to rinse the rice under cold water until the water runs clear, then soak for 30 minutes before cooking. This removes excess starch, helping it achieve that perfect, sticky consistency ideal for forming cups.
Are these Baked Salmon Sushi Cups suitable for gluten-free diets?
Yes, absolutely! By substituting light soy sauce with tamari, you can easily make these sushi cups gluten-free. Additionally, ensure the sushi rice and any other condiments used don’t contain gluten ingredients. Always double-check labels if you’re sensitive or have allergies.
Can I use other proteins or vegetables in this recipe?
Very much! Feel free to get creative by substituting other proteins like tuna, crab, or even cooked shrimp. For a vegetarian twist, try incorporating mixed vegetables or avocado. The versatility of this recipe allows you to explore various fillings and toppings, ensuring everyone at your gathering finds a flavor they’ll love!
Easy Baked Salmon Sushi Cups: A Fun, Flavorful Delight
Ingredients
Equipment
Method
- Prepare the Sushi Rice: Cook sushi rice according to package instructions, mix with warmed rice vinegar and white sugar, then set aside to cool.
- Preheat Your Oven: Preheat your oven to 400°F (200°C).
- Combine the Salmon Filling: Mix cubed salmon, light soy sauce, Kewpie mayo, sriracha, and sesame oil in a bowl.
- Prepare the Nori Sheets: Cut nori into rectangles and coat lightly with cooking spray.
- Layer the Sushi Rice: Press a spoonful of sushi rice into the base of each nori-lined muffin cup.
- Add the Salmon Mixture: Spoon the salmon mixture on top of the sushi rice in each cup.
- Bake the Sushi Cups: Place in the oven for about 15 minutes or until golden brown.
- Add Final Touches: Allow to cool, then drizzle with sriracha/mayo and sprinkle with furikake and green onions.
Leave a Reply