
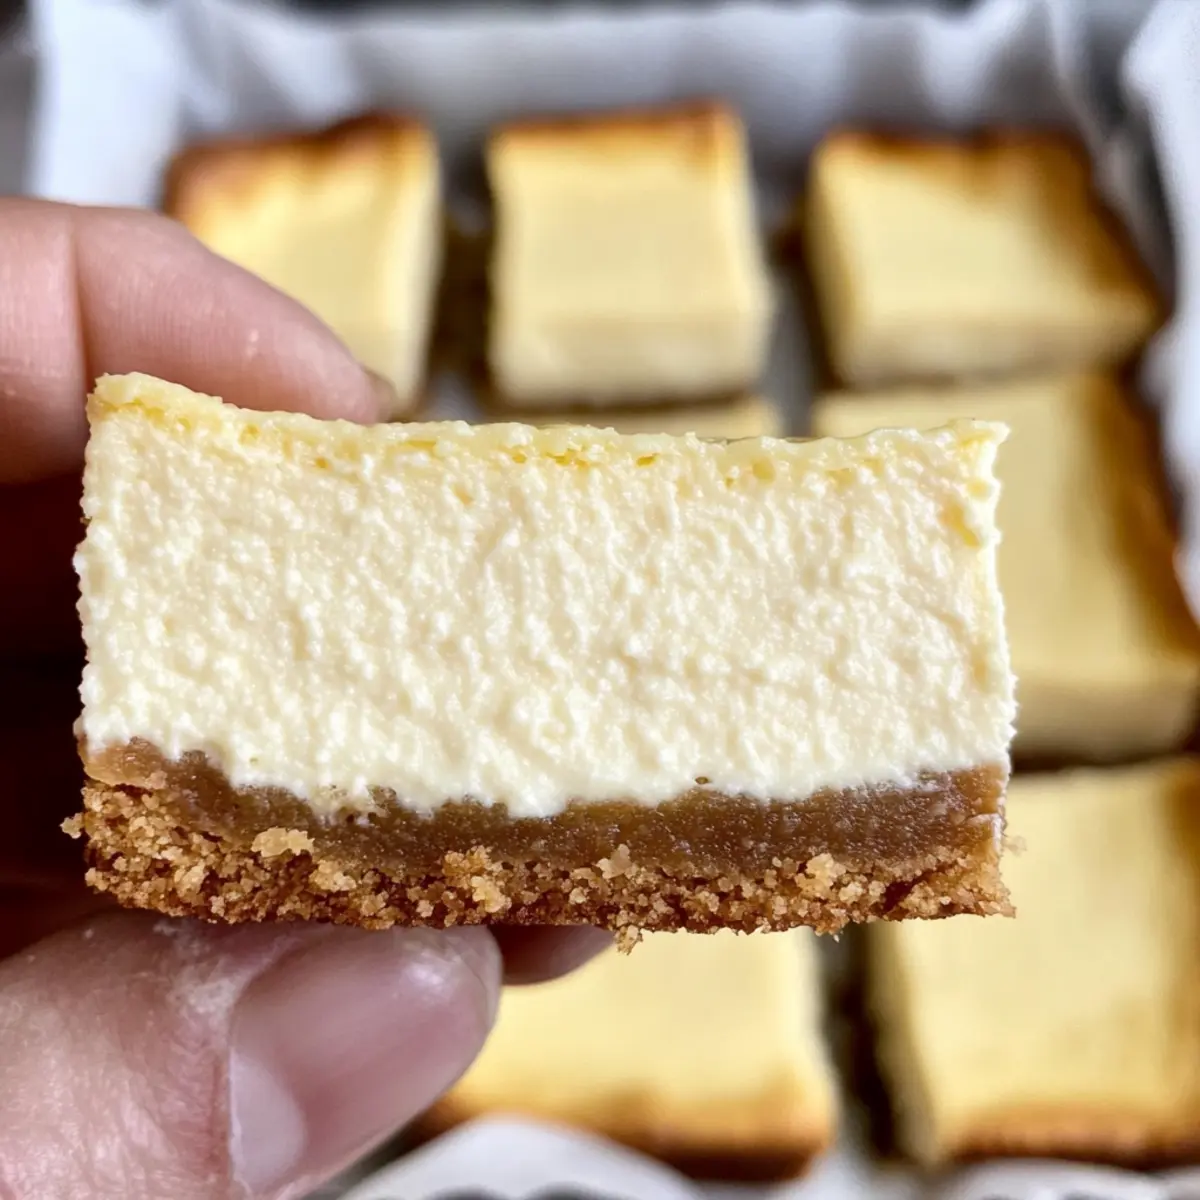
The aroma of sweet cream cheese wafts through the kitchen, immediately bringing a smile to my face. When I crave something indulgent yet delightful, I turn to these easy gluten-free cheesecake bars. This luscious dessert features a dreamy, creamy filling balanced perfectly atop a buttery graham cracker crust. The best part? They come together in a flash, making them perfect for any occasion that calls for a slice of happiness. Plus, as an added bonus, these gluten-free cheesecake bars are so satisfying that they effortlessly cater to those on a gluten-free journey without sacrificing flavor or texture. Are you ready to dive into this heavenly treat?

Why are these cheesecake bars so special?
Simplicity, whip up these delightful bars quickly with minimal ingredients and effort. Creamy texture is achieved with rich cream cheese, ensuring a melt-in-your-mouth experience. Versatile options allow you to customize flavors with lemon juice or flavored extracts. Crowd-pleaser status means they’ll vanish at your next gathering, just like our Chocolate Cheesecake Bars. Health-conscious choice, they cater to gluten-free diets without compromising on taste. Make-ahead magic notes mean you can prep these in advance, just like with Gluten Free Popovers, ensuring less stress when hosting!
Gluten-Free Cheesecake Bars Ingredients
For the Crust
- Gluten-Free Graham Cracker Crumbs – Use certified gluten-free options to ensure everyone can enjoy these cheesecake bars.
- Sugar – Adds sweetness to the crust; substitute with coconut sugar for a healthier twist.
- Butter (or Dairy-Free Butter) – Binds the crust together with richness; opt for coconut oil for a dairy-free version.
For the Filling
- Cream Cheese (or Dairy-Free Cream Cheese) – The star of the filling, providing that delicious creamy texture; full-fat is recommended for the best flavor.
- Eggs – Helps firm up the filling; make sure they’re at room temperature for smooth mixing.
- Milk – Adds creaminess to the filling; substitute with almond milk for a dairy-free alternative.
- Vanilla Extract – Enhances the overall flavor of the cheesecake bars; go for pure vanilla for the best taste.
Optional Ingredients
- Lemon Juice – A splash can brighten the flavors and add a zesty twist to the filling.
- Flavored Extracts (e.g., almond, hazelnut) – Experiment with different extracts for unique flavor profiles.
Step‑by‑Step Instructions for Easy Gluten-Free Cheesecake Bars
Step 1: Preheat and Prep
Begin by preheating your oven to 350°F (175°C). While the oven warms, line an 8-inch square baking pan with parchment paper, letting the edges hang over for easy removal later. This step is crucial for ensuring your easy gluten-free cheesecake bars lift out effortlessly once they cool.
Step 2: Make the Crust Mixture
In a mixing bowl, combine gluten-free graham cracker crumbs, sugar, and melted butter. Stir the mixture until it’s well combined and appears cohesive. This sweet and buttery blend will form the base for your cheesecake bars, so make sure it’s thoroughly mixed before proceeding to the next step.
Step 3: Press the Crust
Transfer the crust mixture into your prepared baking pan. Use your fingers or a flat-bottomed glass to firmly press the mixture into an even layer across the bottom. Once you’ve created a solid base, pop it into the oven and bake for 8 minutes, allowing the crust to set and lightly brown for that perfect crunch.
Step 4: Blend the Cream Cheese
While the crust bakes, grab a large mixing bowl and an electric mixer. Beat the cream cheese and sugar together until the mixture transforms into a creamy and smooth consistency. This step usually takes about 2-3 minutes and is foundational for the luscious filling of your gluten-free cheesecake bars.
Step 5: Incorporate Eggs and Flavor
Add the eggs, milk, and vanilla extract to the cream cheese mixture. Blend everything together for another 1-2 minutes until fully combined and silky smooth. This rich filling is what makes the bars so delightful, so ensure there are no lumps for that dreamy cheesecake experience.
Step 6: Pour the Filling
Once your crust has cooled slightly, carefully pour the cheesecake filling over it. Gently smooth the top using a spatula to create an even layer. It’s important to spread the filling evenly to ensure all parts of your gluten-free cheesecake bars are creamy and delicious.
Step 7: Bake the Cheesecake Bars
Place the pan back into the oven to bake for 30 minutes. After this time, loosely cover the pan with foil to prevent over-browning and continue to bake for an additional 10 minutes. Look for the filling to be just slightly jiggly in the center; this indicates it’s perfectly set.
Step 8: Cool and Chill
Once baked, remove the cheesecake bars from the oven and allow them to cool completely in the pan. After cooling, refrigerate for at least 2 hours to let the bars firm up nicely. This chilling step enhances the creamy texture and flavor, making each bite of your gluten-free cheesecake bars irresistible.
How to Store and Freeze Gluten-Free Cheesecake Bars
Fridge: Store the cheesecake bars in an airtight container in the refrigerator for up to 7 days. This helps preserve their creamy texture and delightful flavor.
Freezer: You can freeze the cheesecake bars wrapped tightly in plastic wrap and then in aluminum foil for up to 3 months. Thaw them in the refrigerator before serving for a fresh taste.
Cutting Tips: For best results, wait until the bars are completely chilled before cutting them into squares. This avoids any mess and keeps the filling intact.
Reheating: While these gluten-free cheesecake bars are delicious chilled, you can also warm them slightly in the microwave for a few seconds if you prefer a cozy, melty dessert experience.
Expert Tips for Gluten-Free Cheesecake Bars
-
Chill Time: Allow your cheesecake bars to chill for at least 2 hours. This not only firms them up but also enhances the flavor and creaminess.
-
Measure Ingredients: Always measure ingredients accurately, especially for the cream cheese filling. Too much can lead to a dense texture instead of creamy.
-
Egg Temperature: Use eggs at room temperature. This helps them incorporate more easily into the filling, resulting in a smoother cheesecake.
-
Avoid Overbaking: Keep an eye on the baking time. The center should be slightly jiggly when you take the bars out to ensure a perfect texture; overbaking can lead to dryness.
-
Parchment Paper: Line your baking pan with parchment paper, allowing edges to hang over. This simple trick makes removing and cutting your gluten-free cheesecake bars so much easier.
Make Ahead Options
These easy gluten-free cheesecake bars are perfect for meal prep enthusiasts looking to save time during busy weeks! You can prepare the crust up to 24 hours in advance; simply combine the gluten-free graham cracker crumbs, sugar, and melted butter, then press the mixture into the baking pan. Store it tightly covered in the refrigerator. The filling can also be made ahead of time—blend the cream cheese, sugar, eggs, milk, and vanilla, then refrigerate it for up to 3 days. When ready to bake, just pour the filling over the prepped crust, and bake as directed for cheesecake bars that are just as delicious as when freshly made!
What to Serve with Easy Gluten-Free Cheesecake Bars
The joy of indulging in these cheesecake bars is heightened when paired with delightful accompaniments that complement their creamy richness.
-
Fresh Berries: A scattering of mixed berries brightens the plate, adding a refreshing tartness that balances the sweet bars perfectly. These little gems not only enhance flavor but also add appealing color.
-
Whipped Cream: Light and airy, a dollop of fresh whipped cream creates a heavenly pairing. Its silky texture contrasts beautifully with the dense cheesecake, making each bite an indulgent experience.
-
Chocolate Sauce: A drizzle of silky chocolate sauce elevates the flavor profile, adding a decadent touch. The contrast between creamy cheesecake and rich chocolate is irresistible and a sure crowd-pleaser.
-
Mint Leaves: Fresh mint leaves provide a pop of color and a hint of cooling freshness. They elevate the presentation of your dessert and add a delightful aroma that complements the creamy bars.
-
Espresso or Coffee: A cup of strong espresso enhances the sweetness of the cheesecake bars, creating a perfect contrast. The bold flavor of coffee balances out the richness, making it an ideal pairing for dessert.
-
Almond Biscotti: The crunch of almond biscotti adds an enjoyable texture contrast with the creamy cheesecake. Dipping them into the bars offers a delightful blend of flavors in every bite.
-
Coconut Whipped Cream: For a tropical twist, serve with coconut whipped cream. It infuses sweetness and a hint of coconut flavor, perfectly balancing the rich cheesecake.
-
Fruit Sorbet: A small scoop of fruit sorbet serves as a refreshing palate cleanser. The vibrant flavor and chilly temperature create a delightful contrast with the warm texture of the cheesecake bars.
Embrace these pairings, and watch as your easy gluten-free cheesecake bars transform into a delightful dessert experience.
Gluten-Free Cheesecake Bars Variations
Feel free to get creative—these delightful bars can be customized to match your taste preferences!
-
Citrusy Burst: Add a splash of lemon juice to the filling for a refreshing twist.
-
Nutty Crust: Substitute almond flour for graham cracker crumbs for a nutty, gluten-free crust that’s full of flavor. The mild nuttiness complements the creamy filling beautifully.
-
Decadent Chocolate Swirl: Fold in melted dark chocolate into the cheesecake mixture for a rich, chocolatey variation. It’ll elevate your dessert game effortlessly!
-
Fruity Delight: Top the bars with fresh berries or a fruit compote for a burst of color and flavor. This delightful addition enhances both texture and taste, making each bite a mini celebration.
-
Spiced Flavor: Introduce a pinch of cinnamon or nutmeg to the crust for warm, cozy spices. This subtle change creates enchanting layers of flavor that pair with the creamy filling.
-
Dairy-Free Swap: Use almond or coconut milk and dairy-free cream cheese to create a deliciously dairy-free option. You won’t sacrifice on taste or texture, and your dairy-free friends will thank you!
-
Flavor Extracts: Experiment with flavored extracts like hazelnut or coconut to create unique taste variations that surprise and delight.
For more delicious ideas, try these chocolate desserts like our Chocolate Cheesecake Bars or add a twist to your meal with Gluten Free Popovers to elevate your culinary creations!
Gluten-Free Cheesecake Bars Recipe FAQs
How can I ensure the gluten-free graham cracker crumbs are the best choice for the crust?
Absolutely! When selecting gluten-free graham cracker crumbs, look for certified gluten-free packages to avoid any cross-contamination with gluten. Check the packaging for authenticity and look for crumbs that appear fine and consistent. You can also make your own by crushing gluten-free cookies or crackers in a food processor for a homemade touch!
What’s the best way to store my gluten-free cheesecake bars for maximum freshness?
Store your gluten-free cheesecake bars in an airtight container in the refrigerator for up to 7 days. This keeps them cool and preserves their creamy texture. If you plan to make them in advance, you can also wrap them tightly in plastic wrap and place them in an airtight container to keep them fresh and delicious.
Can I freeze the cheesecake bars, and how should I do it?
Yes, you can freeze these delightful gluten-free cheesecake bars! First, let them cool completely in the fridge. Then, cut them into squares and wrap each piece tightly in plastic wrap. Next, place the wrapped bars in a freezer-safe container or a heavy-duty zip-top bag. They can be frozen for up to 3 months. When you’re ready to enjoy, thaw them in the refrigerator overnight for optimal flavor and texture.
What should I do if my cheesecake bars crack on top?
The more the merrier, and cracks can happen! If your gluten-free cheesecake bars crack on top during baking, it might be due to overbaking or sudden temperature changes. To fix this, try covering the pan loosely with foil about halfway through baking to prevent them from browning too much. Make sure not to overbake; the center should be slightly jiggly when pulling them out of the oven. Allowing the bars to cool gradually at room temperature before chilling them can also help prevent cracks.
Are these cheesecake bars suitable for someone with dairy allergies?
Absolutely! You can easily adapt this recipe for dairy allergies. Simply swap out regular cream cheese for dairy-free cream cheese, use coconut or almond milk instead of regular milk, and opt for dairy-free butter or coconut oil for the crust. Keep an eye on any other ingredients, like flavored extracts, to make sure they’re dairy-free as well.
Can I use different types of sugar in this recipe?
Yes, you can! If you’re looking for a more natural option, I often substitute regular sugar with coconut sugar, which adds a hint of caramel flavor while still keeping the sweetness balanced. Other alternatives like maple syrup or honey can also be used, but do keep in mind that you may need to adjust the ratios of your other ingredients slightly to maintain the right texture.
Creamy Gluten-Free Cheesecake Bars That Delight Every Bite
Ingredients
Equipment
Method
- Preheat your oven to 350°F (175°C) and line an 8-inch square baking pan with parchment paper.
- In a mixing bowl, combine gluten-free graham cracker crumbs, sugar, and melted butter until well mixed.
- Press the crust mixture into the prepared baking pan evenly. Bake for 8 minutes.
- Beat cream cheese and sugar together until smooth, about 2-3 minutes.
- Add eggs, milk, and vanilla extract, blend until silky smooth for 1-2 minutes.
- Carefully pour the cheesecake filling over the baked crust and smooth the top.
- Bake for 30 minutes, then cover with foil and bake for an additional 10 minutes.
- Cool completely in the pan, then refrigerate for at least 2 hours before cutting.
Leave a Reply