
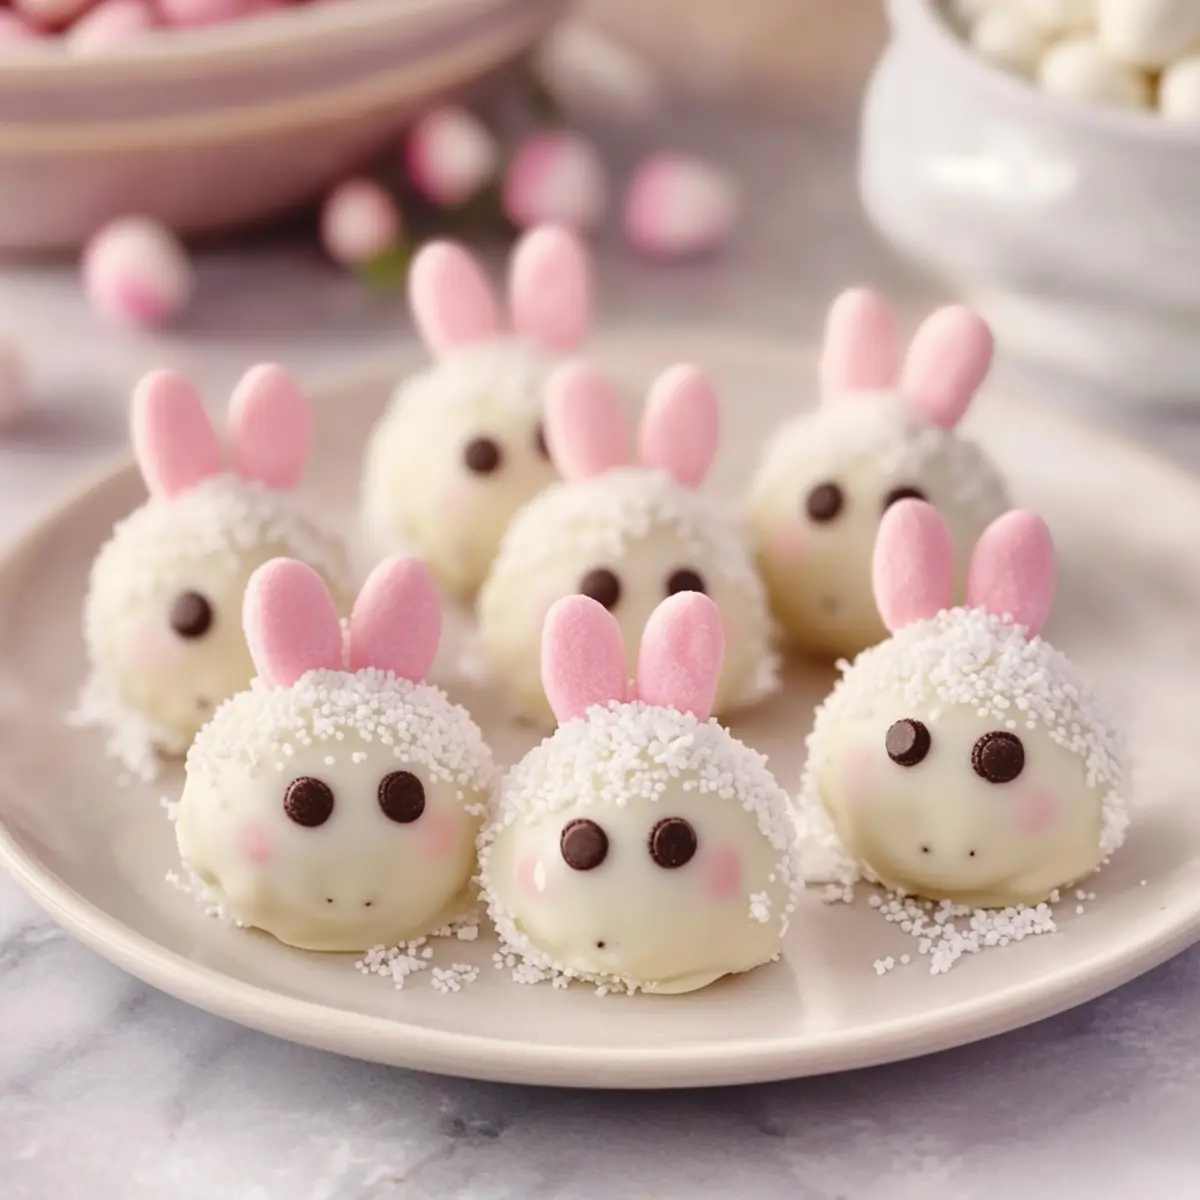
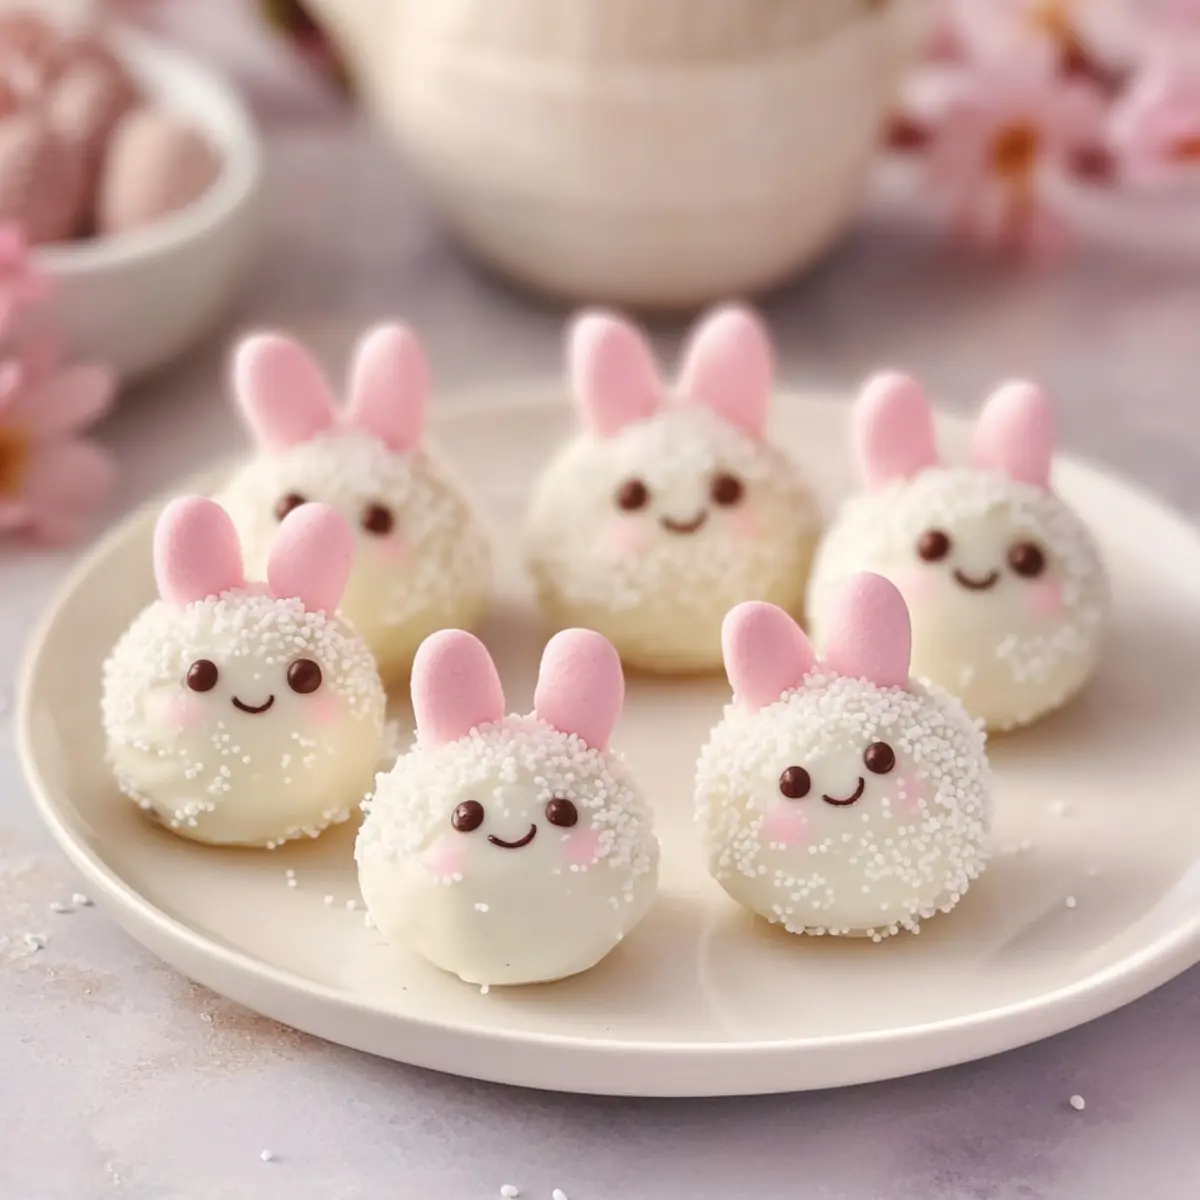
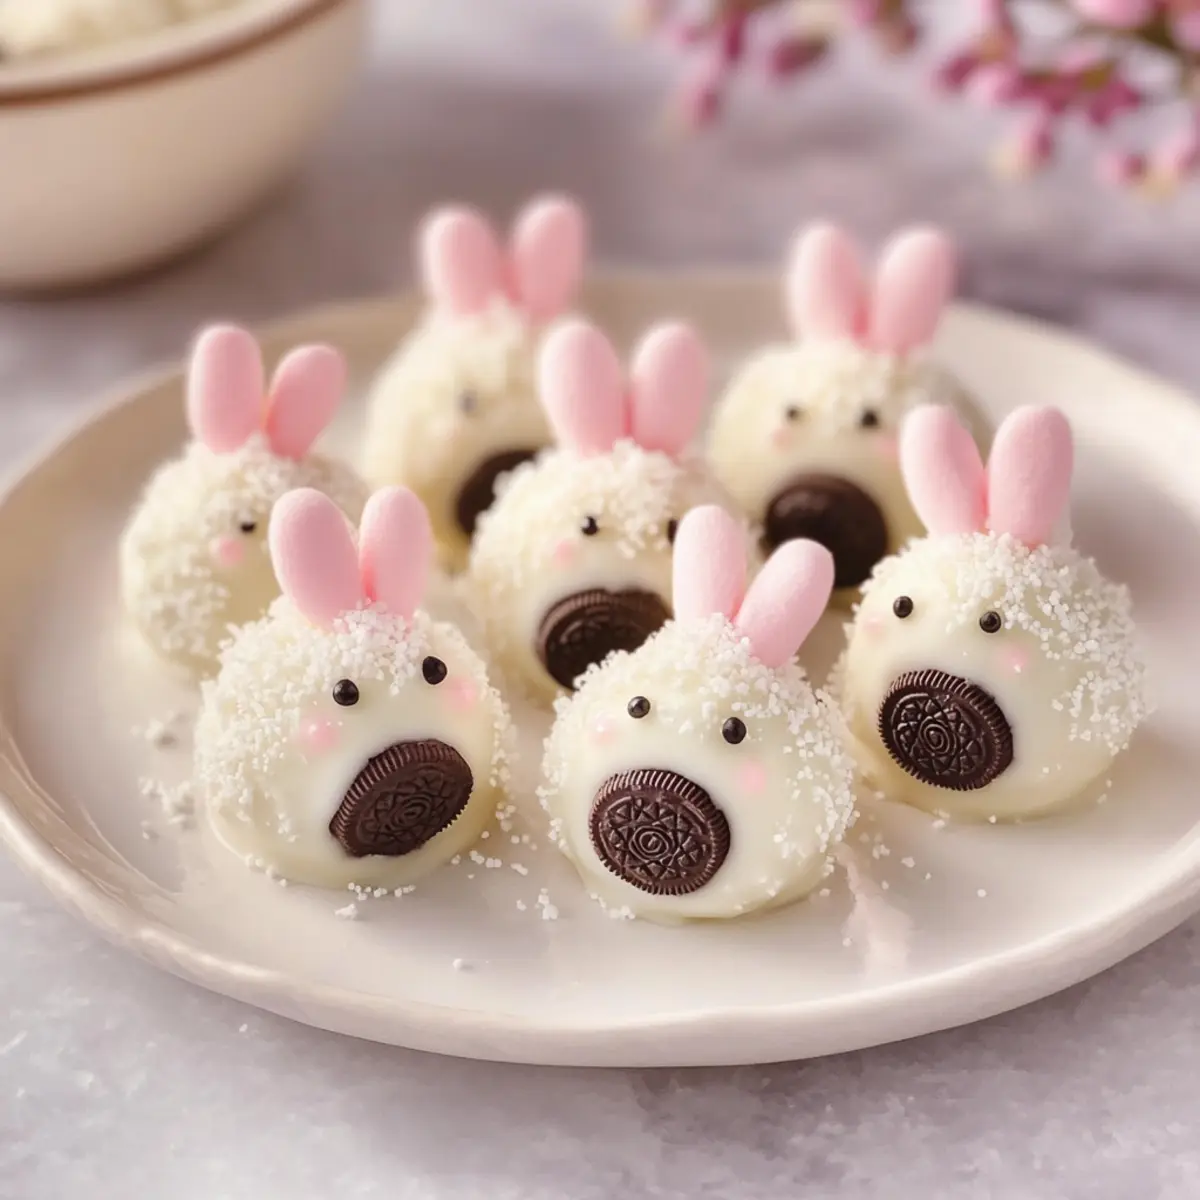
As I unwrapped the soft, creamy delight of an Oreo, inspiration struck—why not bring a playful twist to Easter treats? That’s how Bunny Oreo Balls came to life! These adorable no-bake goodies not only make for a quick and easy dessert but also add a cheerful touch to any festive gathering. With a delightful chocolate center wrapped in a sweet white chocolate shell, they’re bound to create smiles among kids and adults alike. Plus, they’re a fantastic way to involve the little ones in the kitchen without the fuss of baking. Ready to hop into this fun project? Let’s dive into the whimsical world of Bunny Oreo Balls together!
Why Are Bunny Oreo Balls So Fun?
Fun, Festive Appeal: Bunny Oreo Balls are perfect for bringing a playful spirit to your Easter celebrations, enchanting guests of all ages.
No-Bake Convenience: With no baking required, you can whip these up quickly, making them ideal for last-minute gatherings.
Creative Decorating: Let your imagination run wild with the decoration—make each bunny unique and enjoy crafting with your kids!
Deliciously Versatile: Feel free to swap Oreos for golden ones or choose different colored candy melts to suit any occasion.
Crowd-Pleasing Treat: Their irresistible taste is sure to leave everyone asking for more, just like our delightful Chocolate Balls Twist or Mint Oreo Truffles that elevate any dessert table!
Bunny Oreo Balls Ingredients
For the Base:
- Oreo cookies – The core of these treats, offering a rich chocolate flavor; classic or golden Oreos can be used based on your preference.
- Cream cheese – This creamy binder gives the dessert its luscious texture; be sure to let it soften completely for easier mixing.
For the Coating:
- White chocolate or candy melts – Wraps your Bunny Oreo Balls in a sweet, smooth shell; dark chocolate can add a delightful twist if you fancy.
- Pink candy melts – These add a charming touch for bunny noses; optional, but enhances visual interest.
- Black candy melts – Perfect for detailing whiskers and other facial features on your bunny.
For the Decorations:
- Mini marshmallows – Cut diagonally to form bunny ears; this playful detail brings your treats to life!
- Pink sugar sprinkles – These add a fun burst of color to the marshmallow ears; entirely optional yet delightful.
- Edible black food marker – Use this to draw cute facial features on your bunnies; it’s a great way to personalize each treat!
Now you’re all set to gather your ingredients and create these whimsical Bunny Oreo Balls that not only look adorable but are also a fun cooking project for the family!
Step‑by‑Step Instructions for Bunny Oreo Balls
Step 1: Prepare the Base
Start by crushing 25 Oreo cookies into fine crumbs using a food processor or a zip-top bag with a rolling pin, ensuring they achieve a sand-like consistency. In a mixing bowl, blend these crumbs with 8 ounces of softened cream cheese until you have a smooth, cohesive mixture. Chill the mixture for about 15 minutes to firm it up, making it easier to shape into balls.
Step 2: Form the Balls
Once chilled, use a small cookie scoop or your hands to portion the mixture into 1-inch balls. Place each ball onto a parchment-lined baking sheet, ensuring they are spaced apart to avoid sticking. After all the balls are formed, return them to the refrigerator for an additional 30 minutes to set, which will aid in the next step.
Step 3: Dip in Chocolate
While the Bunny Oreo Balls are chilling, melt 12 ounces of white chocolate or candy melts in a microwave-safe bowl, heating in 30-second intervals and stirring until smooth. Remove the chilled balls from the fridge and carefully dip each one in the melted chocolate, letting the excess drip off before placing them back on the parchment. Allow them to set for about 15 minutes until the coating hardens.
Step 4: Decorate the Bunnies
With the coating still slightly tacky, it’s time to add personality to your Bunny Oreo Balls! First, dip mini marshmallows into pink sugar sprinkles and press them onto the top of each ball for bunny ears. Then, use melted pink and black candy melts to attach little noses and whiskers, enhancing their adorable bunny appearance.
Step 5: Final Touches
After decorating, allow your Bunny Oreo Balls to sit at room temperature until all the chocolate decorations are firm. If desired, use an edible black food marker to draw cute eyes on each bunny. Once fully set, transfer them to an airtight container for storage, or enjoy them right away—these delightful no-bake treats are just a hop away from being devoured!
Expert Tips for Bunny Oreo Balls
• Softened Cream Cheese: Ensure your cream cheese is perfectly softened for easy mixing; this provides a creamy and smooth texture in your Bunny Oreo Balls.
• Chill for Shape: Always chill the Oreo mixture before rolling into balls. It helps maintain their shape and makes dipping easier.
• White Chocolate Consistency: If your melted white chocolate thickens, add a teaspoon of coconut oil to keep it smooth for dipping.
• Work in Batches: To avoid chocolate setting too quickly, work in small batches during decoration. This ensures each Bunny Oreo Ball gets the attention it deserves!
• Sprinkle Fun: Don’t shy away from sprinkles! Using pink sugar sprinkles gives your bunny ears a charming look, making your treats even more adorable.
• Edible Marker Use: An edible black food marker can really add personality to your Bunny Oreo Balls—experiment with different expressions!
Make Ahead Options
Bunny Oreo Balls are a fantastic make-ahead option for your holiday festivities! You can prepare the base mixture up to 24 hours in advance; simply crush the Oreo cookies and blend them with softened cream cheese, then chill the mixture. Form the balls and refrigerate for about 30 minutes to set before dipping. For the best quality, keep the undipped balls stored in an airtight container in the refrigerator. Just before serving, melt the white chocolate and dip the chilled balls, allowing the coating to set before adding the decorative touches. This prep method means you can enjoy stress-free time with loved ones while still treating them to delightful Bunny Oreo Balls!
What to Serve with Bunny Oreo Balls
Transform your Easter gathering into a festive feast with delightful side dishes and treats that complement the charm of these Bunny Oreo Balls!
- Fresh Fruit Salad: Bursting with color and flavor, a refreshing fruit salad pairs perfectly. The sweetness of the fruit balances the rich chocolate treats beautifully.
- Carrot Sticks and Hummus: These crunchy veggies add a healthy touch, providing a satisfying contrast to the creamy texture of the Oreo balls. Plus, it’s a fun nod to the bunny theme!
- Mini Cupcakes: Light, fluffy, and topped with pastel frosting, these adorable treats mirror the whimsical nature of Bunny Oreo Balls, delighting both young and old alike.
- Chocolate Milkshakes: Serve a dreamy chocolate milkshake to indulge sweet tooth cravings and create a playful, nostalgia-infused experience.
- Easter-themed Cookies: Decorated sugar cookies in bunny and egg shapes are not only delicious but also enhance the festive spirit—perfect for kids to enjoy!
- Sparkling Lemonade: Add a refreshing fizzy drink like sparkling lemonade to balance out the sweetness while keeping the mood cheerful and celebratory.
Bring these delightful sides together, and watch your Easter celebration come to life with smiles and laughter!
How to Store and Freeze Bunny Oreo Balls
Room Temperature: Store Bunny Oreo Balls in a cool, dry place for up to 2 hours during gatherings. After that, it’s best to refrigerate them to maintain freshness.
Fridge: Keep Bunny Oreo Balls in an airtight container in the fridge for up to 5 days. This helps preserve their soft, creamy center while keeping the coating intact.
Freezer: For longer storage, freeze Bunny Oreo Balls in a single layer on a baking sheet until solid. Then, transfer them to a freezer bag for up to 3 months. Thaw in the refrigerator before serving for best results.
Reheating: There’s no need to reheat these treats; serve directly from the fridge or at room temperature to enjoy their delightful taste and texture!
Bunny Oreo Balls Variations & Substitutions
Feel free to get creative and customize your Bunny Oreo Balls to make them uniquely yours!
- Golden Oreos: Swap classic Oreos for golden Oreos for a lighter, buttery flavor that will surprise your taste buds.
- Pastel Candy Melts: Use pastel-colored candy melts for a cheerful, vibrant presentation, perfect for spring celebrations. Show off your artistic side as you dip and decorate!
- Nut Butter Delight: Replace cream cheese with almond or peanut butter for a nutty twist. This adds a deliciously rich flavor and makes the center a bit less sweet.
- Gluten-Free Option: Opt for gluten-free Oreo cookies to make these treats suitable for gluten-sensitive guests without sacrificing flavor.
- Add a Crunch: Mix in finely chopped nuts or crispy rice cereal to the Oreo-cream cheese mixture for an extra fun crunch. Just imagine the texture contrast!
- Mint Flavor: Add a few drops of peppermint extract to the cream cheese mix to create a refreshing minty version—perfect for those who love a pop of flavor.
- Decorative Sprinkles: Instead of plain candy melts, use colorful edible sprinkles or crushed candies to create a festive look that truly stands out on your dessert table.
- Chick Variation: With the same base, mold the balls into chick shapes and use yellow candy melts for coating, transforming them into adorable Easter chicks!
For further inspiration, check out our delightful Baileys Cheesecake Balls for creamy indulgence or the Mint Oreo Truffles for a refreshing alternative that everyone will love!

Bunny Oreo Balls Recipe FAQs
How do I choose ripe ingredients for Bunny Oreo Balls?
For this recipe, you want to use fresh, high-quality Oreos, which should be free of any visible signs of damage or air exposure. The cream cheese must be softened but not expired—look for a smooth texture without lumps for the best result. If you’re using marshmallows, ensure they are soft and fluffy without any hard spots.
How should I store Bunny Oreo Balls, and for how long?
Absolutely! Store Bunny Oreo Balls in an airtight container in the refrigerator for up to 5 days. This keeps their delightful creamy center fresh while maintaining the crispness of the chocolate coating. If you’re serving them at a gathering, they can last at room temperature for about 2 hours before needing to be chilled again.
Can I freeze Bunny Oreo Balls, and what’s the best method?
Yes, you can! To freeze Bunny Oreo Balls, start by placing them in a single layer on a baking sheet and freeze until they are solid—this typically takes about 1-2 hours. Once set, transfer them to a freezer bag, ensuring to remove as much air as possible. They can be stored for up to 3 months. When ready to enjoy, thaw them in the refrigerator overnight for the best texture.
What are some common troubleshooting tips for Bunny Oreo Balls?
If your Bunny Oreo Balls are falling apart, it might be due to insufficient chilling or too much cream cheese. In that case, return them to the fridge for another 15-20 minutes before decorating. If the chocolate coating is not smooth, ensure you’re melting it at low intervals, stirring in between. If it thickens, add a teaspoon of coconut oil to help it regain a smooth consistency.
Are Bunny Oreo Balls safe for people with allergies?
Always check for allergies! Bunny Oreo Balls contain common allergens such as dairy (cream cheese) and gluten (Oreos). If you’re catering to someone with allergies, consider using gluten-free Oreos and dairy-free cream cheese alternatives. Additionally, the decorations may contain food dyes or allergens, so be sure to check packaging labels.
Can I make variations of Bunny Oreo Balls for different occasions?
Very! You can easily swap in golden Oreos for a different flavor profile or use various candy melt colors to fit any theme—think pastel shades for Easter or festive colors for birthdays. Get creative with decoration styles and characters, transforming your Bunny Oreo Balls into chicks or other fun designs for any celebration!
Bunny Oreo Balls: Irresistible No-Bake Easter Delights
Ingredients
Equipment
Method
- Crush 25 Oreo cookies into fine crumbs using a food processor or rolling pin.
- Blend crumbs with 8 ounces of softened cream cheese until smooth. Chill for 15 minutes.
- Portion mixture into 1-inch balls and place on a parchment-lined baking sheet. Refrigerate for 30 minutes.
- Melt 12 ounces of white chocolate in 30-second intervals until smooth. Dip each ball in melted chocolate.
- Decorate with mini marshmallows and colored melts; refrigerate until set.
Leave a Reply