
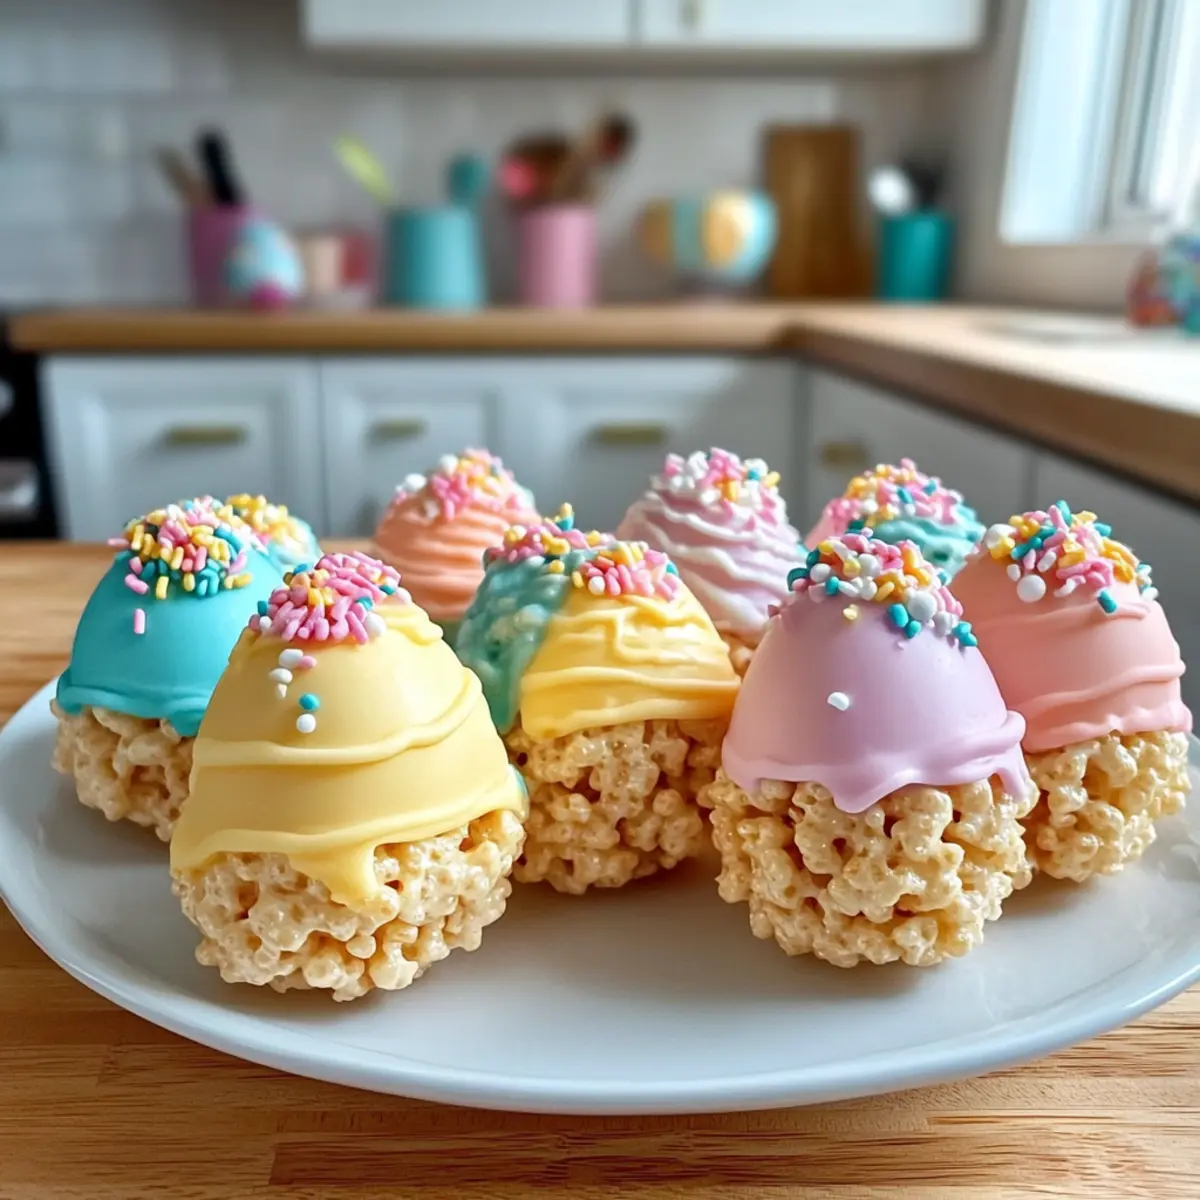
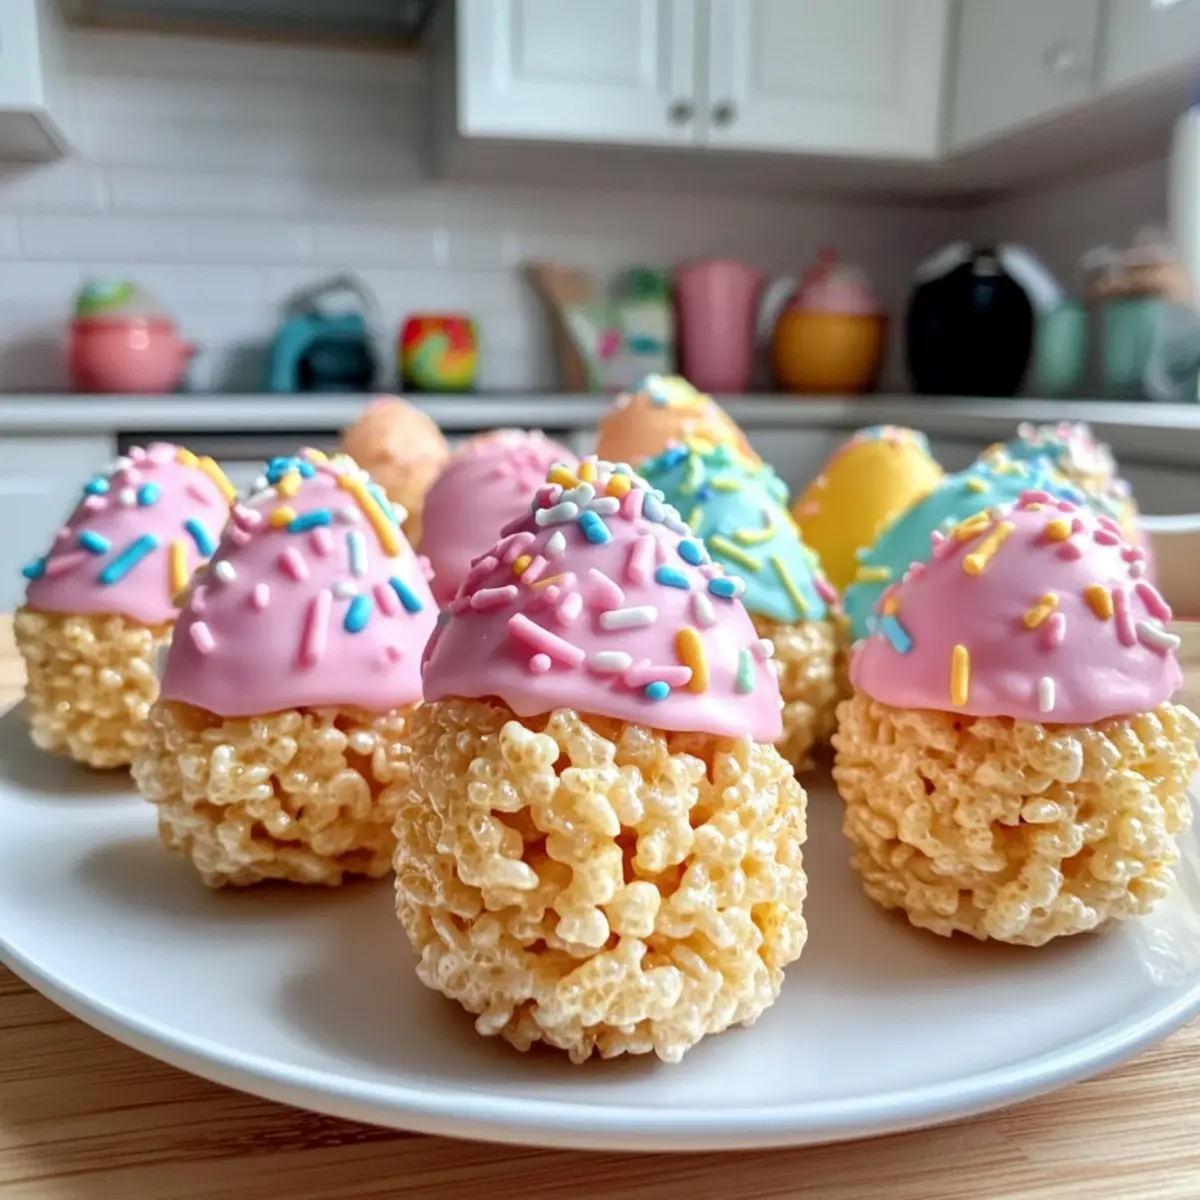
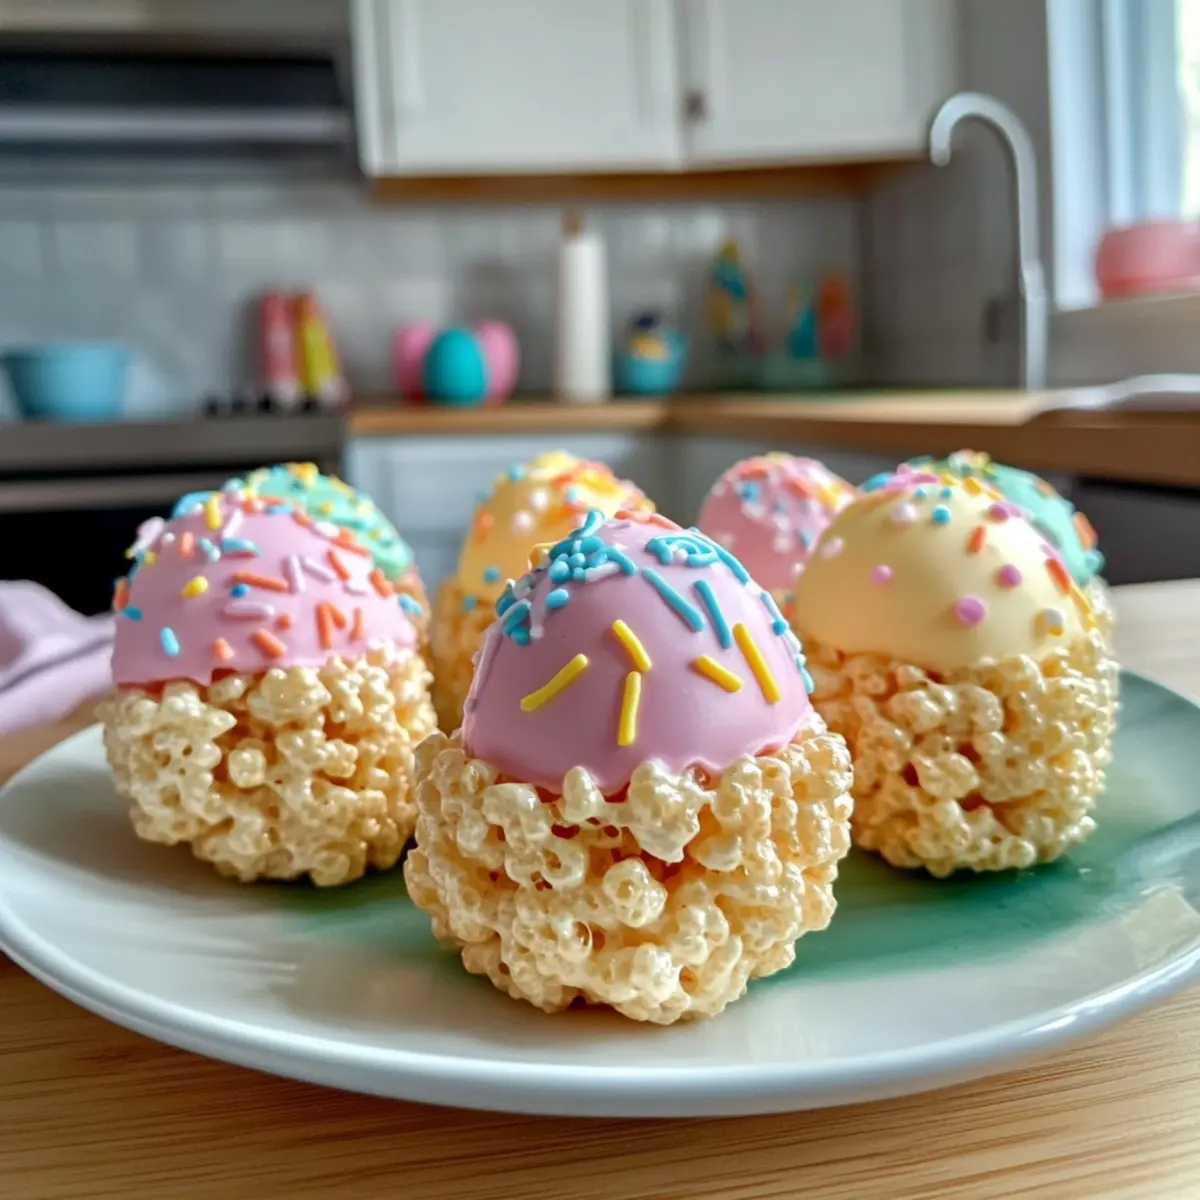
As I was putting together my Easter basket, I couldn’t help but recall the sweet laughter of my little ones as they dove into those colorful treats. This year, I’m excited to bring that joy to life with these adorable Colorful Easter Egg Rice Krispies Treats! They’re not just a simple, no-bake recipe; they add a vibrant pop to your spring celebrations and serve as a delightful bonding experience in the kitchen. Watching the kids shape and decorate their own egg-shaped treats will turn any ordinary day into a fun, festive occasion. Plus, they’re quick to whip up and perfect for sharing at any gathering! Ready to dive into a world of charming spring flavors? Let’s create some magic together!
Why Are These Treats a Must-Make?
Simplicity and Fun: These Colorful Easter Egg Rice Krispies Treats are incredibly easy to make, perfect for chefs of all skill levels!
Interactive Activity: Involve the kiddos in shaping and decorating their own treats, creating precious family memories.
Visual Appeal: The vibrant colors and festive design make these treats eye-catching and perfect for any Easter gathering.
Versatile Recipes: Try using different flavored icing or fun shapes like bunnies for a delightful twist.
Quick and No-Bake: No need for extensive baking times—these treats come together swiftly, making them great for last-minute prep.
Want more sweet ideas? Check out these Eggnog Cupcakes Nutmeg for a holiday treat or make some Eggnog Pudding Holidays for an elegant dessert!
Easter Egg Rice Krispies Ingredients
• Here’s what you’ll need to create these colorful treats!
For the Base
- Rice Krispies Cereal – This adds the essential structure and crunch; no substitutions needed but feel free to use similar puffed cereals.
- Marshmallows – They create the sweetness and bind everything together; mini marshmallows melt faster for ease!
- Butter – Richness and moisture come from this key ingredient; margarine can be used as a substitute if needed.
For the Decoration
- Pastel Icing – Bright and flavorful, giving your treats a vibrant appearance; you can make this at home or buy it pre-made.
- Sprinkles – These add the finishing touch for visual appeal; use any colorful sprinkles or themed decorations to match the occasion!
Be sure your delightful Easter Egg Rice Krispies are ready to dazzle your friends and family!
Step‑by‑Step Instructions for Colorful Easter Egg Rice Krispies Treats
Step 1: Melt the Butter and Marshmallows
In a large pot, melt 3 tablespoons of butter over low heat, stirring gently for about 1-2 minutes until it becomes bubbly. Add 6 cups of mini marshmallows, stirring continuously until they are completely melted and smooth. This creates a creamy base that will bind your Easter Egg Rice Krispies treats together beautifully.
Step 2: Incorporate the Rice Krispies
Remove the pot from heat and fold in 8 cups of Rice Krispies cereal with a spatula. Ensure the cereal is well-coated in the marshmallow mixture, using gentle folding motions to prevent crushing the cereal. The mixture should be sticky and slightly warm, transforming into a delicious base for your festive treats.
Step 3: Shape the Treats
While the mixture is still warm, quickly pour it into a greased egg-shaped mold or use your hands to shape them into oval forms. Aim for about 1-2 inches thick, pressing gently but firmly. Allow the treats to cool at room temperature for approximately 30 minutes, ensuring they hold their shape as they set.
Step 4: Decorate with Icing
Once the treats have cooled, take your pastel icing and drizzle it carefully over the egg-shaped treats. Use a piping bag or a spoon for precision to avoid overwhelming the treats with icing. This colorful layer adds that festive touch that makes these Easter Egg Rice Krispies treats truly special.
Step 5: Add the Finishing Touch with Sprinkles
Sprinkle an array of colorful decorations generously over the icing while it’s still wet. This way, the sprinkles will adhere nicely, creating a vibrant and festive look. Let the decorated treats sit for another 10-15 minutes to set before arranging them on a platter for an eye-catching presentation at your Easter gathering.
Easter Egg Rice Krispies Variations
Feel like getting creative? These variations will help transform your festive treats into something special.
-
Flavored Icing: Try different icings like chocolate or vanilla for a unique taste twist that will surprise your family.
-
Shape Shifting: Instead of egg shapes, mold your treats into bunnies or flowers for a playful Easter presentation.
-
Cocoa Powder Boost: Add 1-2 tablespoons of cocoa powder to the mixture for a rich chocolate flavor that complements the sweetness.
-
Nutty Crunch: Mixed in some chopped nuts or sunflower seeds for an enjoyable texture contrast and added nutrition!
-
Dairy-Free Delight: Substitute butter with coconut oil and marshmallows with vegan options for a fully dairy-free version without losing flavor.
-
Add Some Fruit: Toss in mini chocolate eggs or dried fruit pieces for bursts of flavor and a fun surprise in every bite.
Want to try more delicious ideas? Consider these delightful Eggnog Cupcakes Nutmeg for a festive dessert or make a simple yet elegant Eggnog Pudding Holidays to round out your celebrations!
- Spicy Kick: If you like a little heat, sprinkle some cinnamon or nutmeg on your icing for a warm, comforting flavor that mingles perfectly with the sweetness.
Expert Tips for Easter Egg Rice Krispies
-
Melt Smoothly: Make sure to melt the marshmallows thoroughly without any lumps. Keep stirring to avoid burning and achieve a silky blend.
-
Gentle Mixing: When folding in the Rice Krispies, be gentle to maintain the cereal’s crispness. Too much pressure may lead to mushy treats.
-
Shape with Care: For perfect egg shapes, use a little butter on your hands when molding. This prevents sticking and ensures even forms.
-
Icing Techniques: Drizzle the pastel icing lightly over the treats to avoid overpowering their sweetness. Less is more for visual appeal.
-
Decoration Timing: Add sprinkles immediately after icing, while it’s still wet, to ensure they adhere better. This adds texture and color to your Easter Egg Rice Krispies.
-
Storage Reminder: Keep your colorful creations in an airtight container to maintain freshness, ideally for up to 3 days. Enjoy them at your Easter celebrations!
What to Serve with Colorful Easter Egg Rice Krispies Treats
Bring a festive flair to your Easter table with these delightful treats, perfectly complemented by a range of flavors and textures.
-
Creamy Fruit Salad: A refreshing combination of seasonal fruits balances the sweetness of the treats while adding a burst of color. Enjoy your family gathering with this light and delightful side.
-
Mini Quiches: Savory baked mini quiches provide a wonderful contrast to the sweet treats, making for a well-rounded menu that pleases every palate. Their versatility in fillings ensures something for everyone!
-
Carrot Sticks and Hummus: Crunchy veggies paired with creamy hummus offer a healthy and satisfying bite. This makes for a fun addition that keeps things light and fresh at your Easter celebration.
-
Chocolate Milkshakes: Rich and creamy milkshakes with a hint of chocolate bring a touch of decadence that complements the playful treats beautifully. They’re sure to be a hit with kids and adults alike!
-
Lemonade Spritzers: Zesty lemonade mixed with sparkling water delivers a refreshing drink that enhances the sweetness of the Rice Krispies Treats. This effervescent choice is perfect for a cheerful spring vibe.
-
Pistachio Cupcakes: These treats add a nutty sweetness and are just as colorful as your Rice Krispies creations. Perfect for those who love desserts, they ensure a festive finish to your Easter gathering.
-
Chocolate-Covered Strawberries: Decadent and sweet, these fruits make for a lovely dessert option that elevates your Easter table. The contrast of chocolate with fresh strawberries is simply irresistible!
Make Ahead Options
These Colorful Easter Egg Rice Krispies Treats are perfect for busy home cooks looking to save time during the festive season! You can prepare the base by melting the butter and marshmallows, then mixing in the Rice Krispies up to 24 hours in advance. Just store the mixture in an airtight container to keep it fresh. When you’re ready to serve, simply shape the mixture into egg forms, let cool, and then decorate with pastel icing and sprinkles. This way, you’ll achieve those delightful, colorful treats with minimal effort on the day of your celebration, ensuring they’re just as delicious as if made fresh!
Storage Tips for Easter Egg Rice Krispies
Room Temperature: Store your colorful treats in an airtight container at room temperature for up to 3 days to maintain their delightful freshness and chewy texture.
Refrigerator: If you need to keep them a bit longer, you can refrigerate them for up to a week. Just be sure to let them come to room temperature before serving for the best taste.
Freezer: For longer storage, freeze your treats in a single layer on a baking sheet, then transfer them to a freezer-safe container. They’ll keep well for up to 2 months. Just thaw at room temperature when you’re ready to enjoy!
Reheating: If your treats become a little hard after freezing, you can warm them in the microwave for a few seconds to regain that delightful chewiness. Enjoy your Easter Egg Rice Krispies at every gathering!
Colorful Easter Egg Rice Krispies Treats Recipe FAQs
How do I choose the best marshmallows for the treats?
Absolutely! Opt for mini marshmallows as they melt more quickly and evenly, making your preparation easier. Regular-sized marshmallows will work too, but you’ll need to chop them into smaller pieces, which can add extra steps to the process.
How should I store leftover Easter Egg Rice Krispies Treats?
Very! Store your colorful treats in an airtight container at room temperature for up to 3 days. If you refrigerate them, they can last up to a week, but be sure to let them soften back to room temperature before serving for the best taste and texture.
Can I freeze these treats for later enjoyment?
Absolutely! To freeze, lay your shaped treats in a single layer on a baking sheet and place them in the freezer until firm. Then transfer them to a freezer-safe container, where they can last for up to 2 months. When you’re ready to enjoy your Easter Egg Rice Krispies, simply thaw them at room temperature and they’ll be as delightful as fresh!
What should I do if the mixture is too sticky?
If your mixture ends up overly sticky and hard to handle, try dusting your hands with a little powdered sugar or lightly greasing them with butter. This will help you shape the treats without everything sticking to your fingers. Additionally, ensure you’re not over-melting the marshmallows, as this can lead to a messier mixture.
Are there any dietary considerations I should be aware of?
Absolutely! If catering to allergies, make sure to check for gluten-free Rice Krispies, especially for those with gluten sensitivities. Also, if you’re using store-bought icing, confirm it doesn’t contain any allergens like nuts or dairy, as these can vary by brand. Always double-check labels to keep your treats safe for all your festive celebrations.
Can pets share in on the fun with Rice Krispies Treats?
Not really! While plain Rice Krispies are generally safe for dogs in small amounts, the marshmallows and butter are not recommended for pets. Make sure to keep these festive treats as a special human-only snack, ensuring that your furry friends stay healthy and happy!

Colorful Easter Egg Rice Krispies Treats for Family Fun
Ingredients
Equipment
Method
- In a large pot, melt 3 tablespoons of butter over low heat, stirring gently for about 1-2 minutes until it becomes bubbly. Add 6 cups of mini marshmallows, stirring continuously until they are completely melted and smooth.
- Remove the pot from heat and fold in 8 cups of Rice Krispies cereal with a spatula. Ensure the cereal is well-coated in the marshmallow mixture.
- While the mixture is still warm, pour it into a greased egg-shaped mold or shape them into oval forms. Allow the treats to cool at room temperature for approximately 30 minutes.
- Once cooled, drizzle pastel icing carefully over the treats using a piping bag or spoon.
- Sprinkle colorful decorations generously over the icing while it’s still wet, then let them sit for another 10-15 minutes to set.
Leave a Reply