
As I rummaged through my pantry, the sweet aroma of melting chocolate filled the air, sparking memories of festive Easter mornings. These Fudge Filled Easter Eggs effortlessly blend gratification and nostalgia, creating a treat that’s perfect for the holiday celebrations. With simple ingredients and no baking required, this recipe brings the joy of homemade sweets without the long hours in the kitchen. They are not only a crowd-pleaser, but they also allow for plenty of creative variations—try adding nuts or using different chocolates to make them your own! So, are you ready to indulge in a delightful chocolate experience that will have everyone asking for seconds?

Why Are Fudge Filled Easter Eggs So Irresistible?
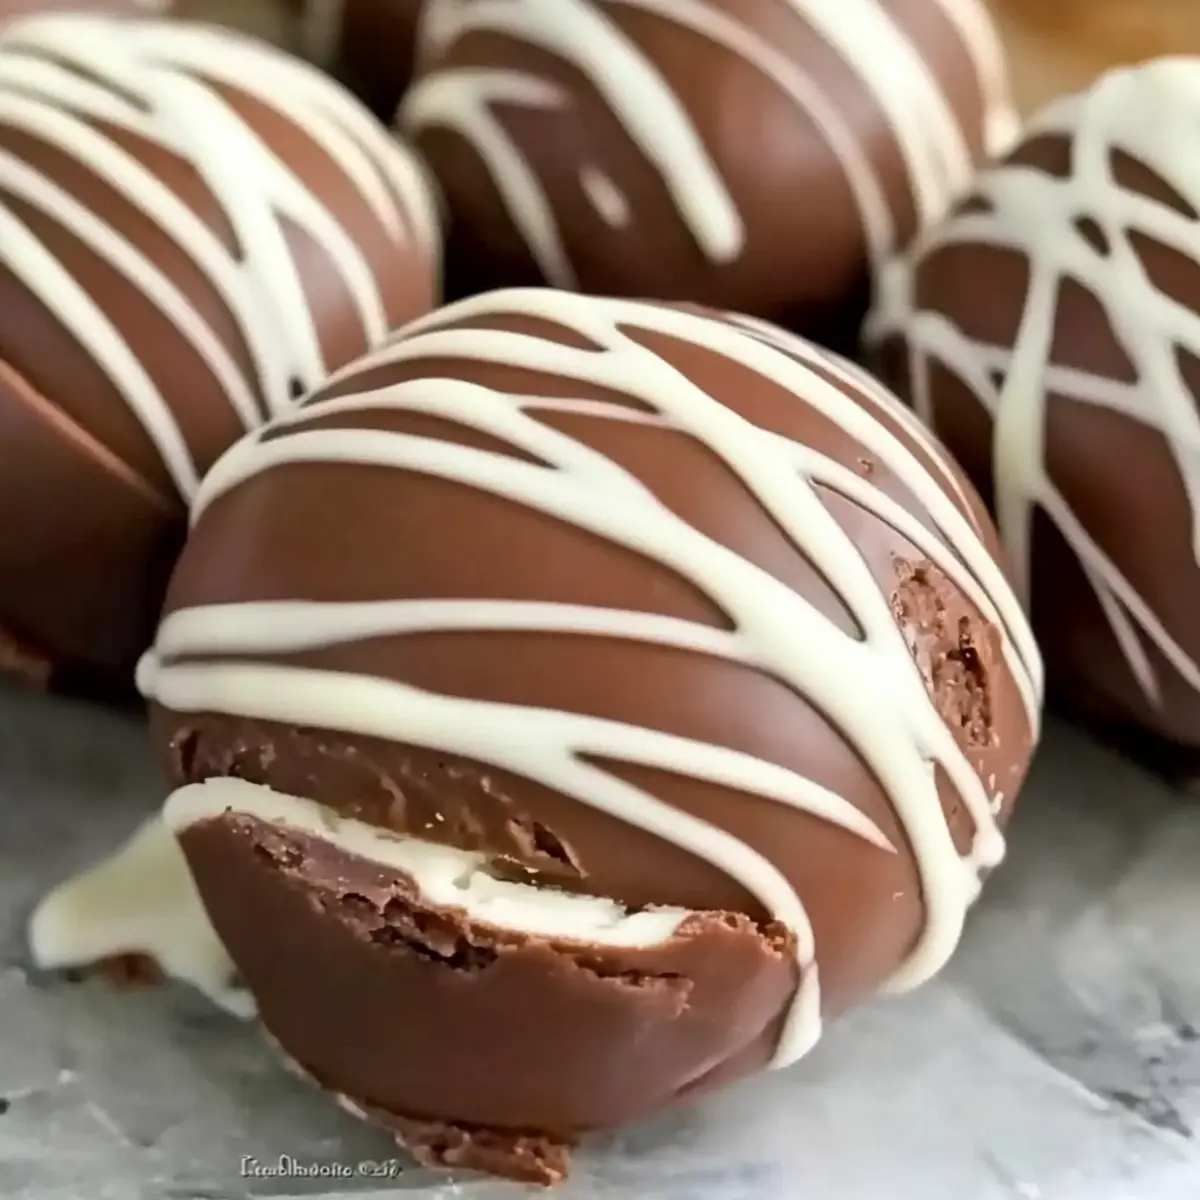
Decadent and Delightful: These treats are a chocolate lover’s dream, offering a rich, fudgy interior enveloped in a smooth chocolate coating that literally melts in your mouth.
No-Bake Convenience: Perfect for busy home cooks, this easy recipe requires no baking, making it accessible for anyone looking to whip up festive treats quickly.
Versatile Variations: Customize your creations by experimenting with different chocolate types or delightful mix-ins like crushed nuts or sprinkles. The options are endless!
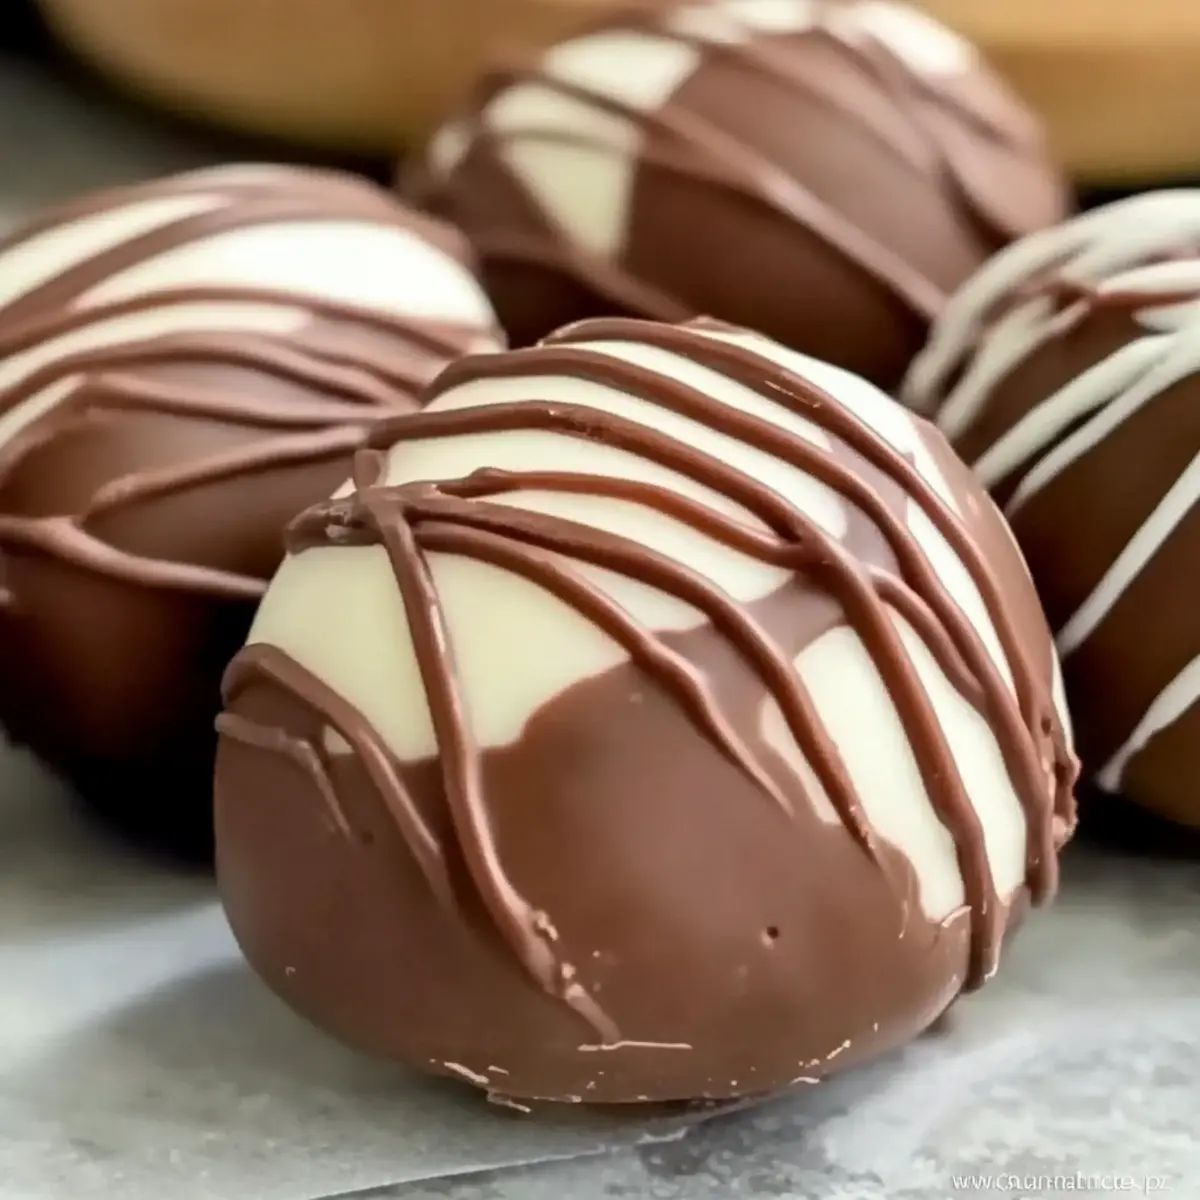
Festive Presentation: With their charming egg shape, these snacks are ideal for Easter gatherings or as thoughtful handmade gifts, guaranteed to impress family and friends.
Quick to Make Ahead: Preparing these Fudge Filled Easter Eggs in advance is a breeze; they stay fresh for up to two weeks, allowing for hassle-free entertaining.
Fudge Filled Easter Eggs Ingredients
For the Fudge Base
• Milk Chocolate Chips – Provides a rich chocolate flavor and forms the base of the fudge; feel free to swap in dark chocolate for a bolder taste.
• Sweetened Condensed Milk – Acts as a binding agent for a creamy texture; evaporated milk mixed with sugar can create a lighter version.
• Vanilla Extract – Enhances the fudge’s flavor, making it deeper and more aromatic; while optional, it’s highly recommended for extra deliciousness.
For the Coating
• White Chocolate Chips – Used for dipping and drizzling, adding a beautiful contrast and sweetness to the treats; can be substituted with milk or dark chocolate if you prefer.
Get ready to whip up these delightful Fudge Filled Easter Eggs, a no-bake treat that will capture hearts and taste buds alike!
Step-by-Step Instructions for Fudge Filled Easter Eggs
Step 1: Prepare the Fudge Mixture
In a large microwave-safe bowl, combine 3 cups of milk chocolate chips, one can of sweetened condensed milk, and a splash of vanilla extract to kick up the flavor. Microwave the mixture at half power for 1 minute. Stir well, then continue heating in 30-second intervals, stirring after each, until the mixture is completely smooth and glossy.
Step 2: Cool the Fudge
Allow your fudge mixture to cool for about 3-4 minutes until it’s manageable but still pliable. This cooling step is crucial to ensure that the fudge holds its shape when shaped into Easter eggs. As it cools, the mixture will thicken slightly, making it easier to scoop and form into perfect egg shapes.
Step 3: Shape the Easter Eggs
Once the fudge has cooled enough, use a tablespoon to scoop out about 1.5 tablespoons of the mixture. Roll it gently between your palms to form egg shapes and place them on a parchment-lined baking sheet. Aim for uniform sizes so that they cook evenly. Continue this process until all the fudge mixture is used up.
Step 4: Chill the Eggs
Refrigerate the formed fudge eggs for approximately 30 minutes, or until they are firm to the touch. This step helps set the fudge and makes it easier to coat with chocolate later. While you wait, you can prepare your coating ingredients, ensuring everything is ready for the next steps.
Step 5: Melt the Coating Chocolates
In two separate microwave-safe bowls, melt the remaining milk chocolate and white chocolate chips. Heat each bowl at half power in 30-second intervals, stirring in between until smooth and completely melted. It’s important to watch carefully to avoid burning the chocolate—look for a glossy, liquid consistency.
Step 6: Dip the Fudge Eggs
Carefully dip each chilled fudge egg into the melted milk chocolate, allowing any excess to drip off before placing them back on the parchment paper. This ensures a smooth, even coating. If you prefer a more decorative touch, you can also drizzle some of the melted white chocolate over the coated fudge eggs for a beautiful contrast.
Step 7: Cool and Set the Chocolate
After dipping, let the Fudge Filled Easter Eggs sit at room temperature or in the refrigerator until the chocolate coating fully hardens. This will typically take about 15-20 minutes. They will develop a firm, glossy finish, making them look just like gourmet chocolates ready to impress.
Step 8: Serve or Store
Once the chocolate has set completely, gently remove the fudge eggs from the parchment paper and transfer them to an airtight container. These delightful Fudge Filled Easter Eggs can be stored at room temperature for up to a week or in the refrigerator for longer freshness. Enjoy them as festive treats or thoughtful handmade gifts!
What to Serve with Fudge Filled Easter Eggs?
Indulging in these delightful chocolate creations sets the stage for a festive gathering, inviting flavor and joy to your celebration.
-
Creamy Vanilla Ice Cream: A scoop of vanilla ice cream adds a refreshing contrast and creamy richness that balances the fudge’s sweetness.
-
Fresh Strawberries: Juicy, ripe strawberries bring a tartness that elevates each chocolate bite, making every taste a delicious balance of flavors.
-
Chocolate Milkshake: This indulgent drink enhances the chocolate experience and is sure to be a hit with both kids and adults alike.
-
Coffee or Espresso: The slight bitterness of coffee beautifully complements the sweetness of the fudge-filled treats, creating a blissful pairing.
-
Mini Easter Cupcakes: A fun addition! These sweet bites can add color and a festive touch to your dessert table.
-
Nutty Trail Mix: A crunchy, salty trail mix offers texture and depth, providing a great contrast after each rich chocolate bite.
-
Fruit Tart: A light and refreshing fruit tart can cleanse the palate, serving as a lovely, fruity counterpart to the rich fudge.
-
Lemonade or Iced Tea: A light, refreshing drink option to balance out the sweetness and keep the celebration lively and cool.
These pairings enhance the enjoyment of your Fudge Filled Easter Eggs, making your gathering memorable and delicious!
Fudge Filled Easter Eggs Variations & Substitutions
Get ready to personalize your sweet creations with fun and flavorful twists that’ll take your Fudge Filled Easter Eggs to the next level!
-
Dark Chocolate: Swap out milk chocolate for dark chocolate to create a bolder, more indulgent treat. The contrast between the rich fudge and deep chocolate will be irresistible.
-
Flavored Chocolates: Experiment with mint or orange-flavored chocolate for a unique taste adventure. These unexpected notes will add an exciting zing to your holiday treats!
-
Nutty Delight: Fold in crushed nuts like pecans or almonds into the fudge mixture for a delightful crunch. The added texture will make each bite a little surprise!
-
Decadent Sprinkles: Top your eggs with colorful sprinkles for a festive touch. This adds not only a pop of color but also a fun, celebratory feel perfect for Easter gatherings.
-
Peanut Butter Swirl: Add dollops of peanut butter to the fudge mix before shaping for a classic combo. The luscious swirl will create a creamy, nutty flavor that is simply divine.
-
Coconut Flake Topping: Sprinkle shredded coconut on the chocolate coating for a tropical twist. The sweet and chewy finish will complement the fudge beautifully.
-
Spicy Kick: For an adventurous twist, add a pinch of cayenne pepper to the fudge. Just a hint will create an exciting flavor profile that balances the sweetness.
-
Festive Fillings: Try adding fruit purees or flavored creams as a surprise inside. A raspberry or strawberry center will perfectly complement the rich chocolate exterior—talk about festive freshness!
Feel free to get creative and mix and match these ideas. Your treasured Fudge Filled Easter Eggs will be as unique as your holiday spirit! And for even more inspiration, check out some of our other treats like No-Bake Chocolate Biscuit Cake or Chocolate Peanut Butter Cups to vary your dessert repertoire!
Expert Tips for Fudge Filled Easter Eggs
-
Mind the Temperature: Ensure the fudge mixture isn’t too hot before shaping, as this will help maintain the eggs’ form and make the process easier.
-
Even Melting: Use a microwave on low power or a double boiler for melting chocolate to avoid burning, keeping your fudge filled Easter eggs coating smooth and glossy.
-
Uniform Sizes: Scoop out consistent portions when forming the eggs to ensure even chilling and coating, which enhances the overall presentation and texture.
-
Chill Time Matters: Be patient while chilling the fudge eggs; they need enough time to firm up, ensuring a great bite when coated and enjoyed!
-
Creative Additions: Don’t hesitate to incorporate fun mix-ins like crushed nuts or sprinkles into your fudge to personalize your Fudge Filled Easter Eggs and add delightful texture.
How to Store and Freeze Fudge Filled Easter Eggs
Room Temperature: Place Fudge Filled Easter Eggs in an airtight container at room temperature to keep them fresh for up to 1 week. This allows for easy snacking during the Easter festivities.
Fridge: For longer-lasting freshness, store the eggs in the refrigerator, where they can stay good for up to 2 weeks. Just be mindful that refrigeration might slightly alter the texture.
Freezer: If you want to enjoy these treats later, wrap each egg individually in plastic wrap and place them in a freezer-safe bag. They can be frozen for up to 3 months.
Reheating: To enjoy after freezing, thaw the eggs in the refrigerator overnight. Allow them to come to room temperature before indulging for the best texture and flavor.
Make Ahead Options
These Fudge Filled Easter Eggs are a fantastic choice for meal prep, allowing you to enjoy your holiday treats with ease! You can prepare the fudge mixture and shape the eggs up to 24 hours in advance by refrigerating them. Simply follow the recipe up to the chilling step (Step 4), then transfer the shaped eggs to an airtight container to keep them fresh. For best quality, ensure they stay cool and are not overcrowded in the container. When you’re ready to serve, melt your chocolate coating and dip the eggs as instructed (Steps 5-7), and you’ll have delightful treats that are just as delicious as if they were freshly made!

Fudge Filled Easter Eggs Recipe FAQs
How do I know if my ingredients are ripe or suitable for this recipe?
Absolutely! Use fresh ingredients for the best results. When selecting milk chocolate chips, look for a smooth texture without any clumps. Sweetened condensed milk should be in a sealed can, and check the expiration date. Fresh vanilla extract should have a strong aroma and deep color.
What is the best storage method for Fudge Filled Easter Eggs?
For storing these delightful treats, place them in an airtight container at room temperature for up to 1 week. If you wish to keep them fresher for longer, you can refrigerate them, where they will last up to 2 weeks. Just remember that refrigeration may slightly alter the texture.
Can I freeze Fudge Filled Easter Eggs?
Yes, indeed! To freeze your Fudge Filled Easter Eggs, wrap each one individually in plastic wrap, then place them in a freezer-safe bag or airtight container. They can be frozen for up to 3 months. When you’re ready to enjoy them, thaw in the refrigerator overnight, and allow them to come to room temperature before serving for the best flavor and texture.
What should I do if the fudge mixture is too hot to shape?
If your fudge mixture has cooled down too much and is difficult to shape, try placing it back in the microwave for 15-second intervals at half power, stirring in between until it’s just warm enough to handle. Alternatively, you can let it sit at room temperature for a few minutes to become more pliable.
Are there any dietary considerations I should keep in mind?
Very! If you’re making these Fudge Filled Easter Eggs for guests, consider allergies such as gluten or dairy. You can use dairy-free chocolate and sweetened condensed milk alternatives to create a treat everyone can enjoy. Always check labels for allergens and inform your guests of the ingredients used.
How can I customize the flavor and texture of my Fudge Filled Easter Eggs?
The more the merrier! You can easily customize your fudge by adding mix-ins like crushed nuts, sprinkles, or even flavored extracts such as almond or peppermint. For a fun twist, swap the chocolate types—try using semi-sweet, dark, or flavored chocolates for coating to create an exciting variation on the classic recipe.
Fudge Filled Easter Eggs: No-Bake Treats You'll Adore
Ingredients
Equipment
Method
- In a large microwave-safe bowl, combine 3 cups of milk chocolate chips, one can of sweetened condensed milk, and a splash of vanilla extract. Microwave at half power for 1 minute, stir, then continue heating in 30-second intervals until smooth.
- Allow the fudge mixture to cool for about 3-4 minutes until manageable but still pliable.
- Scoop out about 1.5 tablespoons of the mixture and roll it between your palms to form egg shapes, placing them on a parchment-lined baking sheet.
- Refrigerate the fudge eggs for approximately 30 minutes, or until firm to the touch.
- In two separate bowls, melt the remaining milk chocolate and white chocolate chips at half power in 30-second intervals until smooth.
- Carefully dip each chilled fudge egg into the melted milk chocolate, letting excess drip off and place back on parchment paper. Drizzle with white chocolate if desired.
- Let the coated eggs sit at room temperature or in the refrigerator until the chocolate fully hardens, about 15-20 minutes.
- Once set, remove from parchment and transfer to an airtight container. Can be stored at room temperature for up to a week or in the fridge for longer freshness.
Leave a Reply