
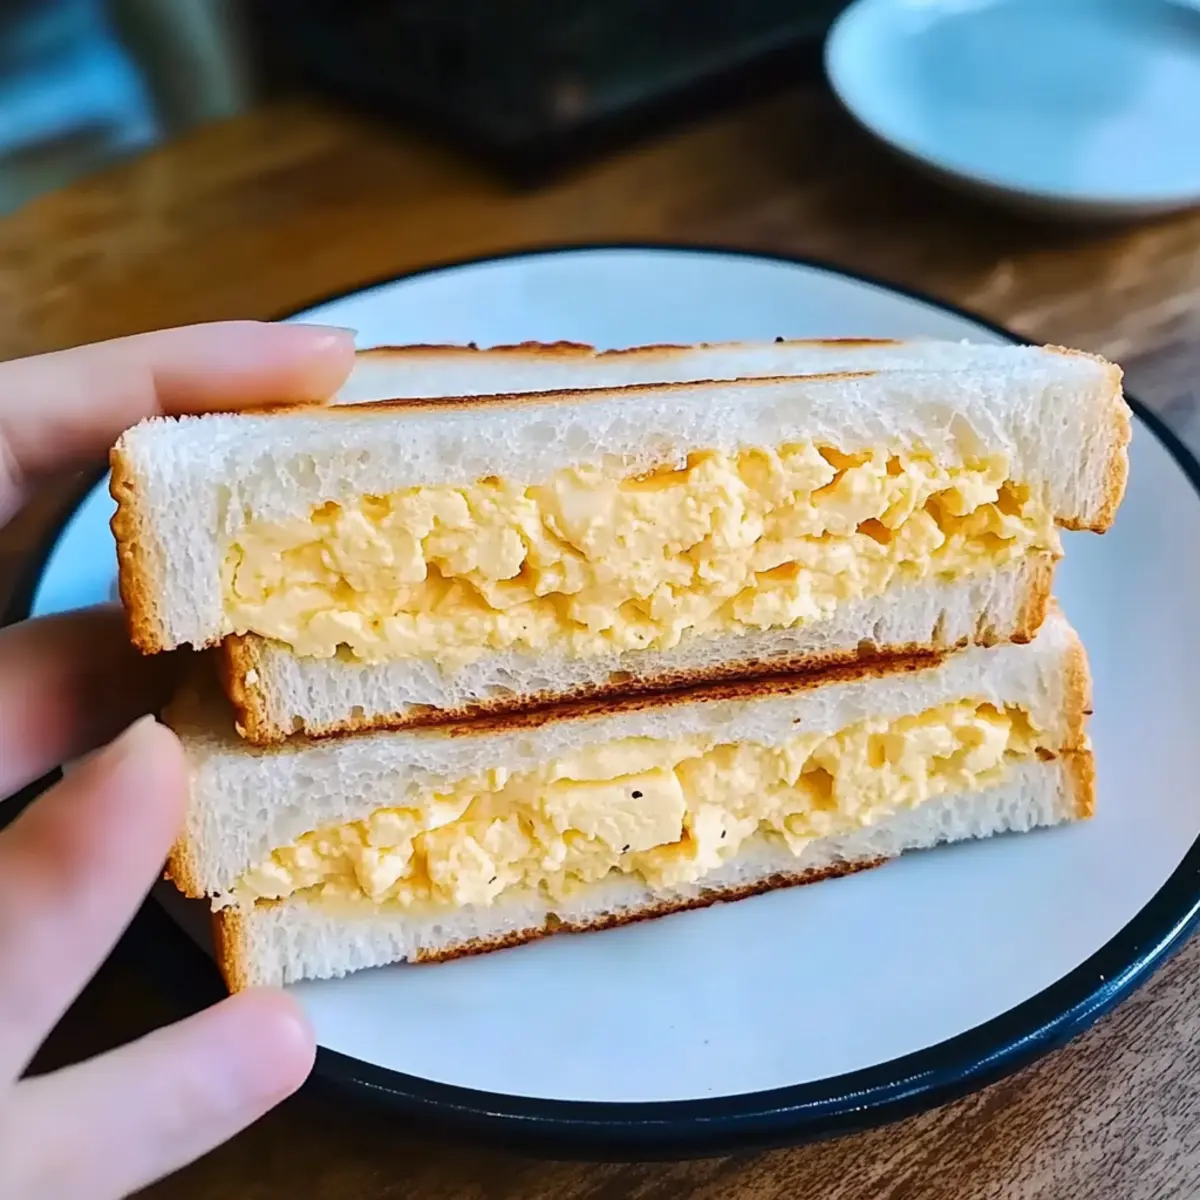
As I wandered through the bustling streets of Tokyo, the aroma of freshly made street food lured me towards a small vendor. Among the many enticing offerings, the Japanese Egg Sandwich, or Tamago Sando, caught my eye and tantalized my taste buds. This recipe brings that experience home, featuring an extra creamy salad filling made from simple ingredients like high-quality eggs and Japanese mayo, all cradled between soft slices of milk bread. It’s a perfect solution for those hectic mornings or as a delightful afternoon snack—quick to prepare yet incredibly satisfying. Whether you’re looking for a comforting breakfast or a tasty lunch option, this vegetarian delight is bound to become a staple in your kitchen. Curious how this Japanese classic can transform your next meal? Let’s dive into the details!
Why Is This Sandwich So Irresistible?
Creamy Perfection: The extra creamy egg salad filling is a revelation, thanks to the unique Japanese mayo that elevates the taste to new heights.
Quick and Easy: In just a few simple steps, you can whip up a delicious, homemade meal that surpasses any fast food option.
Versatile Serving: Enjoy it as a breakfast marvel, lunch option, or even an afternoon snack—it’s great any time of day!
Embracing Authenticity: Each bite transports you to Japan, making this Tamago Sando an unforgettable experience that brings a taste of street food right to your kitchen.
Crowd-Pleaser: Whether you’re serving friends or family, everyone will love this delightful twist on a classic! For more delicious options, check out my Eggnog Pudding Holidays for a sweet finish.
Japanese Egg Sandwich Ingredients
Get ready for the creamy delight!
For the Egg Filling
- Extra Large Free-Range Eggs – Use high-quality eggs to maximize richness and creaminess.
- Japanese Mayo – This adds custard-like richness and a hint of sweetness; it’s worth seeking out for authentic flavor!
- Sugar – Enhances sweetness; you can skip it for less sweetness if preferred.
- Black Pepper – Adds the perfect amount of spiciness; feel free to adjust according to your taste.
For the Bread
- Milk Bread – Offers the softest texture and mild sweetness needed for the authentic taste; substitute with regular sandwich bread if necessary.
These ingredients come together to create a wonderful Japanese Egg Sandwich experience that you won’t forget!
Step‑by‑Step Instructions for Extra Creamy Japanese Egg Sandwich
Step 1: Boil Eggs
In a medium pot, fill water and add 1 tablespoon of vinegar. Bring the water to a rolling boil over medium heat, then gently place in 4 extra-large free-range eggs. Allow the eggs to boil for 10 minutes to achieve perfectly hard-boiled centers, ensuring the yolks remain creamy and rich.
Step 2: Ice Bath
Once the eggs have finished boiling, carefully transfer them into an ice bath by using a slotted spoon. Let the eggs sit in the cold water for approximately 5 minutes. This step helps stop the cooking process and makes peeling the eggs much easier, which is crucial for creating your Japanese Egg Sandwich.
Step 3: Separate Yolk and White
Remove the cooled eggs from the ice bath and gently tap them on a hard surface to crack the shells. Cut the eggs in half, placing the yolks into a mixing bowl and the whites into another bowl. This careful separation ensures a smooth and creamy egg filling for your delicious Tamago Sando.
Step 4: Make Filling
In the bowl containing the yolks, add 1 tablespoon of sugar, a sprinkle of black pepper, and 3 tablespoons of Japanese mayo. Using a fork, mix these ingredients together until creamy and well combined. Then, chop the egg whites into small pieces and gently fold them into the yolk mixture, creating a delightful filling for your Japanese Egg Sandwich.
Step 5: Assemble Sandwiches
Take two slices of soft milk bread and generously spread the creamy egg salad filling between them. For an added touch, you may press the sandwich with a weighted plate for about 5 minutes to help meld the flavors together. This step enhances the texture, making your Extra Creamy Japanese Egg Sandwich even more satisfying.
Step 6: Serve and Enjoy
After pressing, slice the sandwich in half diagonally to reveal the creamy filling. Serve your delightful Japanese Egg Sandwich immediately, perhaps alongside pickled vegetables or potato chips for a balanced meal. Relish in the sweet and savory flavors that make this Tamago Sando a classic snack loved by many!
What to Serve with Extra Creamy Japanese Egg Sandwich?
Elevate your meal experience with these delightful accompaniments that beautifully complement the creamy goodness of this Japanese favorite.
-
Pickled Vegetables: The tanginess of pickled veggies balances the richness of the egg salad, adding a refreshing crunch to each bite.
-
Crispy Potato Chips: A classic pairing, the saltiness and crunch of chips provide a satisfying contrast to the soft, creamy sandwich.
-
Fresh Salad: A light mixed greens salad dressed in a citrus vinaigrette adds a burst of freshness, enhancing the overall meal experience.
-
Fruit Platter: Seasonal fruits like strawberries or melons bring a touch of sweetness, making for a vibrant and colorful side that brightens your plate.
-
Green Tea: A warm cup of green tea complements the flavors while providing a soothing and healthful beverage option.
-
Miso Soup: A comforting bowl of miso soup serves as a cozy starter, offering umami richness that pairs well with the sandwich’s creamy profile.
These pairings not only bring balance but also enhance the overall enjoyment of your Extra Creamy Japanese Egg Sandwich, inviting you to savor each moment.
Make Ahead Options
These Extra Creamy Japanese Egg Sandwiches are perfect for meal prep, allowing you to enjoy a delicious homemade snack without the stress on busy days! You can prepare the egg salad filling up to 24 hours in advance and store it in an airtight container in the refrigerator to maintain its creaminess. To avoid the bread becoming soggy, assemble the sandwich just before serving. When ready to enjoy, simply spread the egg salad filling between two slices of fresh milk bread, optionally press with a weighted plate for 5 minutes, and savor the delightful combination of flavors. With these prep tips, a tasty, satisfying Tamago Sando is always within reach!
Japanese Egg Sandwich Variations
Customize your Japanese Egg Sandwich with these delightful twists that will light up your taste buds!
- Dairy-Free: Use avocado mayo instead of Japanese mayo for a creamy, plant-based option that’s just as delicious.
- Herb Boost: Add chopped dill or cilantro to the egg mix for a fresh herbal note that elevates the filling’s flavor.
- Spicy Kick: Mix in a teaspoon of sriracha or a dash of hot sauce to heat things up—this adds an exciting layer of flavor! Don’t be afraid to experiment with different heat levels for your perfect sandwich.
- Added Crunch: Toss in some finely chopped celery or cucumber to the egg salad for a refreshing crunch that contrasts beautifully with the creamy filling.
- Grass-Fed Goodness: Swap in grass-fed butter for a richer spread on the bread—it’s a small change that makes a world of difference!
- Gourmet Touch: Drizzle a bit of truffle oil into the filling for a luxurious twist that jazzes up this classic street food. It’s the perfect surprise for entertaining guests!
- Savory Umami: Incorporate a pinch of furikake (Japanese rice seasoning) into the egg mixture for an umami boost and a hit of additional flavor.
- Try It Toasted: Toast the milk bread for an added texture that brings a warm, comforting essence to your sandwich.
For more delicious ideas and inspiration, don’t forget to check out my Eggnog Pudding Holidays for a delightful finish after your meal!
How to Store and Freeze Japanese Egg Sandwich
Fridge: Keep your assembled Japanese Egg Sandwich in an airtight container in the fridge for up to 2 days for optimal freshness. For best results, avoid adding ingredients like pickles until serving.
Freezer: For freezing, separate the egg filling from the bread. The egg salad can be stored in an airtight container for up to 1 month, while the bread can last up to 3 months in the freezer.
Reheating: To enjoy your sandwich warm, thaw the egg filling overnight in the fridge. Assemble the sandwich fresh and serve immediately for the best texture and taste.
Make-Ahead: Prepare the egg filling in advance and store it in the fridge for up to 24 hours. Assemble the sandwich just before serving to maintain the soft and fluffy quality of the milk bread.
Expert Tips for Japanese Egg Sandwich
- Quality Matters: Use extra-large free-range eggs for a richer flavor and creamier texture. Low-quality eggs can impact the overall taste of your Japanese Egg Sandwich.
- Don’t Overcook: Boil your eggs for exactly 10 minutes to maintain that creamy yolk. Overcooking will lead to a dry filling!
- Chill the Eggs: The ice bath is crucial for easy peeling. Skipping this step can result in frustratingly damaged eggshells.
- Authentic Dressing: If you can, seek out authentic Japanese mayo for the best taste. American mayo can work in a pinch but won’t deliver the same richness.
- Mix It Up: Feel free to customize the salad by adding herbs or spices to enhance the flavors, but keep the egg mixture creamy for the perfect Japanese Egg Sandwich experience.
Japanese Egg Sandwich Recipe FAQs
What type of eggs should I use for the best flavor?
Absolutely! Using extra-large free-range eggs is key to achieving a richer flavor and creamier texture in your Japanese Egg Sandwich. High-quality eggs have vibrant yolks, which contribute to the sandwich’s delightful custard-like filling.
How should I store leftover Tamago Sando?
For the best taste, store your assembled Japanese Egg Sandwich in an airtight container in the fridge for up to 2 days. To keep the bread’s texture intact, it’s wise to add any ingredients that might make it soggy, like pickles, just before serving.
Can I freeze the egg filling for later use?
Very! To freeze, separate the egg salad from the bread. Store the egg filling in an airtight container for up to 1 month, and the bread can be frozen for up to 3 months. When you’re ready to enjoy, thaw the egg filling overnight in the fridge, then assemble the sandwich with freshly thawed bread.
What’s the best way to ensure my eggs don’t overcook?
To maintain that creamy yolk, boil your eggs for exactly 10 minutes. After boiling, immerse them in an ice bath for about 5 minutes. This will halt the cooking process and make peeling much easier, ensuring a luscious filling for your Japanese Egg Sandwich.
Is this recipe suitable for anyone with allergies?
While the Japanese Egg Sandwich is vegetarian-friendly, make sure to check for specific allergies, especially regarding condiments like mayonnaise. If someone has an egg allergy, this recipe wouldn’t be suitable. For those avoiding Japanese mayo due to dietary restrictions, you can substitute with American mayo, but keep in mind it won’t have the same flavor.
Can I make the egg filling ahead of time?
Absolutely! You can prepare the egg filling up to 24 hours in advance. Store it in the fridge in an airtight container. Just be sure to assemble your sandwiches with fresh bread right before serving to preserve that lovely, fluffy texture of the milk bread.
Extra Creamy Japanese Egg Sandwich for a Taste of Bliss
Ingredients
Equipment
Method
- In a medium pot, fill water and add 1 tablespoon of vinegar. Boil the water, then gently place in 4 eggs and boil for 10 minutes.
- Transfer the boiled eggs into an ice bath for about 5 minutes.
- Remove the eggs, crack the shells, and separate the yolks into a mixing bowl and whites into another bowl.
- In the yolk bowl, add 1 tablespoon of sugar, black pepper, and 3 tablespoons of Japanese mayo. Mix until creamy, then fold in the chopped egg whites.
- Spread the egg filling between two slices of milk bread. Press with a weighted plate for 5 minutes.
- Slice the sandwich in half and serve immediately, perhaps with pickled vegetables or potato chips.
Leave a Reply