
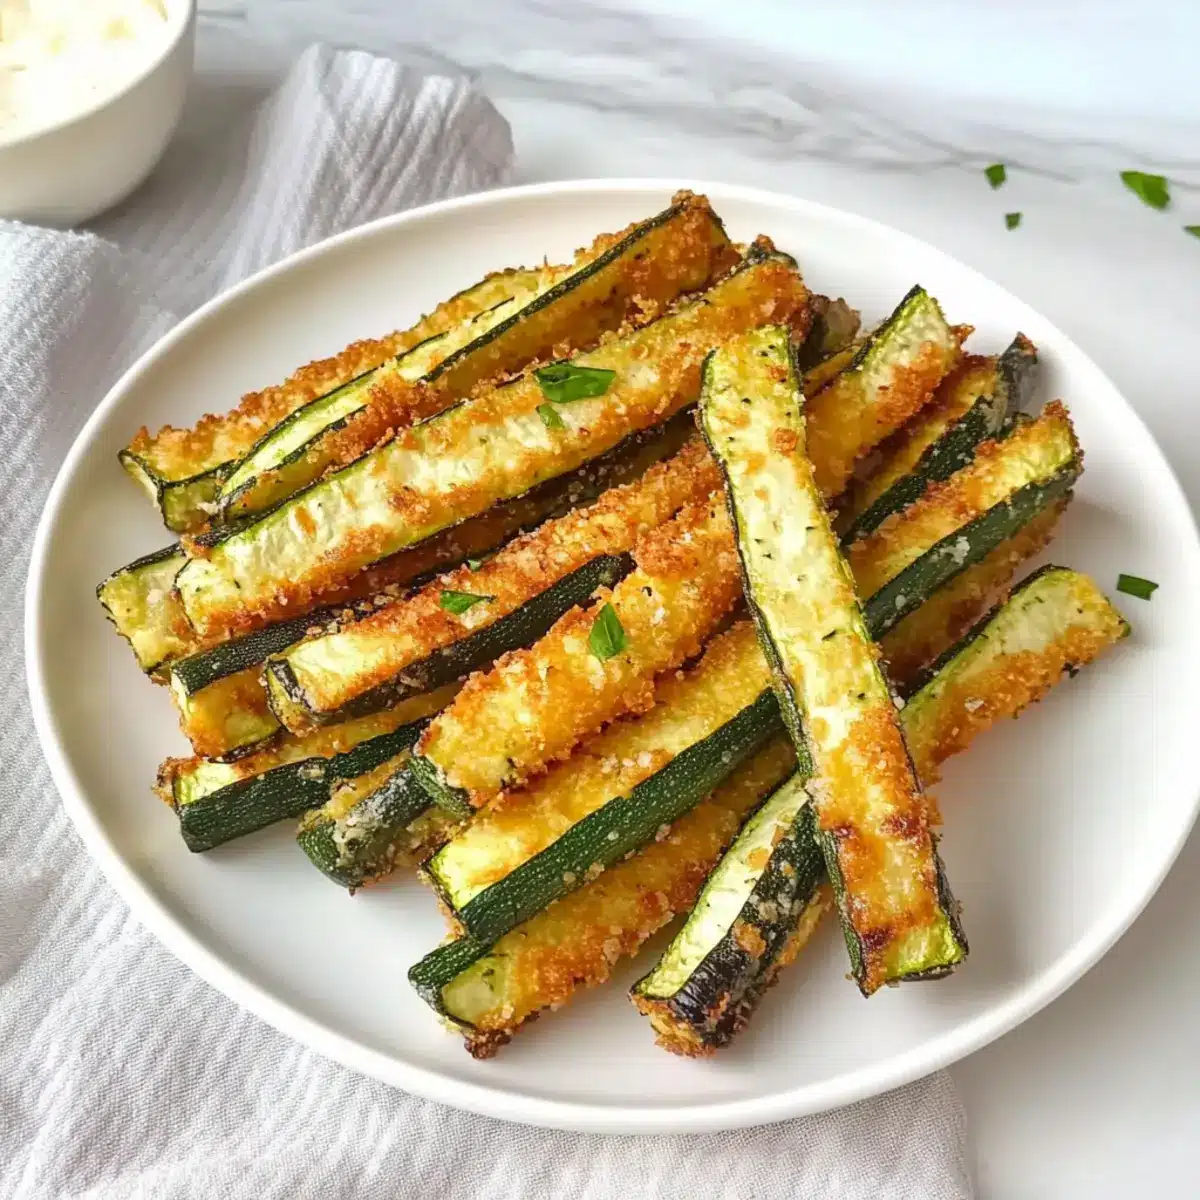
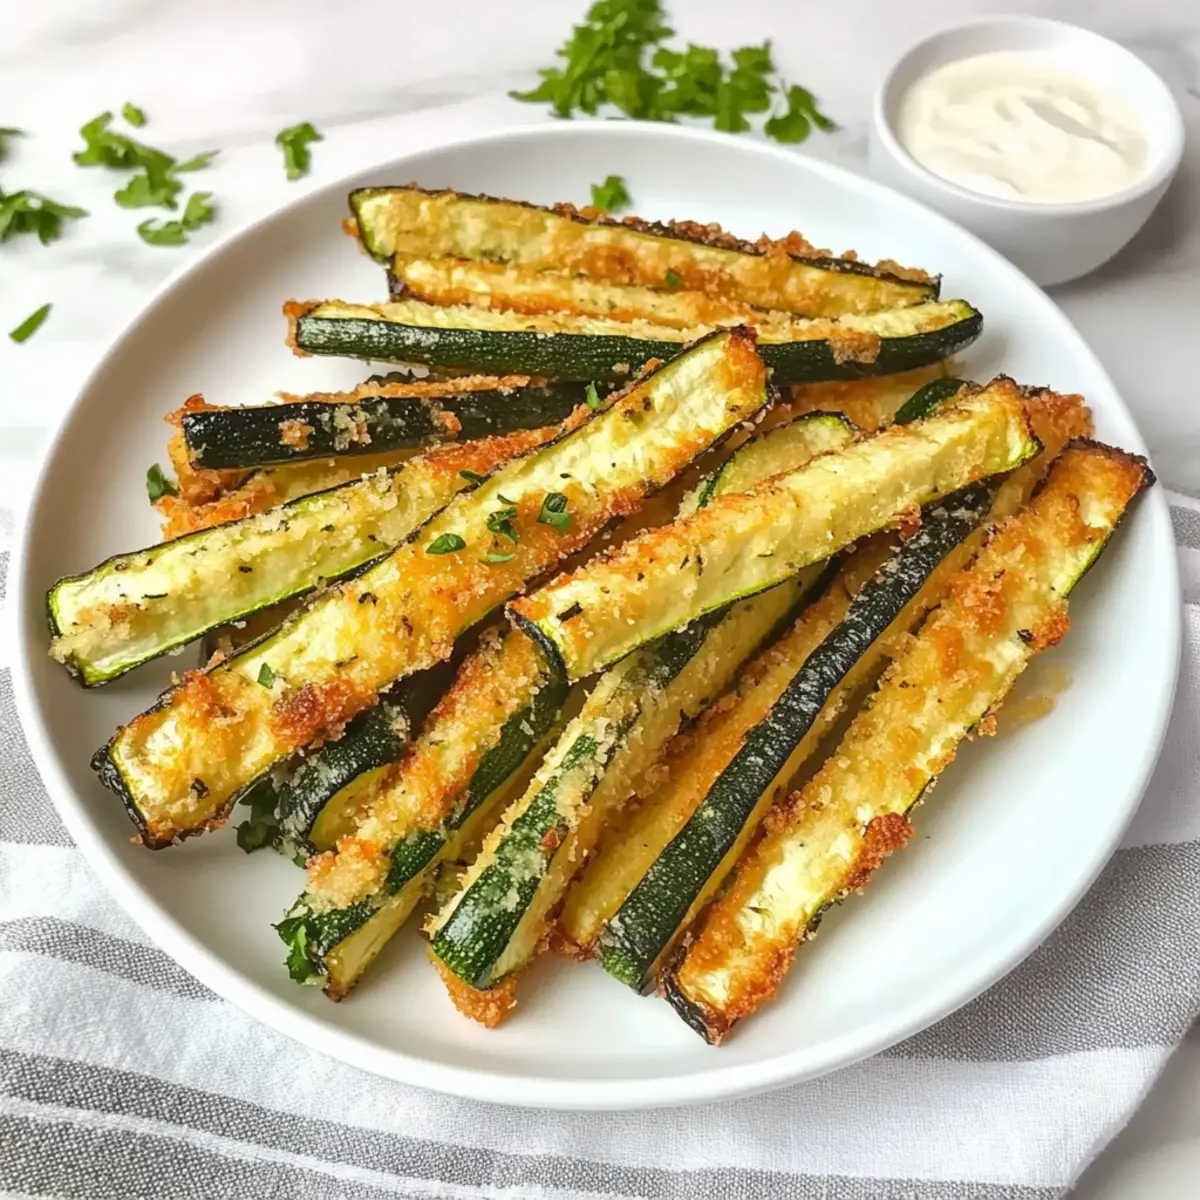
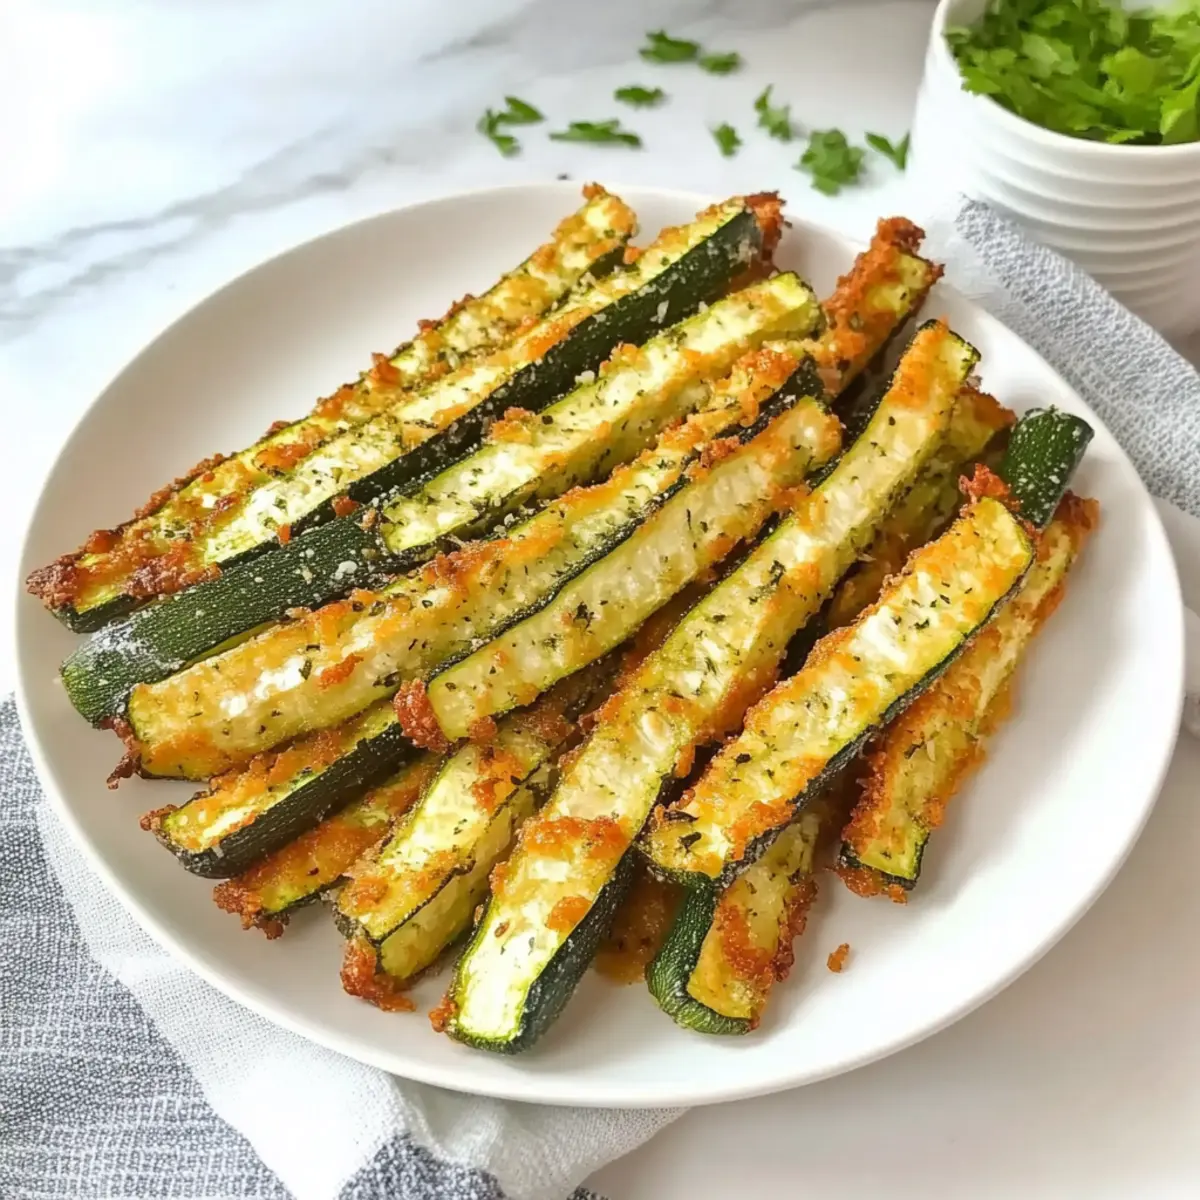
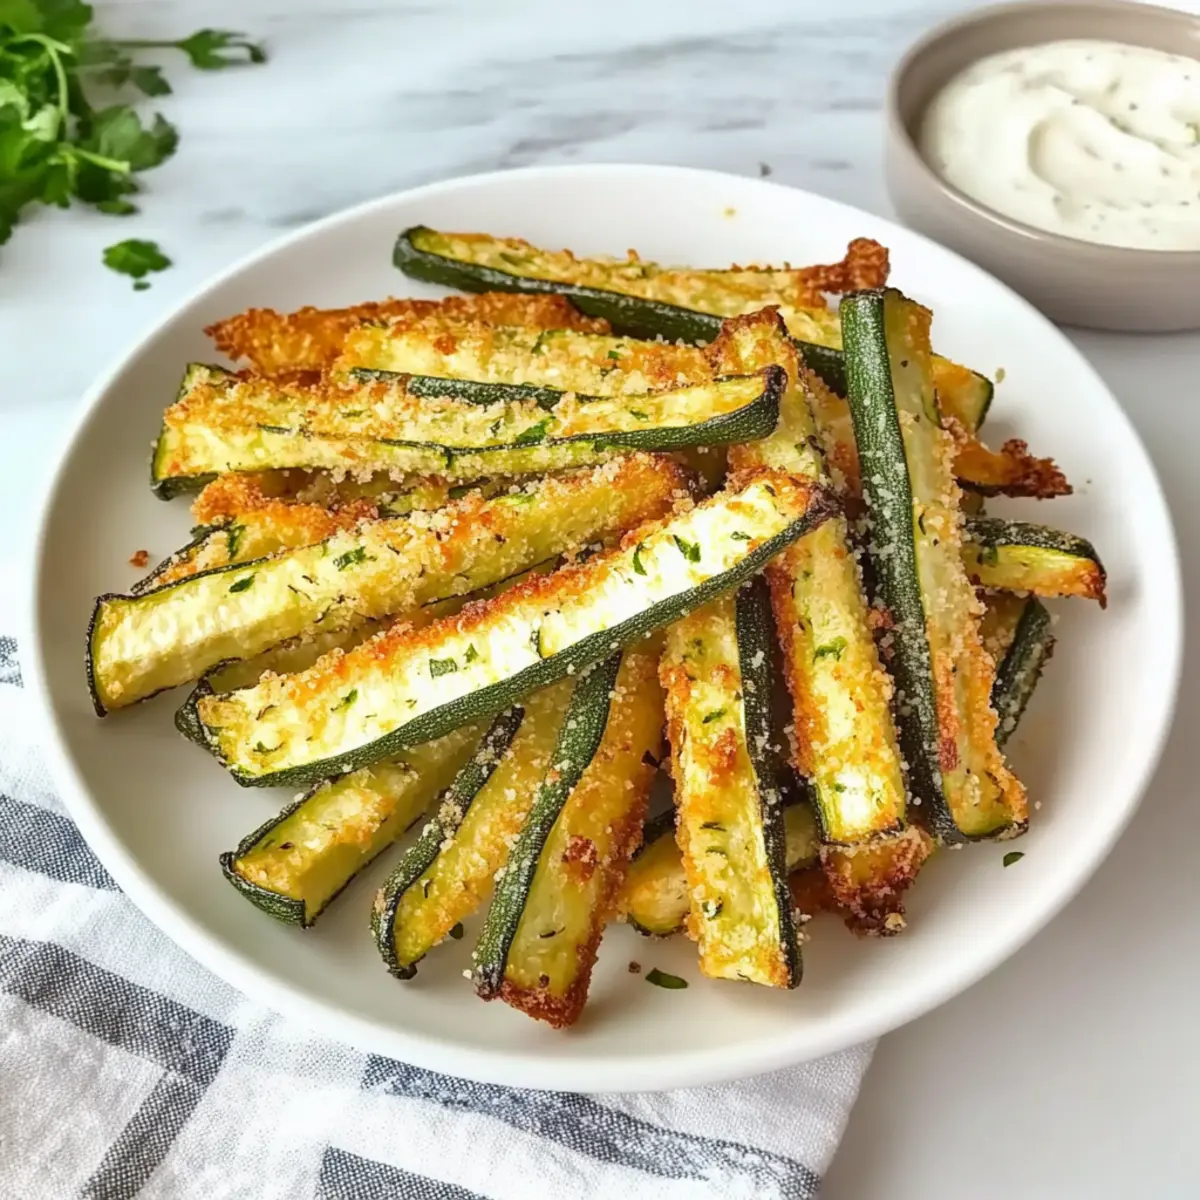
Every time I step into my kitchen, I’m reminded of the true joy that fresh ingredients can bring. Today, I’m excited to share my recipe for Crispy Keto Baked Zucchini Fries, a delightful way to transform simple zucchini into a crunchy, guilt-free snack. These golden fries, made with tender zucchini and savory parmesan, are not only low-carb but also gluten-free, making them the perfect healthy appetizer for anyone tired of fast food options. Whipping them up is a breeze, so even the busiest home chefs can enjoy a satisfying crunchy bite without feeling guilty. Are you ready to bring a little crunch to your next meal? Let’s dive in!
Why Are These Zucchini Fries a Must-Try?
Crispy, golden perfection: Each bite offers a satisfying crunch that rivals traditional fries, without the carb overload.
Guilt-free indulgence: These keto and gluten-free zucchini fries let you snack happily, keeping your health goals in check.
Quick and easy: Ready in just 20 minutes, they’re perfect for busy nights or unexpected guests.
Versatile flavors: Customize them with different cheeses or spices, ensuring they never get boring. Try pairing with a delicious dip to elevate your appetizer game!
For more tasty ideas, don’t miss my Gluten Free Popovers!
Keto & Gluten Free Zucchini Fries Ingredients
• Get ready to whip up a crunchy delight!
For the Fries
• Zucchini – The star ingredient that provides a low-carb base; fresh from the garden is best, but store-bought works too.
• Salt – Enhances overall flavor; use it to taste to avoid overwhelming the dish.
• Parmesan Cheese – Creates a rich, cheesy coating; substitute with grated mozzarella for a milder flavor.
• Garlic Powder – Adds savory depth to the fries; if you prefer fresh, minced garlic can work but may change the texture.
• Red Pepper Flakes (optional) – For a touch of heat; feel free to omit if you’re leaning toward a milder flavor.
• Egg – Binds the coating perfectly; for those on a vegan diet, a flaxseed or chia seed egg is a suitable alternative.
Feel free to experiment and customize your keto & gluten-free zucchini fries!
Step‑by‑Step Instructions for Keto & Gluten Free Zucchini Fries
Step 1: Preheat Your Oven
Start by preheating your oven to 400°F (200°C) to ensure it’s hot enough for baking. While the oven warms up, line a baking sheet with parchment paper to prevent sticking. This setup will help achieve the perfect crispiness for your Keto & Gluten Free Zucchini Fries.
Step 2: Prepare the Zucchini
Take your fresh zucchini, rinse it under cold water, and slice off both ends. Cut the zucchini into long, even spears, aiming for about 16 spears per zucchini. The uniform size will ensure they cook evenly, transforming into deliciously crunchy fries that are both tasty and healthy.
Step 3: Season the Spears
Once your zucchini spears are cut, lightly sprinkle them with salt to enhance their natural flavor. Then, use a clean kitchen towel to pat them dry thoroughly. This step is crucial, as removing excess moisture will help your zucchini fries become delightfully crispy when baked.
Step 4: Prepare the Coating
In a shallow bowl, whisk an egg until it’s well mixed. In a separate bowl, combine grated parmesan cheese, garlic powder, and optional red pepper flakes for added heat. These ingredients will create a flavorful coating that adheres beautifully to your zucchini, ensuring every bite is packed with flavor.
Step 5: Coat the Zucchini
Take a zucchini spear and dip it into the whisked egg, allowing any excess to drip off. Next, roll the spear in the parmesan mixture, ensuring it’s evenly coated. Repeat this process for all your zucchini spears, making sure each one has a lovely layer of the cheesy coating for a crispy finish.
Step 6: Arrange for Baking
Place the coated zucchini spears on the lined baking sheet, ensuring they are spaced apart. This arrangement allows air to circulate, helping them to crisp up nicely. Now, they’re ready to go into the oven for baking, transforming into the perfect crunchy snack.
Step 7: Bake to Perfection
Slide the baking sheet into the preheated oven and bake for about 20 minutes. You’ll want to keep an eye on them; they should turn golden brown and crispy. If you like extra crunch, consider broiling for the last 2-3 minutes, but stay close to avoid any burning.
Step 8: Serve and Enjoy
Once your Keto & Gluten Free Zucchini Fries are beautifully golden, remove them from the oven and let them cool slightly. Serve them hot alongside your favorite dipping sauces, such as ranch or garlic aioli, making for a delightful and healthy appetizer that everyone will love.
Keto & Gluten Free Zucchini Fries Variations
Feel free to get creative with these scrumptious zucchini fries and tailor them to your taste buds!
- Cheese Swap: Try using cheddar or a fancy cheese blend for a distinct flavor twist that adds richness.
- Herb Boost: Mix in dried oregano or basil to the parmesan coating for an Italian flair that brightens every bite.
- Spicy Kick: Add more red pepper flakes for a bolder heat that gives these fries an exciting edge!
- Crunchy Topping: For extra crunch, sprinkle pork rinds or almond flour on top before baking for an added texture contrast.
- Parmesan Enhance: Halfway through baking, dust with extra parmesan to amplify the cheesy goodness and create a crusty top layer.
- Vegetable Mix: Add slices of eggplant or turnip alongside zucchini for colorful variation and to mix up the nutrients in your fries.
- Dipping Duo: Pair with different dips like spicy mayo or a creamy avocado dip to keep snacking exciting with flavorful options.
- Sweet Twist: For a sweeter snack, try drizzling a bit of honey or agave over the baked fries before serving.
These ideas can really bring your keto & gluten-free zucchini fries to the next level! For the best fluffy experience, also check out my Gluten Free Popovers and don’t miss out on enhancing your snacks!
What to Serve with Crispy Keto Baked Zucchini Fries
Pairing your crispy, guilt-free fries with the right dishes can enhance the flavors and create a balanced meal experience.
-
Creamy Avocado Dip: This buttery dip adds richness and a fresh twist, making it perfect for scooping up crispy fries.
-
Zesty Cilantro Lime Rice: The fluffy texture and zesty profile complement the fries beautifully, introducing a bright, refreshing element.
-
Garlic Aioli: A smooth, garlicky dip that pairs deliciously with the fries, offering a creamy contrast to their crunch.
-
Side Salad: A simple arugula or spinach salad with cherry tomatoes and a balsamic vinaigrette can add vibrant freshness to your plate.
-
Grilled Lemon Chicken: The smoky, citrusy chicken brings in protein and adds a savory bite that perfectly balances the lightness of zucchini fries.
-
Roasted Bell Peppers: The sweetness and char of roasted bell peppers introduce a wonderful texture and flavor, elevating the overall dish.
-
Sparkling Lemonade: A refreshing drink that cuts through the savory flavors and adds a fun fizz to your snacking experience.
-
Cheesecake Bites: For dessert, these mini indulgences offer a creamy sweetness that beautifully complements the savory zucchini fries.
Expert Tips for Keto & Gluten Free Zucchini Fries
-
Dry Thoroughly: Ensure the zucchini is completely dry to avoid soggy fries; excess moisture will make achieving crispiness difficult.
-
Uniform Spear Sizes: Cut zucchini into evenly sized spears to ensure they bake evenly; mixed sizes can lead to uneven cooking and a less desirable texture.
-
Coating Technique: Coat zucchini spears thoroughly with the parmesan mixture for maximum crispiness; make sure to shake off excess egg before dipping.
-
Watch the Oven: Keep a close eye as baking time approaches the 20-minute mark; if they aren’t golden yet, an additional broil can help but watch closely to prevent burning.
-
Pair Wisely: Serve these keto & gluten-free zucchini fries with complementary dipping sauces like ranch or garlic aioli to enhance their flavor and appeal.
Make Ahead Options
These Keto Baked Zucchini Fries are perfect for busy home cooks looking to save time during the week! You can prep the zucchini spears and coat them with the parmesan mixture up to 24 hours in advance. Simply follow the initial steps of seasoning and coating, then place the uncooked fries in a single layer on a baking sheet and cover them with plastic wrap before refrigerating. This keeps them fresh and prevents browning. When you’re ready to enjoy them, just preheat your oven, bake for about 20 minutes, and relish in the satisfying crunch of these guilt-free snacks without any hassle!
How to Store and Freeze Keto & Gluten Free Zucchini Fries
Fridge: Keep leftover zucchini fries in an airtight container for up to 3 days to maintain their taste and texture.
Freezer: For longer storage, freeze baked zucchini fries on a baking sheet until firm, then transfer to a freezer-safe container for up to 2 months.
Reheating: To enjoy your fries again, reheat them in the oven at 375°F (190°C) for about 10-15 minutes, ensuring they regain their crispy texture.
Room Temperature: Avoid leaving zucchini fries out for more than 2 hours to prevent spoilage; it’s best to refrigerate any leftovers promptly.
Keto Baked Zucchini Fries Recipe FAQs
How do I select ripe zucchini for the fries?
Absolutely! Look for zucchini that is firm to the touch with a vibrant green color. Avoid zucchini that has blemishes or dark spots all over as they may be overripe. If it’s too soft, it may not hold up well during baking.
How should I store leftover zucchini fries?
For best results, keep your leftover zucchini fries in an airtight container in the refrigerator, where they will stay fresh for up to 3 days. When you’re ready to enjoy them again, a gentle reheating in the oven at 375°F (190°C) for about 10-15 minutes will help to restore their delightful crunch.
Can I freeze zucchini fries?
Yes, you can freeze your baked zucchini fries! First, lay them out on a baking sheet in a single layer and freeze until solid — about 1 to 2 hours. Then, transfer them to a freezer-safe container or bag where they can be stored for up to 2 months. When you’re ready to have them, simply reheat them straight from the freezer in the oven at 375°F (190°C) for 15-20 minutes for a crispy finish.
What should I do if the zucchini fries are soggy after baking?
If your zucchini fries turn out soggy, don’t worry! To help with future batches, make sure to pat the zucchini spears dry thoroughly before coating them. Additionally, consider reducing the baking time and possibly adding a quick broil at the end to achieve that crispiness. Remember to spread the fries out on the baking sheet to allow proper air circulation.
Are these zucchini fries suitable for my gluten-free diet?
Very much so! These Keto & Gluten Free Zucchini Fries are entirely gluten-free, thanks to their simple and wholesome ingredients. However, check your parmesan packaging as some brands may have gluten cross-contamination. If you have serious allergies, consider using certified gluten-free cheese alternatives to be safe.
Can these zucchini fries be made vegan?
Absolutely! To make these zucchini fries vegan, simply replace the egg with a mixture of 1 tablespoon of ground flaxseed combined with 2.5 tablespoons of water (let it sit for about 5 minutes to thicken). This swap will help bind the coating just like the egg, allowing you to enjoy this delicious snack without compromising your dietary choices.
Crispy Keto & Gluten Free Zucchini Fries You’ll Crave
Ingredients
Equipment
Method
- Preheat your oven to 400°F (200°C) and line a baking sheet with parchment paper.
- Rinse the zucchini under cold water, slice off both ends, and cut into long, even spears.
- Lightly sprinkle zucchini spears with salt and pat dry with a kitchen towel.
- In a bowl, whisk the egg. In another bowl, mix parmesan cheese, garlic powder, and red pepper flakes.
- Dip each zucchini spear into the whisked egg and then roll it in the parmesan mixture.
- Arrange the coated zucchini spears on the baking sheet, ensuring they are spaced apart.
- Bake in the preheated oven for about 20 minutes until golden and crispy, optionally broiling for the last 2-3 minutes.
- Remove from oven, let cool slightly, and serve hot with dipping sauces.
Leave a Reply