
Steam rises gently from the oven, wrapping itself around you like a warm hug as the rich aroma of freshly baked scones fills the air. This simple scone recipe offers a delightful journey into the realm of bakery-style baked goods right from your own kitchen. In just 10 minutes of hands-on work, you can transform a few basic ingredients into tall, flaky scones, customizable with flavors from sweet blueberries to decadent chocolate chips—perfect for brunch or an afternoon treat. Plus, these scones are a crowd-pleaser, and they’re just as easy to make in gluten-free variations. Who wouldn’t want to experience that? So, why wait? Let’s dive into creating these irresistible treasures that will make your kitchen the heart of your home! What flavor combination will you choose today?
Why are scones so irresistible?
Simplicity: This simple scone recipe comes together in just 10 minutes! With minimal effort, even beginner bakers can whip up a delicious batch.
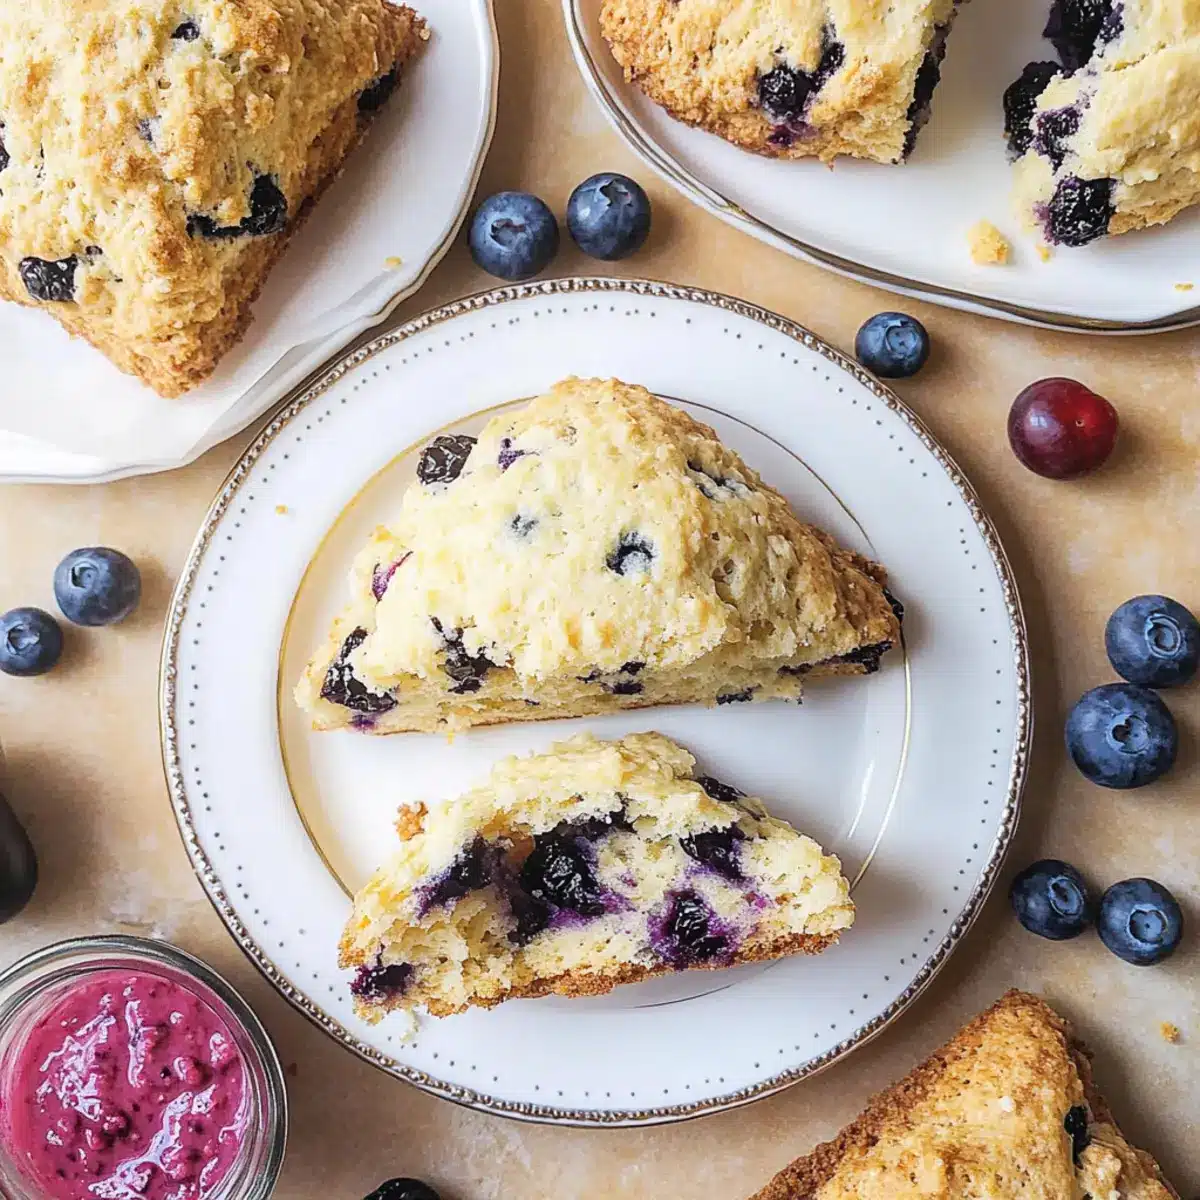
Customizable: With options like blueberries, strawberries, and chocolate chips, you can tailor these scones to your taste. Feel free to experiment and create your unique flavor masterpiece!
Bakery-Style Results: Enjoy tall, flaky scones that rival your favorite café, ensuring you’ll impress family and friends at brunch.
Versatile: Whether you need a sweet indulgence or a savory twist, these scones adapt beautifully to your cravings—try them with cheese for a savory delight! For more delightful baked goods, don’t forget to check out my Cottage Cheese Flatbread or the classic Pecan Cream Pie to satisfy any sweet tooth.
Gluten-Free Options: You won’t miss out if you’re gluten-free! Follow the recipe with a simple flour swap to enjoy the same great taste and texture.
Simple Scone Recipe Ingredients
For the Scone Base
• All-Purpose Flour – Provides structure and tenderness; substitute with a gluten-free 1:1 flour blend for the same bakery-style bliss.
• Granulated Sugar – Adds sweetness and improves browning; no substitutions suggested.
• Baking Powder – Acts as a leavening agent, so make sure it’s fresh for the best rise.
• Salt – Balances flavors beautifully; opt for fine salt for even distribution.
• Cold Unsalted Butter – Essential for that flaky texture; keep it cold and cubed. No substitutes recommended.
• Buttermilk – Contributes moisture and a slight tang; can be replaced with DIY buttermilk or diluted sour cream.
• Vanilla Extract – Enhances overall flavor; this is optional but adds sweetness.
• Large Egg – Provides richness and helps bind the ingredients; no alternatives suggested.
For the Customizable Add-Ins
• Fresh Fruit (e.g., blueberries, strawberries) – Offers delightful flavor; adjust flour as needed based on moisture content.
• Chocolate Chips – For a sweet twist; ensure the total add-ins stay within 1-1.5 cups.
• Nuts or Spices – Consider adding walnuts or cinnamon for a unique flavor profile; these can elevate your simple scone recipe.
Now you have everything you need to get started on your journey to delicious, bakery-style scones!
Step‑by‑Step Instructions for Simple Scone Recipe
Step 1: Preheat the Oven
Begin by preheating your oven to 400°F (200°C). This ensures a hot environment for the scones, allowing them to rise beautifully as they bake. Prepare a baking sheet by lining it with parchment paper to prevent sticking and make cleanup easy.
Step 2: Mix Dry Ingredients
In a large mixing bowl, whisk together 2 cups of all-purpose flour, 1/4 cup of granulated sugar, 1 tablespoon of baking powder, and a pinch of salt until well combined. The mixture should appear airy and light. This blend forms the base of your simple scone recipe, contributing to the tender crumb you desire.
Step 3: Incorporate Cold Butter
Next, take 1/4 cup of cold unsalted butter, cut into small cubes, and add it to the dry ingredients. Using a pastry cutter or your fingers, work the butter into the flour mixture until it resembles coarse crumbs. This is a crucial step for achieving the flaky texture that makes scones so irresistible.
Step 4: Add Wet Ingredients
Pour in 3/4 cup of buttermilk, 1 teaspoon of vanilla extract, and 1 large egg into the bowl with the flour and butter mixture. Gently stir the ingredients together until just combined, being careful not to over-mix. This will keep your scones tender, setting the stage for an enjoyable treat.
Step 5: Fold in Add-Ins
If you’re customizing your simple scone recipe with add-ins like chocolate chips, blueberries, or nuts, now’s the time! Gently fold in 1 to 1.5 cups of your chosen mix-ins, thoroughly but gently, adjusting the flour slightly if needed. This ensures the moisture from fruits doesn’t make the dough too wet.
Step 6: Laminate the Dough
Transfer the dough onto a lightly floured surface and knead it gently about 4-5 times. This lamination technique incorporates air and creates layers in the dough, enhancing the flakiness. Pat it into a circle roughly 1 inch thick, being cautious not to overwork the dough.
Step 7: Shape and Cut the Dough
Using a sharp knife or a pizza cutter, divide the dough circle into wedges (like a pie). Place the scones on your prepared baking sheet, leaving space in between each piece. If desired, brush the tops with a bit of buttermilk for added golden color while baking.
Step 8: Bake to Perfection
Bake the scones in your preheated oven for 20-25 minutes or until they turn golden brown on top. You want them to be lightly browned and slightly firm to the touch. During baking, inhale the delightful aroma spreading through your kitchen; it’s a sure sign something delicious is happening!
Step 9: Cool and Serve
Once baked, remove the scones from the oven and let them cool on a wire rack for about 10 minutes. This cooling phase allows the scones to firm up a bit more, making them perfect for serving. Once cooled, enjoy them warm with butter, jam, or cream for a delightful treat!

Tips for the Best Simple Scone Recipe
-
Keep Butter Cold: Ensure your butter is very cold before cutting it in. This is crucial for achieving that flaky texture everyone loves in a simple scone recipe.
-
Don’t Over-Mix: After adding wet ingredients, stir just until combined. Over-mixing can lead to tough scones, which are far from tender bliss.
-
Adjust for Moisture: If using fruits or other wet add-ins, remember to tweak your flour amount to keep the dough from getting too sticky.
-
Watch Baking Time: Keep an eye on your scones while baking; they should be golden, not dark, ensuring a beautiful finish without being overdone.
-
Cool Completely: Allow scones to cool fully on a wire rack before storing. This prevents condensation from making them soggy, maintaining that delightful texture.
Make Ahead Options
These deliciously simple scones are perfect for meal prep enthusiasts! You can prepare the dough up to 24 hours in advance and keep it wrapped tightly in plastic wrap in the refrigerator to maintain freshness. Additionally, you can mix your dry ingredients and store them in an airtight container for up to 3 days; just remember to add the cold butter and wet ingredients right before baking to ensure optimal flakiness. If you’re really pressed for time, consider freezing unbaked scones for up to 2 months; bake them straight from the freezer, adding a couple of extra minutes to the baking time for equally delicious results. This way, you’ll have fresh, bakery-style scones ready for any occasion with minimal effort!
Simple Scone Recipe Variations
Feel free to get creative with your scone-making adventure, as there’s a world of flavors to explore!
-
Fruit Fusion: Mix and match fruits like blueberries and strawberries for a deliciously colorful twist. The fresh sweetness brightens every bite!
-
Chocolate Lover’s Delight: Fold in chocolate chips or chunks for a decadent treat. There’s nothing quite like the melted chocolate mingling with buttery scone goodness!
-
Savory Twist: Add crumbled cheese and herbs for a savory scone option. Imagine enjoying them warm with a bowl of soup—pure comfort food!
-
Citrus Zest: Incorporate lemon or orange zest to brighten the flavor profile. This adds a refreshing pop that lifts the scone experience.
-
Spiced Up: Add a pinch of cinnamon or nutmeg for a warm, cozy scent that dances in the air as they bake. It’s like a hug in baked form!
-
Gluten-Free: Use a gluten-free flour blend to enjoy the same delightful texture without the gluten. Your scones will still be irresistibly fluffy and delicious!
-
Berry Cream: Mix in dried berries like cranberries or cherries, perfect for a sweet and tart surprise inside each scone. Pair them with clotted cream for a true indulgence!
-
Nutty Crunch: Add nuts like walnuts or pecans to give your scones a delightful crunch. They introduce a lovely earthy flavor that complements the sweetness beautifully.
Explore these variations to discover what brings you the most joy. Want to complement your scone adventure? Try pairing these delightful bites with a cup of tea or enjoy them alongside my scrumptious Goats Cheese Scones for a savory twist!
What to Serve with Flaky Bakery-Style Scones?
Indulging in warm, flaky delicacies can be even more delightful when paired with the right accompaniments.
- Rich Clotted Cream: Luxuriously creamy, this classic pairing enhances the buttery scone, creating an irresistible combination you’ll savor.
- Fresh Berry Jam: The sweet, tart flavor of berry jam beautifully complements the buttery texture of the scones, adding a burst of fruity freshness.
- Savory Cheese Platter: Offering a mix of sharp and mild cheeses provides a delightful contrast and introduces savory flavors, perfect for a brunch spread.
- Herbal Tea: A cup of steaming herbal tea adds warmth and sophistication, creating a serene moment to enjoy your scones.
- Homemade Lemon Curd: Bright and zesty, lemon curd brings a refreshing twist that balances the richness of scones for a well-rounded treat.
- Whipped Honey Butter: Sweetened butter mixed with honey creates a velvety topping that melts into the scone, enhancing each bite with sweetness.
- Seasonal Fresh Fruit: Serve alongside sliced strawberries or raspberries for a pop of color and freshness, complementing the scone’s flavors and textures beautifully.
- Iced Coffee: For a refreshing pairing, iced coffee with cream adds a cooling element that contrasts perfectly with warm scones.
- Chocolate Drizzle: Drizzle melted chocolate over scones for an indulgent treat that satisfies the sweet tooth, especially if you opt for chocolate chip scones!
- Sparkling Lemonade: This bubbly refreshment enhances your scone experience by adding a zesty bite and a bit of fizz that brightens the palate.
How to Store and Freeze Simple Scone Recipe
Fridge: Store completely cooled scones in an airtight container for up to 2 days. This keeps them fresh and minimizes moisture loss.
Freezer: For longer storage, freeze unbaked scones individually wrapped. They can be stored for up to 2 months; simply bake straight from the freezer when you’re ready.
Reheating: To enjoy scones at their best, reheat in a preheated oven at 350°F (175°C) for about 10 minutes, ensuring they’re warmed through and the texture is restored.

Simple Scone Recipe FAQs
What type of flour should I use for scones?
For a classic scone, all-purpose flour works best to give structure and a tender crumb. If you’re looking for a gluten-free option, I recommend using a gluten-free 1:1 flour blend, which mimics the properties of all-purpose flour quite well.
How should I store leftover scones?
Absolutely! To keep your scones fresh, store completely cooled scones in an airtight container at room temperature for up to 2 days. This prevents moisture loss and preserves their delightful texture. If you want to store them longer, think about freezing!
Can I freeze the scone dough?
Yes, you can! For freezing, shape the unbaked scone dough into wedges and place them on a baking sheet lined with parchment paper. Freeze them until solid, then wrap each wedge tightly in plastic wrap and store them in an airtight container for up to 2 months. When you’re ready to bake, simply place them directly from the freezer into a preheated oven, adding a few extra minutes to the baking time.
What should I do if my scones turn out too dry?
If you find your scones are too dry, there are a couple of things to check. First, ensure that you are measuring your flour correctly; over-packed flour can lead to dryness. Also, make sure not to overmix the dough after adding the wet ingredients, as this can lead to tough scones. If you use fruit as an add-in, consider adjusting the flour if your fruits are particularly juicy, as they can add moisture to the mixture.
Can I make these scones dairy-free?
Very! To make these scones dairy-free, substitute the buttermilk with a plant-based milk mixed with a bit of vinegar or lemon juice to mimic the acidity of buttermilk. You can also use coconut oil or a dairy-free butter substitute in place of cold unsalted butter, ensuring you get that desired flakiness.
How do I know when my scones are done baking?
Bake the scones for about 20-25 minutes, or until they are golden brown on top. A great way to test their doneness is to tap the top lightly; they should feel firm and not doughy. The delightful aroma of freshly baked scones will also fill your kitchen—another sure sign that they are beautifully done!

Deliciously Simple Scone Recipe for Bakery-Style Bliss
Ingredients
Equipment
Method
- Preheat your oven to 400°F (200°C) and prepare a baking sheet by lining it with parchment paper.
- In a large mixing bowl, whisk together 2 cups of all-purpose flour, 1/4 cup of granulated sugar, 1 tablespoon of baking powder, and a pinch of salt until well combined.
- Add 1/4 cup of cold unsalted butter and work it into the flour mixture until it resembles coarse crumbs.
- Pour in 3/4 cup of buttermilk, 1 teaspoon of vanilla extract, and 1 large egg into the bowl; stir until just combined.
- Gently fold in 1 to 1.5 cups of your chosen mix-ins.
- Transfer the dough onto a lightly floured surface and knead gently about 4-5 times, forming it into a circle roughly 1 inch thick.
- Divide the dough circle into wedges and place on the baking sheet, brushing tops with buttermilk if desired.
- Bake for 20-25 minutes or until golden brown on top.
- Let the scones cool on a wire rack for about 10 minutes before serving.
Leave a Reply