
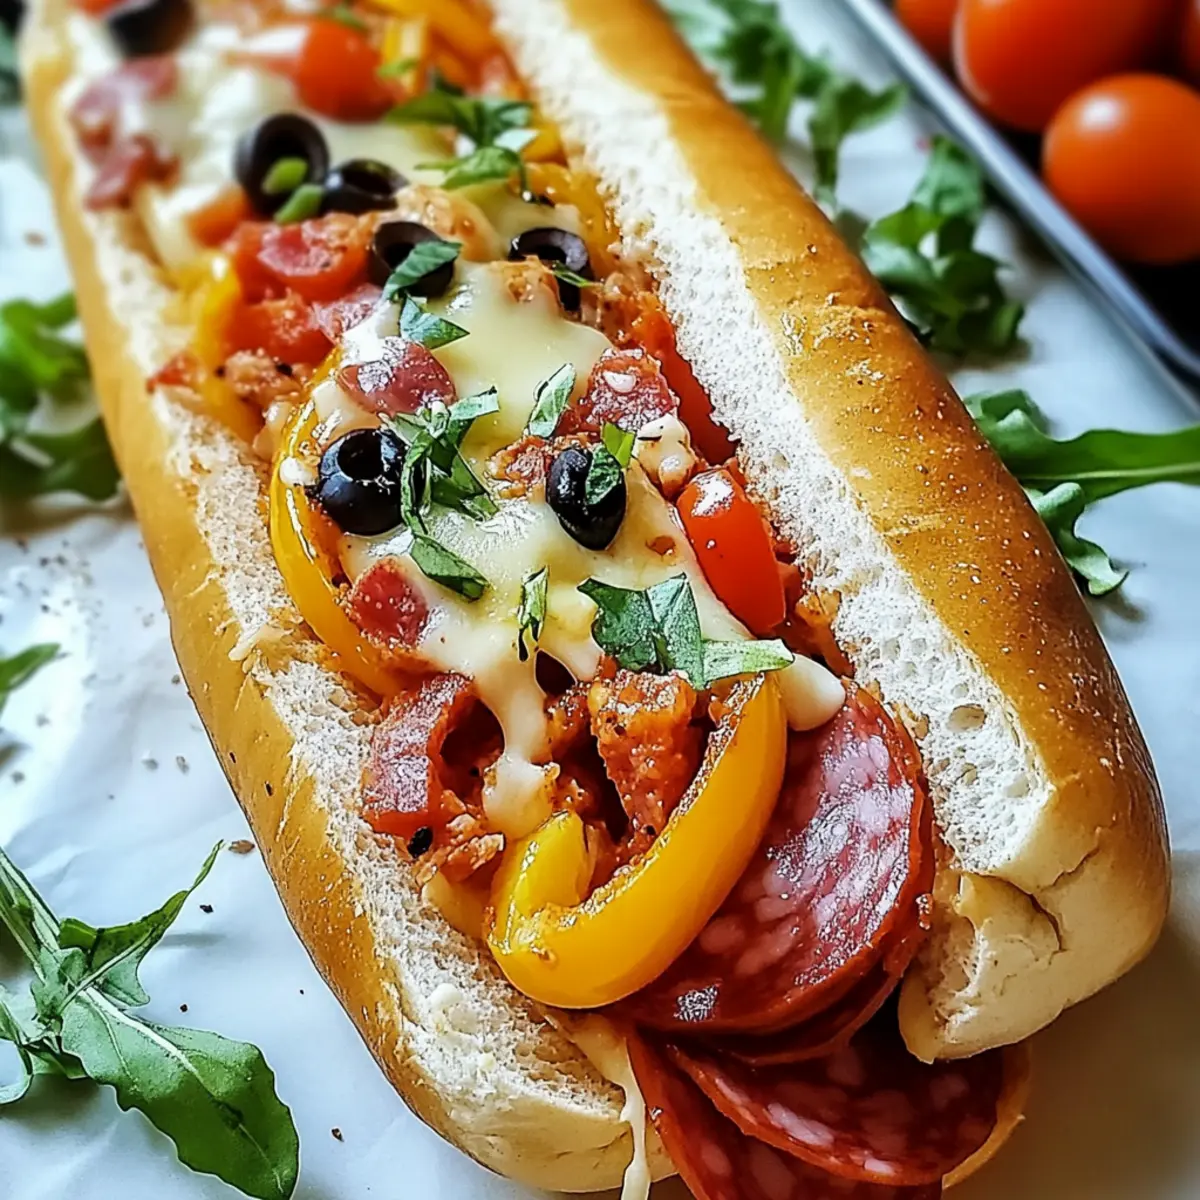
There’s something magical about sinking your teeth into a warm, toasted sandwich that takes you straight to a bustling Italian deli. Today, I’m excited to share my recipe for Baked Italian Grinder Sandwiches—a comforting dish that combines crispy hoagie rolls with layers of savory Italian meats, gooey provolone, and zesty marinara. Perfect for weeknight dinners or cozy gatherings, these sandwiches are not only a crowd-pleaser but also easy to customize to your liking. Plus, you can prepare them ahead of time and pop them in the oven when you’re ready to eat! With each delicious bite, you’ll discover that simplicity and flavor can go hand in hand. Ready to dive into this Italian delight?

Why are Baked Italian Grinder Sandwiches a must-try?
Simplicity and Flavor: This recipe effortlessly combines rich ingredients into a hearty sandwich, perfect for even the busiest weeknights.
Flavor Variability: You can easily swap out meats and veggies, tailoring each sandwich to your family’s tastes—try it with grilled vegetables for a delightful vegetarian twist!
Make-Ahead Magic: Prepare them a day in advance and bake when you’re ready—no more scrambling for last-minute dinners!
Crowd-Pleasing Comfort: Ideal for gatherings, these sandwiches bring comfort food to the next level, much like Baked Cod Coconut or Baked Lemon Butter.
Perfectly Textured: Enjoy the satisfying combination of crispy, warm bread and gooey cheese that keeps everyone coming back for more.
Baked Italian Grinder Sandwiches Ingredients
• Get ready for layers of deliciousness!
For the Rolls
- Italian sub rolls – These sturdy rolls provide a soft base and a crispy crust when baked.
- Unsalted butter, melted – Enhances the richness and flavor of the bread perfectly.
For the Seasoning
- Garlic powder – Adds a savory aroma that elevates the entire sandwich.
- Onion powder – Contributes a mild flavor that complements the meats and cheese.
- Dried oregano – A classic Italian herb that offers earthiness to each bite.
- Dried basil – Provides a slightly sweet and peppery note for freshness.
- Red pepper flakes – Bring in a bit of heat to contrast against creamy cheeses.
- Salt – Essential for enhancing all the flavors in this comforting dish.
- Black pepper – Adds depth and a warm finish to your sandwich profile.
For the Fillings
- Deli-sliced salami – Offers a robust, slightly spicy savory bite.
- Deli-sliced ham – Balances the flavors with its sweetness and smokiness.
- Deli-sliced pepperoni – A bold, tangy flavor that enhances the Italian vibe.
- Deli-sliced mozzarella cheese – Melts into a creamy layer, enhancing that comfort-food appeal.
- Deli-sliced provolone cheese – Adds depth with its slight sharpness and smokiness.
- Grated Parmesan cheese – Crisps up beautifully on top, providing a nutty flavor.
- Roasted red peppers, sliced – Infuse sweetness and smokiness that contrast the richness.
- Sliced black olives – Deliver a briny, tangy kick to balance the savory ingredients.
- Banana peppers, sliced – Add a crunchy, tangy element for a refreshing contrast.
- Fresh basil leaves – Introduce bright, peppery notes for an herbaceous lift.
Get ready to savor every bite of your Baked Italian Grinder Sandwiches!
Step‑by‑Step Instructions for Baked Italian Grinder Sandwiches
Step 1: Preheat the Oven
Begin by preheating your oven to 375°F (190°C). This temperature is perfect for achieving a golden, crispy exterior on your Baked Italian Grinder Sandwiches. Make sure your oven is fully heated before moving on to the next steps, as this will ensure even baking.
Step 2: Prepare the Rolls
Take your Italian sub rolls and carefully slice them in half lengthwise, keeping them attached at one side. This hinge will help the fillings stay intact and create a cozy pocket for all the delicious layers to come. Place the rolls on a baking sheet, cut side up, ensuring there is comfortable spacing between them.
Step 3: Mix the Seasoned Butter
In a small bowl, melt unsalted butter in the microwave or on the stovetop. Once melted, whisk in garlic powder, onion powder, dried oregano, dried basil, red pepper flakes, salt, and black pepper until well blended. This flavorful mixture will give your rolls a delightful taste, enhancing your Baked Italian Grinder Sandwiches.
Step 4: Brush the Rolls
Using a pastry brush, generously apply the seasoned butter over the cut sides of each roll. Make sure to cover them completely to impart that savory goodness. This will not only add flavor but will also help crisp up the bread as it bakes, creating a perfect balance of texture in your sandwiches.
Step 5: Layer the Meats and Cheeses
Start layering the bottom halves of the rolls with slices of salami, ham, and pepperoni, covering them evenly. Follow this with a delightful stack of mozzarella and provolone cheese. The melted cheeses will bring all the flavors together, giving your Baked Italian Grinder Sandwiches that gooey, comforting sensation everyone loves.
Step 6: Add the Veggies
Next, sprinkle roasted red peppers, sliced black olives, and banana peppers on top of the cheese layer. These colorful and tasty additions not only enhance the flavor but also add a fresh crunch to your sandwiches. Finish off this layer with fresh basil leaves for a burst of herbaceous goodness.
Step 7: Bake the Sandwiches
Place the prepared baking sheet in the preheated oven and bake for 10-12 minutes. Keep an eye on your Baked Italian Grinder Sandwiches; they’ll be ready when the cheese is melted and bubbly, and the bread turns a beautiful golden brown.
Step 8: Cool and Serve
Once baked, remove the sandwiches from the oven and let them cool for a few minutes. This will make them easier to cut and serve. Finally, slice them into portions, and enjoy these warm, savory sandwiches. Each bite will showcase the delicious combination of flavors and textures that make this recipe a true comfort food classic!
What to Serve with Baked Italian Grinder Sandwiches
Elevate your dining experience with a few carefully chosen sides that complement the rich, savory flavors of these delicious sandwiches.
-
Crispy French Fries: The perfect crunchy counterpart, dipping fries into marinara adds an extra layer of enjoyment to every meal.
-
Mixed Greens Salad: A light, fresh salad with a zesty vinaigrette will balance the richness of the sandwiches, offering refreshing bites in between.
-
Garlic Parmesan Roasted Vegetables: These add a delightful crunch and earthy flavor, enhancing the overall meal experience. Picture warm, roasted veggies alongside each sandwich bite!
-
Pickles: Their tangy crunch offers a refreshing contrast, cutting through the richness and making every mouthful feel bright and lively.
-
Homemade Potato Chips: For a crispy alternative, serve warm potato chips tossed in herbs and spices, bringing an addictively crunchy texture to the table.
-
Italian Panna Cotta: For dessert, indulge in a creamy panna cotta, light yet decadently rich—it’s the perfect sweet ending to a savory feast!
Make Ahead Options
These Baked Italian Grinder Sandwiches are perfect for busy home cooks looking to save time! You can assemble the sandwiches up to 24 hours in advance; simply layer the meats, cheeses, and veggies inside the rolls, then cover and refrigerate them. This not only ensures the flavors meld beautifully but also keeps the bread from getting soggy. When you’re ready to enjoy, preheat your oven to 375°F (190°C), bake for 10-12 minutes until the cheese is bubbly and the rolls are crispy, and your delicious sandwiches are ready to serve! They’re just as tasty when prepared ahead, making mealtime a breeze.
Baked Italian Grinder Sandwiches Variations
Feel free to make these Baked Italian Grinder Sandwiches your own by swapping in ingredients or tweaking flavors!
- Roll Options: Switch Italian sub rolls for hoagie rolls, French baguettes, or ciabatta for a playful twist on texture.
- Meat Substitutions: Try turkey, chicken, or even roast beef to create a lighter sandwich; for vegetarian guests, grilled veggies work beautifully!
- Cheese Mix: Experiment with different cheeses like gouda for a smokier flavor or pepper jack for an extra kick, delighting cheese lovers.
- Spice it Up: Increase the heat by adding sliced jalapeños or red pepper flakes or opt for a mild version by omitting spicy elements altogether.
- Herbal Infusion: Instead of fresh basil, use spinach or arugula for a fresh, peppery bite, adding fun consistency alongside flavor.
- Flavor Boost: Incorporate sun-dried tomatoes or pesto for an Italian flavor explosion that pairs deliciously with the other sandwich components.
- Crunch Factor: Add a layer of crispy bacon to give your sandwich an extra savory crunch that elevates the comfort food experience.
- Saucy Addition: Drizzle with zesty marinara or creamy ranch dressing right before serving for a final flourish of flavor that everyone will love.
With these variations, the Baked Italian Grinder Sandwiches can cater to everyone’s tastes! If you’re in the mood for something further afield, consider exploring dishes like Baked Cod Coconut or Baked Lemon Butter. Enjoy customizing your cozy Italian comfort!
Storage Tips for Baked Italian Grinder Sandwiches
- Fridge: Wrap cooled sandwiches in parchment paper and store in an airtight container for up to 3 days. Reheat in the oven at 350°F for about 10 minutes to regain crispness.
- Freezer: For longer storage, wrap unbaked sandwiches tightly in plastic wrap followed by aluminum foil, and freeze for up to 3 months. Bake directly from frozen at 375°F for an additional 5-10 minutes.
- Make-Ahead: Assemble your Baked Italian Grinder Sandwiches and refrigerate for up to 24 hours before baking. This way, you can easily pop them in the oven whenever hunger strikes!
- Reheating: To reheat previously baked sandwiches, place them in a preheated oven at 350°F for about 8-10 minutes or until warmed through and crispy again.
Expert Tips for Baked Italian Grinder Sandwiches
-
Evenly Distribution: Ensure the butter and seasoning mix is well blended before brushing, guaranteeing each bite of your Baked Italian Grinder Sandwiches is packed with flavor.
-
Watch the Baking Time: Keep a close eye on your sandwiches as they bake; remove them once the cheese is melted and the bread is golden to avoid an overcooked crust.
-
Use a Serrated Knife: When cutting the sandwiches, opt for a serrated knife. This will help maintain the integrity of the fillings without squashing them.
-
Customize to Taste: Feel free to swap out the meats and veggies based on your preferences. This versatility makes the Baked Italian Grinder Sandwiches a hit with everyone!
-
Make-Ahead Convenience: Prepare these sandwiches in advance and refrigerate them for up to 24 hours before baking. This is perfect for hassle-free weeknight dinners!

Baked Italian Grinder Sandwiches Recipe FAQs
How do I choose the right Italian sub rolls for my sandwiches?
Absolutely! When selecting your Italian sub rolls, look for ones that are fresh, with a slight crusty exterior. They should feel soft to the touch and have a bit of flexibility. Avoid rolls with dark spots or any signs of staleness, as these could affect the sandwich’s overall quality. The ideal roll will hold up well against the fillings and provide that perfect crispy texture when baked.
What’s the best way to store leftovers of Baked Italian Grinder Sandwiches?
Very! If you have any delicious leftovers, wrap the cooled sandwiches in parchment paper and place them in an airtight container. They’ll stay fresh in your refrigerator for up to 3 days. When you’re ready to enjoy them again, simply reheat in a preheated oven at 350°F (about 10 minutes) to restore that crispy outer layer!
Can I freeze Baked Italian Grinder Sandwiches?
Absolutely! To freeze your unbaked sandwiches, wrap them tightly in plastic wrap followed by aluminum foil, and pop them in the freezer. They can be stored for up to 3 months. When you’re ready to bake, remove from the freezer, unwrap, and bake directly at 375°F (190°C) for an additional 5-10 minutes until hot and golden.
How can I adjust the spice level for my sandwiches?
Very! If you prefer a milder flavor, simply reduce or omit the red pepper flakes in the seasoning mix. Alternatively, for those who love heat, consider adding sliced jalapeños in addition to or instead of red pepper flakes. Start with small amounts, taste, and adjust to your liking for a perfectly customized flavor profile.
Are there any dietary considerations I should keep in mind?
Absolutely! If you or your loved ones have specific dietary restrictions, consider using gluten-free rolls or swapping deli meats for your preferred choices—like turkey, chicken, or even grilled veggies for a vegetarian option. Also, ensure there are no allergies to ingredients like olives or peppers, adjusting as needed to delight everyone with your Baked Italian Grinder Sandwiches!

Savory Baked Italian Grinder Sandwiches for Cozy Nights
Ingredients
Equipment
Method
- Preheat your oven to 375°F (190°C).

- Slice the Italian sub rolls in half lengthwise and place them on a baking sheet, cut side up.
- In a bowl, melt unsalted butter and whisk in garlic powder, onion powder, dried oregano, dried basil, red pepper flakes, salt, and black pepper.
- Brush the seasoned butter over the cut sides of the rolls.
- Layer the bottom halves of the rolls with salami, ham, and pepperoni, followed by mozzarella and provolone cheese.
- Add roasted red peppers, black olives, banana peppers, and fresh basil on top of the cheese.
- Bake for 10-12 minutes until the cheese is melted and the bread is golden.
- Allow to cool for a few minutes before slicing and serving.
Leave a Reply