
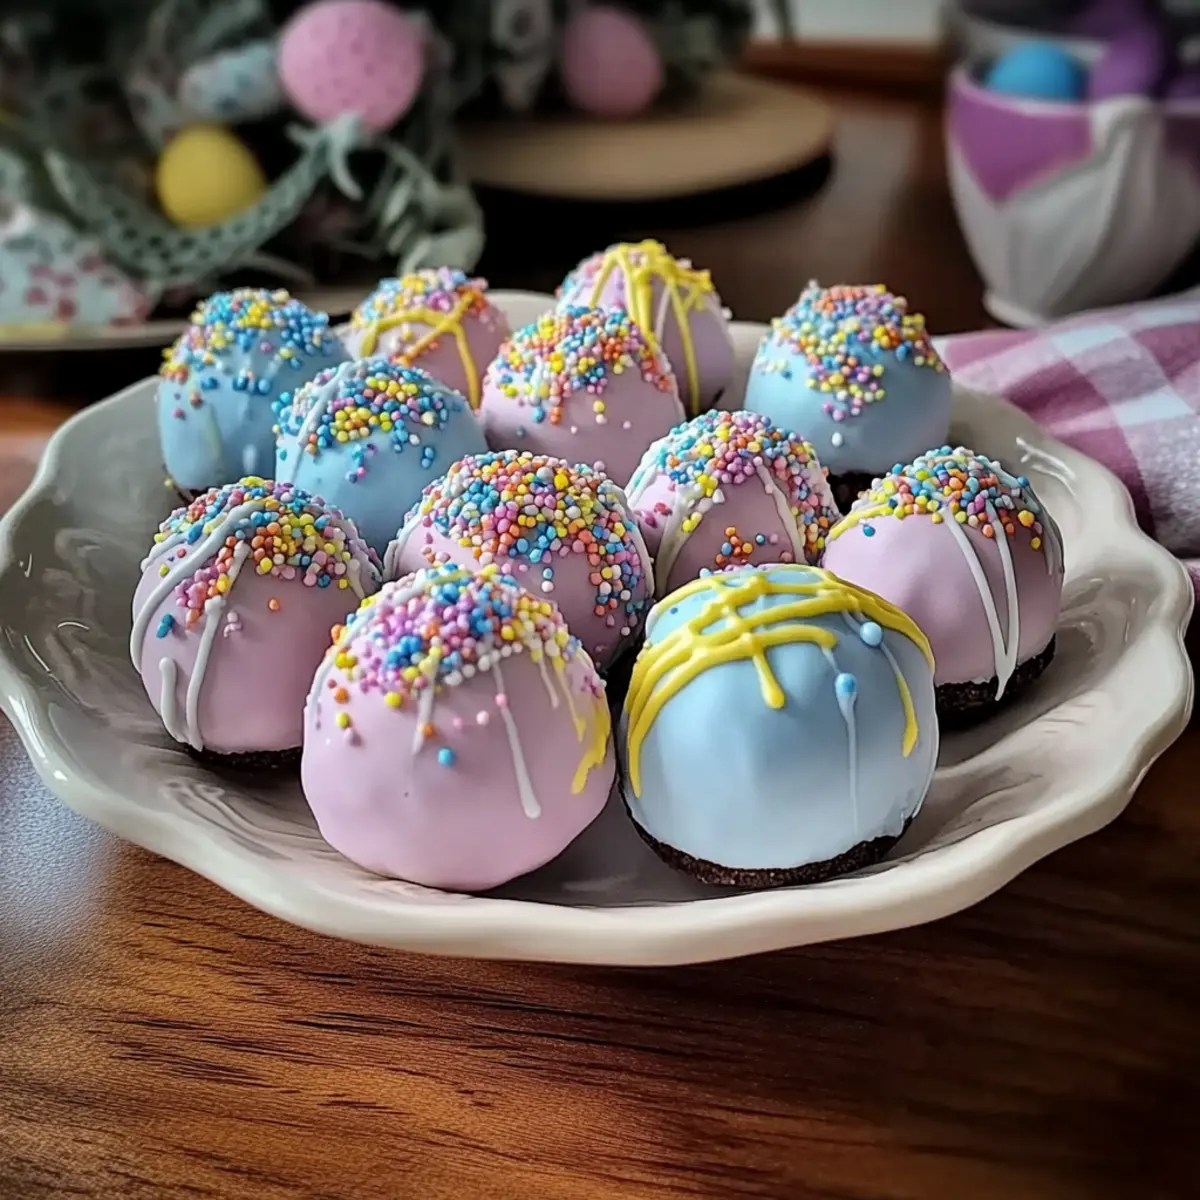
“Can you believe Easter is just around the corner?” I overheard a friend exclaim, eagerly searching for festive treat ideas. That’s when I couldn’t help but share my go-to recipe: No-Bake Easter Egg Oreo Balls. These delightful bites bring the fun back into holiday baking without requiring an oven! Not only are they a quick and easy treat to whip up, but they’re also customizable, making them perfect for kids and adults alike. Each bite features a creamy, chocolatey center wrapped in a colorful candy coating, adding a festive touch to any table. Whether for an Easter gathering or simply to indulge your sweet tooth, these delightful little eggs elevate any occasion. Curious about how to make them and wow your guests? Let’s dive in!
Why Make Easter Egg Oreo Balls?
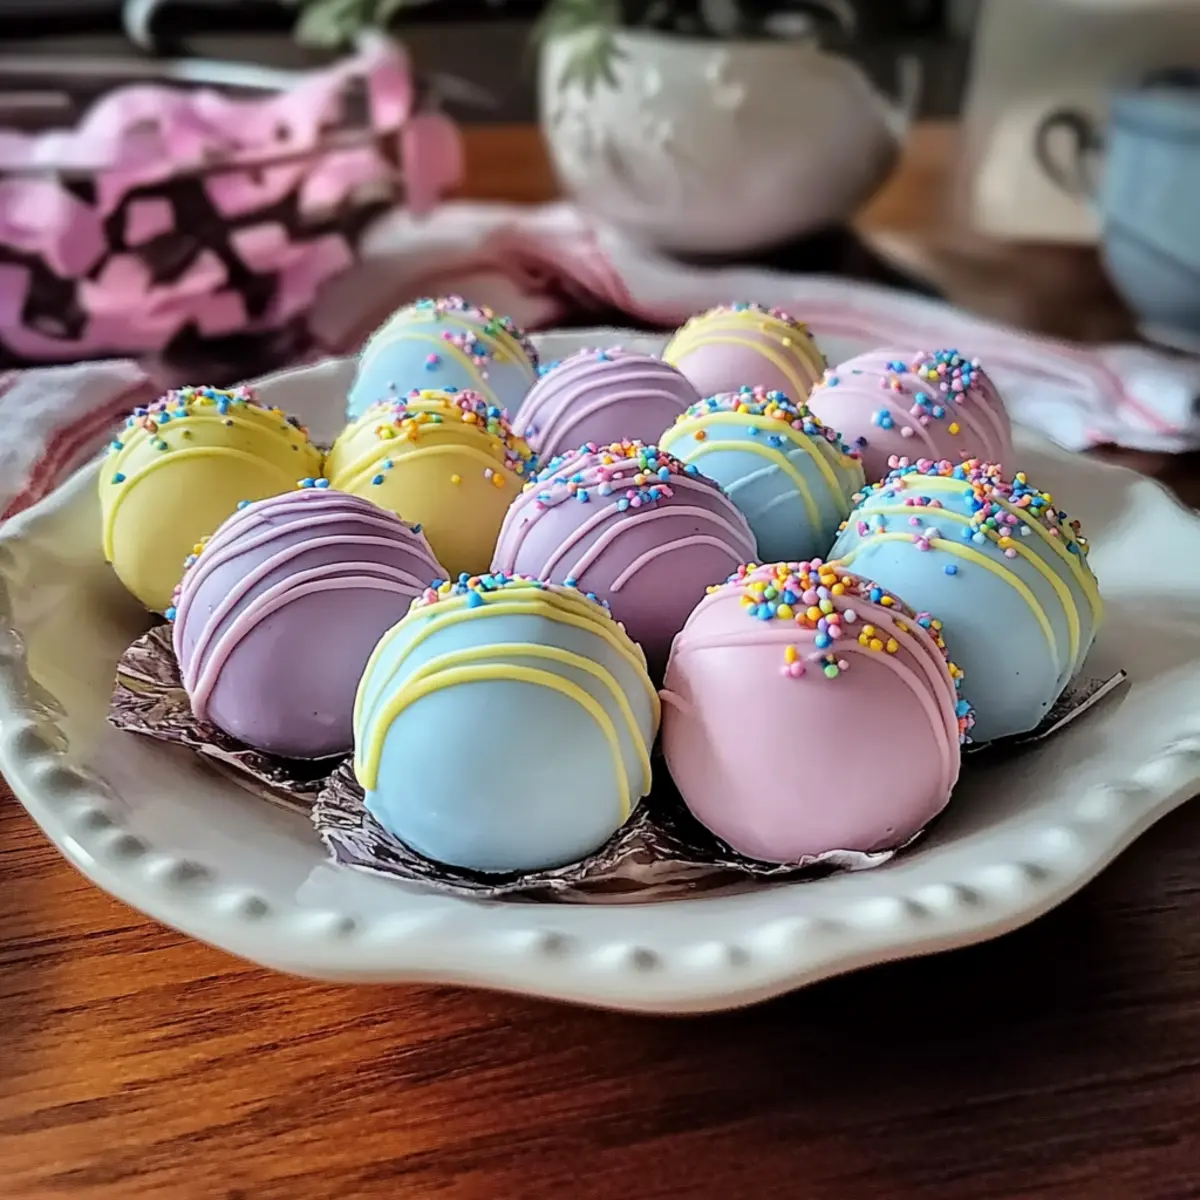
Irresistible, Festive Fun: These delightful treats capture the essence of Easter with their vibrant colors and playful shapes, making them a visual feast.
No-Bake Convenience: No oven? No problem! These easy-to-make Oreo Balls save you time while delivering maximum satisfaction.
Customizable Creations: With simple substitutions like using Golden Oreos or adding your favorite sprinkles, your imagination is the limit.
Kid-Friendly Activity: Engaging kids in the kitchen is a breeze with this no-bake recipe, letting them shape, dip, and decorate their own treats.
Versatile for All Occasions: Whether it’s Easter, birthdays, or just a sweet treat, these Oreo Balls are a hit!
Want more delicious ideas? Check out the Mint Oreo Truffles or give a nod to the classic with Baileys Cheesecake Balls.
Easter Egg Oreo Balls Ingredients
Get ready to create these sweet delights!
For the Filling
- Oreo Cookies – Ideal for a rich, chocolatey base; feel free to use Graham crackers or Golden Oreos if preferred.
- Cream Cheese – Provides a velvety texture; consider reduced-fat or dairy-free cream cheese for a lighter option.
- Vanilla Extract – Optional but adds a lovely depth of flavor to the filling.
For the Coating
- White Candy Melts – Perfect for creating a smooth, colorful shell; substitute with white chocolate chips mixed with 1 tsp coconut oil for added gloss.
- Pastel Food Coloring – Enhances the festive look; gel colorings work best for vibrant results.
For Decoration
- Decorative Sprinkles/Sanding Sugar – Use for a playful touch and visual appeal on your Easter Egg Oreo Balls.
Step‑by‑Step Instructions for Easter Egg Oreo Balls
Step 1: Crush Oreos
Begin by crushing your Oreo cookies into fine crumbs. You can use a food processor for a quick and consistent texture, or place the cookies in a zip-top bag and crush them with a rolling pin. Aim for a fine crumb that resembles sand, which will form the delicious base of your Easter Egg Oreo Balls.
Step 2: Mix Filling
In a large mixing bowl, combine the Oreo crumbs with softened cream cheese and an optional splash of vanilla extract. Use a sturdy spatula or your hands to mix until the ingredients are thoroughly combined and form a thick dough. This creamy mixture should hold together well, making it ready for shaping into delightful egg forms.
Step 3: Shape Truffles
Scoop about 1 tablespoon of the dough and roll it between your palms to create egg shapes. Place each shaped truffle on a parchment-lined baking sheet, ensuring there’s space between them to prevent sticking. The shaping process adds a fun touch, and your Easter Egg Oreo Balls are sure to look adorable!
Step 4: Chill
Once all the truffles are shaped, refrigerate the baking sheet for at least 30 minutes, or you can speed things up by freezing them for 15 minutes. This chilling step helps firm up the Easter Egg Oreo Balls, making them easier to dip in the candy coating later on.
Step 5: Prepare Coating
While the truffles chill, melt your white candy melts in a microwave-safe bowl. Heat in 30-second intervals, stirring in between, until completely smooth. If using white chocolate chips, add 1 teaspoon of coconut oil to achieve a glossy finish. Once melted, divide the mixture and add pastel food coloring for a festive touch.
Step 6: Coat Eggs
Remove the chilled truffles from the refrigerator. Dip each egg-shaped truffle into the melted candy coating, using a fork to lift it out, allowing excess to drip off. Return each coated truffle to the parchment-lined baking sheet. The colorful coating will create an eye-catching outer shell for your Easter Egg Oreo Balls.
Step 7: Decorate
Before the candy coating sets, get creative by adding sprinkles or a drizzle of contrasting chocolate on top. This step adds a fun and festive flair to your Easter Egg Oreo Balls, making them even more irresistible as they await the final hardening.
Step 8: Set
Allow the coating to harden at room temperature for about 15 minutes, or expedite the process by chilling them in the fridge for 10 minutes. Once set, your vibrant, enticing Easter Egg Oreo Balls are ready to be enjoyed or beautifully arranged for your springtime celebrations!

Storage Tips for Easter Egg Oreo Balls
-
Fridge: Keep your Easter Egg Oreo Balls in an airtight container in the refrigerator for up to 5 days. This ensures they stay fresh and creamy, ready to delight your taste buds.
-
Freezer: For longer storage, you can freeze the Oreo Balls for up to 2 months. Just make sure they’re well-wrapped in plastic wrap and stored in a freezer-safe container to prevent freezer burn.
-
Thawing: When you’re ready to enjoy your frozen treats, simply transfer them to the fridge to thaw for a few hours before serving. This helps maintain their delicious texture.
-
Reheating: Unlike baked goods, these no-bake treats are best enjoyed cold or at room temperature. Avoid reheating in the microwave, as it can alter their delightful creamy center.
Expert Tips for Easter Egg Oreo Balls
-
Uniform Size: Ensure the truffles are rolled into uniform egg shapes for consistent coating and a professional look.
-
Smooth Coating: Melt the white candy melts until completely smooth to avoid lumps. This creates a glossy and appealing shell for your Easter Egg Oreo Balls.
-
Color Gradation: When adding pastel food coloring, start with just a drop; you can always add more to achieve your desired hue without overwhelming the candy melts.
-
Before Decorating: Add decorations like sprinkles immediately after coating while it’s still warm so they adhere nicely. If you wait too long, they won’t stick.
-
Chill Between Steps: Don’t skip the chilling step after shaping the truffles—this makes dipping in the coating much easier and helps maintain their shape.
Make Ahead Options
These delightful Easter Egg Oreo Balls are perfect for meal prep, making your busy days a little sweeter! You can easily prepare the filling by mixing the Oreo crumbs and cream cheese up to 24 hours in advance. Just store the mixture in an airtight container in the refrigerator to maintain its creamy texture. Additionally, you can shape the truffles and refrigerate them for up to 3 days before coating. When you’re ready to serve, simply dip the chilled truffles in the melted candy coating and decorate as desired. This way, you’ll have irresistibly festive treats that taste just as delicious without the hassle of last-minute preparation!
What to Serve with Easter Egg Oreo Balls?
Elevate your dessert table by pairing these festive treats with delightful accompaniments that enhance their charm and taste.
- Fresh Berries: The tartness of strawberries or raspberries complements the sweetness of the Oreo Balls, adding a refreshing balance.
- Vanilla Ice Cream: A scoop of creamy vanilla ice cream creates a dreamy contrast, making every bite indulgent and satisfying.
- Chocolate Fondue: Set up a chocolate fountain for dipping fruits and the Oreo Balls themselves, creating an interactive and fun dessert experience.
For a delightful touch, consider adding a platter of assorted cookies or mini pastries to round out your dessert display.
- Sparkling Lemonade: A bubbly lemonade or other citrus drink brings brightness to the table and offsets the richness of the treats beautifully.
- Mini Cupcakes: Cute, colorful mini cupcakes add variety to your dessert offerings and are always a hit with guests of all ages.
- Coffee or Hot Chocolate: Warm beverages like coffee or hot chocolate provide a cozy touch and make for a comforting pairing with the sweet Oreo Balls.
Easter Egg Oreo Balls Variations
Feel free to get creative with these delightful treats, tweaking them to match your taste and style!
-
Golden Oreo Substitute: Use Golden Oreos for a lighter, sweeter version that adds a different twist to the traditional flavor.
-
Dark Chocolate Coating: Swap out the white candy melts for dark chocolate for a rich, decadent contrast that chocolate lovers will adore.
-
Coconut Roll: Skip the coating entirely and roll your truffles in shredded coconut for a tropical vibe that’s simply amazing.
-
Holiday Themes: Customize decorations based on other holidays—think red and green sprinkles for Christmas or pastel colors for a spring gathering.
-
Nutty Touch: Add chopped nuts to the filling for an extra crunch, or roll the truffles in crushed nuts for a delightful texture contrast.
-
Minty Freshness: For a refreshing twist, incorporate a few drops of mint extract into the filling, offering a unique flavor that’s reminiscent of decadent mint desserts.
-
Mini Egg Version: Shape the mixture into smaller, bite-sized balls for a fun treat that’s perfect for snacking or dessert tables.
-
Flavor Infusions: Experiment with flavored extracts like almond or hazelnut to give your filling a delicious new personality.
Want to try some exciting variations? You might enjoy adding a personal touch to your treats by checking out Mint Oreo Truffles or switching things up with some Baileys Cheesecake Balls.
Easter Egg Oreo Balls Recipe FAQs
What kind of Oreo cookies should I use?
Absolutely! Regular Oreo cookies work perfectly as the base for these treats, giving that chocolatey flavor we all love. However, feel free to experiment with Graham crackers or Golden Oreos for a different taste. Each option will still yield delightful results!
How should I store my Easter Egg Oreo Balls?
Store your Easter Egg Oreo Balls in an airtight container in the refrigerator for up to 5 days. For longer storage, you can freeze them for up to 2 months. Just be sure they’re well-wrapped in plastic wrap and placed in a freezer-safe container to keep them fresh.
Can I freeze these Easter Egg Oreo Balls? How?
Yes, you can freeze these tasty treats! To freeze, place the individually coated Oreo Balls on a baking sheet in a single layer and freeze until solid. Then transfer them to a freezer-safe container or wrap them in plastic wrap. For serving, let them thaw in the refrigerator for a few hours before enjoying them again!
Why is my candy coating not smooth?
If your candy coating isn’t smooth, it could be due to the candy melts not being fully melted or heating too quickly. I recommend melting the candy melts in 30-second intervals and stirring well in between until completely smooth. Also, remember to add a teaspoon of coconut oil if using chocolate chips to achieve that glossy finish!
Are these Easter Egg Oreo Balls pet-friendly?
No, these delicious treats are not safe for pets. Both chocolate from the Oreo cookies and cream cheese may cause health issues in animals, particularly dogs and cats. Always keep these delightful confections out of reach from your furry friends to avoid any mishaps.
Can I adapt the recipe for allergies?
Certainly! To make this recipe more allergy-friendly, use dairy-free cream cheese alternatives and consider using gluten-free Oreos for a gluten-free version. Additionally, always check the labels for any potential allergenic ingredients, especially in toppings and colorings.

Easter Egg Oreo Balls: Irresistibly Fun No-Bake Treats
Ingredients
Equipment
Method
- Begin by crushing your Oreo cookies into fine crumbs.
- Combine the Oreo crumbs with softened cream cheese and vanilla extract.
- Scoop about 1 tablespoon of the dough and roll it into egg shapes.
- Refrigerate the shaped truffles for at least 30 minutes.
- Melt the white candy melts in a microwave-safe bowl.
- Dip each egg-shaped truffle into the melted candy coating.
- Decorate with sprinkles before the coating sets.
- Allow the coating to harden at room temperature.
Leave a Reply