
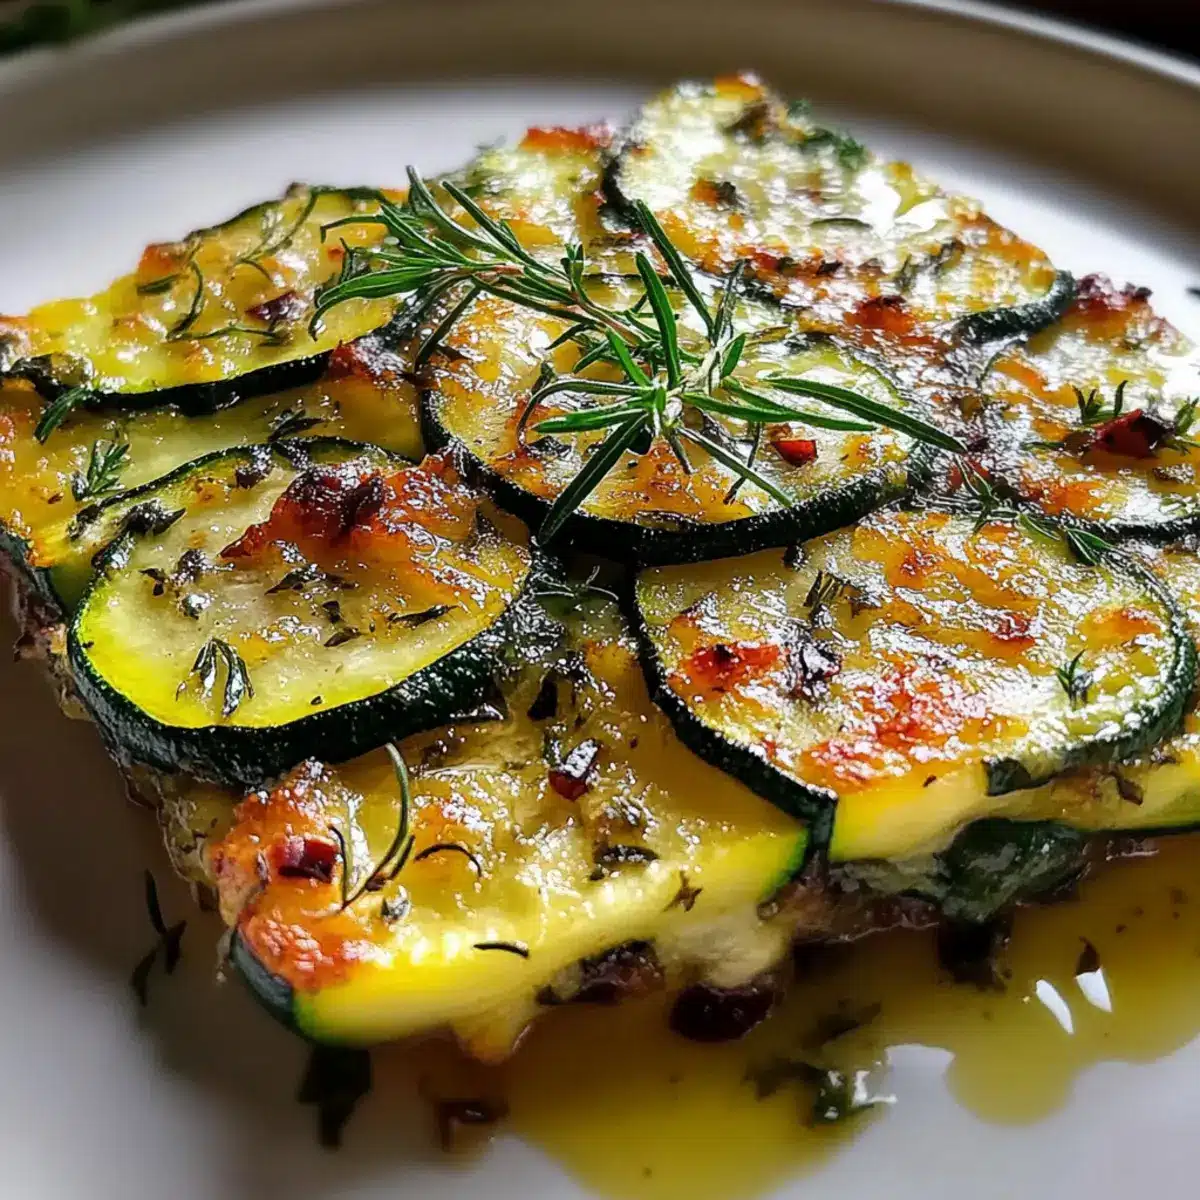
As I wandered through the bustling markets of Tuscany, I stumbled upon a delightful dish that captures the essence of summer: Italian Zucchini Scarpaccia. This rustic bake is a celebration of tender zucchini, embraced by a golden crust and accented with nutty Parmesan and fragrant thyme. What sets this recipe apart is how effortlessly it combines seasonal ingredients to create a dish that serves beautifully both warm and at room temperature. Perfect as an appetizer or a light main course, it’s a quick triumph that will have your friends and family begging for seconds. Trust me, with its simple preparation and the ability to make ahead, this versatile vegetarian delight will quickly become a staple in your kitchen. Ready to uncover the magic of this rustic Italian treat?
Why is Scarpaccia a Must-Try Dish?
Rustic Charm: Each bite of this Italian Zucchini Scarpaccia transports you to sun-kissed Tuscan markets, celebrating seasonal zucchini like no other dish.
Simple Preparation: With easy-to-follow steps, this recipe is approachable for both novice cooks and seasoned chefs alike.
Flavorful Fusion: The earthy taste of fresh zucchini blends beautifully with nutty Parmesan and aromatic thyme, creating a flavor profile that delights.
Versatile Serving: Perfect as an appetizer, side dish, or light main course, it pairs effortlessly with a crisp salad or yogurt dipping sauce for added zest.
Make-Ahead Friendly: Prepare ahead of time, store in the fridge, and simply reheat for an effortless meal solution. For more zucchini-inspired recipes, check out our article on zucchini cooking techniques.
Italian Zucchini Scarpaccia Ingredients
For the Batter
- Zucchini – Adds moisture and tender texture; substitute with yellow squash if desired.
- All-purpose flour – Provides structure and chewiness; consider whole wheat flour for added heartiness.
- Cornmeal – Contributes a unique crunch and subtle sweetness; polenta can be a substitute.
- Baking powder – Acts as a leavener to create a light texture; make sure it’s fresh for best results.
- Salt – Enhances overall flavor; can be reduced for a low-sodium option.
- Black pepper – Provides warmth and enhances savory notes; adjust to your taste.
For the Flavor
- Eggs – Bind ingredients and enrich the batter for fluffiness; egg substitutes can work when needed.
- Whole milk – Adds creaminess and hydrates dry ingredients; almond or oat milk can serve as alternatives.
- Olive oil – Adds richness and moisture; avocado oil is a good swap.
- Parmesan cheese – Brings salty umami flavor and aids in browning; Pecorino or mozzarella are excellent replacements.
- Fresh thyme – Delivers aromatic notes; use 1 teaspoon dried thyme for every tablespoon fresh.
- Pine nuts (optional) – Introduces crunch and mild sweetness; omit if following a nut-free diet.
- Garlic (minced) – Infuses savory essence throughout; adjust quantity according to your preference.
Finishing Touches
- Olive oil for drizzling – Promotes browning and enhances flavor, tying all ingredients beautifully together.
Dive into this delightful Italian Zucchini Scarpaccia, and let the vibrant flavors and comforting textures whisk you away to a Tuscan afternoon!
Step‑by‑Step Instructions for Italian Zucchini Scarpaccia
Step 1: Preheat and Prepare the Baking Pan
Begin by preheating your oven to 375°F (190°C). While the oven warms up, grease a 9×13-inch baking pan with olive oil or line it with parchment paper for easy removal later. This preparation ensures your Italian Zucchini Scarpaccia bakes evenly, with the edges getting an appetizing golden brown hue.
Step 2: Combine Dry Ingredients
In a large mixing bowl, whisk together the all-purpose flour, cornmeal, baking powder, salt, and black pepper until fully blended. This step adds essential flavor and structure to your dish, setting the foundation for a savory and satisfying bake. The dry mixture should have a uniform texture, ready for the wet ingredients.
Step 3: Mix Wet Ingredients
In a separate bowl, crack in the eggs and whisk until smooth. Add the whole milk and olive oil, and mix until the ingredients are thoroughly combined. This wet mixture will create a luscious batter for your Italian Zucchini Scarpaccia, binding everything together beautifully.
Step 4: Combine Wet and Dry Mixtures
Gently pour the wet ingredients into the bowl with the dry mixture, stirring lightly until just combined. Be careful not to overmix, as this can lead to a dense texture. The batter should remain slightly lumpy to maintain that tender quality you’re aiming for in your rustic bake.
Step 5: Fold in Flavorful Additions
Carefully fold in the sliced zucchini, minced garlic, grated Parmesan cheese, fresh thyme, and pine nuts (if using) into the batter. The zucchini should be evenly distributed throughout, ensuring every piece of your Italian Zucchini Scarpaccia boasts that delightful flavor. The mixture will be slightly thick but should still flow easily.
Step 6: Transfer to Baking Pan
Pour the zucchini batter into your prepared baking pan, spreading it evenly with a spatula. Drizzle a bit of olive oil on top to encourage browning and add flavor during baking. This ensures that the edges become golden and crispy while the center remains soft and moist—a perfect contrast in textures.
Step 7: Bake to Perfection
Insert the baking pan into your preheated oven and bake for 35-40 minutes. You’ll know it’s done when the edges are golden brown and the top feels firm to the touch. The sultry aroma of Italian Zucchini Scarpaccia wafting through your kitchen will entice everyone nearby, hinting at the delicious treat awaiting them.
Step 8: Cool and Serve
Once baked, remove the pan from the oven and let it cool for about 10 minutes. This resting time allows the scarpaccia to firm up slightly, making it easier to slice. Cut into squares, serve warm, and watch as your family and friends savor every bite of this delightful Italian dish!

Expert Tips for Italian Zucchini Scarpaccia
-
Avoid Overmixing: Gently fold the ingredients to maintain that tender texture; overmixing can result in a dense bake.
-
Thinly Slice Zucchini: Ensuring even cooking and integration into the batter will provide a consistent flavor and texture throughout your scarpaccia.
-
Fresh Baking Powder: Always check the freshness of baking powder to guarantee a light and fluffy outcome in your Italian Zucchini Scarpaccia.
-
Crispy Leftovers: For the crispiest result, reheat your leftover scarpaccia in a preheated oven rather than in the microwave, ensuring it retains that perfect texture.
-
Customize Flavors: Don’t hesitate to experiment with different cheeses or herbs to enhance your dish with your favorite flavors!
Make Ahead Options
These Italian Zucchini Scarpaccia are perfect for meal prep enthusiasts! You can prepare the batter up to 24 hours in advance; simply mix the dry and wet ingredients separately, but hold off on adding the zucchini until you’re ready to bake. This keeps the zucchini fresh and prevents excess moisture from making the batter soggy. When ready to cook, fold the zucchini into the batter and pour it into your greased baking pan. Bake as directed, and you’ll have a delicious, rustic dish ready with minimal last-minute effort. Store any leftovers in an airtight container in the refrigerator for up to 3-4 days, ensuring they remain just as delightful when reheated!
What to Serve with Italian Zucchini Scarpaccia
Indulge in a delightful medley of flavors that perfectly complements this rustic Italian bake.
- Arugula Salad: A peppery salad with a lemon vinaigrette adds a fresh bite, balancing the savory richness of the scarpaccia.
- Garlic Bread: This buttery, crusty bread offers a satisfying crunch alongside the soft, moist scarpaccia. The flavors meld beautifully together.
- Roasted Cherry Tomatoes: Their sweet and tangy burst of flavor pairs well with the earthiness of the zucchini, enhancing the overall experience.
- Classic Tzatziki Sauce: This creamy yogurt dip provides a cooling contrast, making each bite of scarpaccia even more refreshing.
- Crispy Polenta Fries: The crunchy polenta adds a delightful texture while echoing the golden crust of the scarpaccia itself.
- White Wine Spritzer: A light, chilled spritzer complements the dish, enhancing the flavors without overpowering the delicate zucchini notes.
- Lemon Sorbet: As a light dessert, it cleanses the palate after the richness of the scarpaccia and rounds out a lovely meal.
- Prosciutto-Wrapped Melon: This sweet and salty pairing brings a vibrant touch that livens the dining experience and adds an element of surprise.
- Olive Oil Cake: A subtle, moist cake topped with citrus notes ties in beautifully with the Italian theme, providing a lovely finish to the meal.
How to Store and Freeze Italian Zucchini Scarpaccia
Fridge: Store leftovers in an airtight container for up to 3-4 days. This will keep your Italian Zucchini Scarpaccia fresh while maintaining its delicious flavor and texture.
Freezer: Wrap individual portions tightly in plastic wrap and place them in a freezer bag for up to 2 months. This is great for easy meal prep and quick reheating later!
Reheating: When you’re ready to enjoy, reheat in a preheated oven at 350°F (175°C) for about 15-20 minutes. This restores the crispy edges and ensures a delightful eating experience.
Cooling: Let the scarpaccia cool completely before storing to prevent condensation, which can make it soggy. Enjoy your flavorful dish even after it has been stored!
Italian Zucchini Scarpaccia Variations
Feel free to embrace your culinary creativity and customize this recipe to fit your taste and dietary needs!
-
Dairy-Free: Substitute Parmesan cheese with nutritional yeast or a dairy-free alternative to maintain flavor without the cheese.
-
Gluten-Free: Use a gluten-free flour blend in place of all-purpose flour for those avoiding gluten. Your scarpaccia will still be delightful and satisfying.
-
Nut-Free: Omit the pine nuts or replace them with pumpkin seeds for a similar crunch without the allergens.
-
Spicy Kick: Add a pinch of red pepper flakes to the batter for a warm, spicy twist that adds excitement to each bite.
-
Veggie Boost: Fold in extra veggies like bell peppers, spinach, or diced tomatoes to skyrocket the flavor and nutritional value. Just be mindful of moisture—squeeze out excess liquid if necessary.
-
Herb Infusion: Fresh herbs like basil or oregano can be used instead of thyme, providing a fragrant twist. Imagine the aromatic symphony wafting through your kitchen!
-
Cheese Alternatives: Experiment with different cheeses like feta for a tangy flavor or cheddar for a sharp, creamy richness that complements the zucchini beautifully.
-
Caramelized Onions: Adding sautéed onions can bring sweetness and complexity. The rich, sweet flavor pairs wonderfully with the zucchini, creating new layers of taste!
Feel inspired? With these variations, you can make your Italian Zucchini Scarpaccia uniquely yours. If you’re looking for more ideas, check out our article on seasonal veggie recipes!
Italian Zucchini Scarpaccia Recipe FAQs
How do I choose the right zucchini for this recipe?
Absolutely! Select zucchini that are firm, unblemished, and medium-sized for the best texture. Look for a glossy skin and avoid those with dark spots all over, as they indicate overripeness. If you can’t find zucchini, yellow squash makes a lovely alternative!
What’s the best way to store leftover Italian Zucchini Scarpaccia?
Very! Store any leftovers in an airtight container in the refrigerator for up to 3-4 days. This keeps it fresh, retaining its delicious flavors. If you’re making it ahead of time, you can freeze portions; just make sure they’re tightly wrapped to prevent freezer burn.
Can I freeze Italian Zucchini Scarpaccia? If so, how?
Absolutely! To freeze, allow your scarpaccia to cool completely first. Then, wrap individual squares tightly in plastic wrap and place them in a freezer-safe bag. Label them with the date, and they’ll stay good for up to 2 months. When you’re ready to enjoy, reheat in a preheated oven at 350°F (175°C) for about 15-20 minutes until warmed through.
What should I do if my scarpaccia is too dense?
If your Italian Zucchini Scarpaccia turns out dense, it might be due to overmixing the batter or too much flour. For future attempts, make sure to hand-fold the ingredients gently and measure the flour accurately—scooping directly from the bag can lead to adding too much. Remember, a little lumpiness in the batter is perfectly fine!
Are there any dietary concerns with Italian Zucchini Scarpaccia?
Very! If you’re concerned about allergies, this recipe contains wheat and dairy. For gluten-free options, try substituting all-purpose flour with a gluten-free blend. Dairy can easily be replaced with almond or oat milk and nutritional yeast can stand in for Parmesan for a vegan option. Always check ingredient labels to ensure they meet your dietary needs.
How do I know when my scarpaccia is fully baked?
You’ll know it’s done when the top is firm to the touch and the edges are a lovely golden brown, typically after 35-40 minutes of baking. If it jiggles in the center, it may need a few more minutes in the oven. Take a peek through the oven door—don’t open it too often though, as this can cause the bake to sink!
Italian Zucchini Scarpaccia: A Cozy Summer Bake Delight
Ingredients
Equipment
Method
- Preheat your oven to 375°F (190°C) and grease a 9×13-inch baking pan with olive oil.
- In a large bowl, whisk together the all-purpose flour, cornmeal, baking powder, salt, and black pepper.
- In a separate bowl, whisk the eggs until smooth, then add the milk and olive oil, mixing well.
- Gently combine the wet ingredients into the dry mixture, stirring until just mixed.
- Fold in the sliced zucchini, garlic, Parmesan, thyme, and pine nuts (if using) until evenly mixed.
- Pour the batter into the prepared pan and drizzle a little olive oil on top.
- Bake for 35-40 minutes until the edges are golden brown and the top feels firm.
- Let it cool for about 10 minutes before slicing into squares and serving warm.
Leave a Reply