
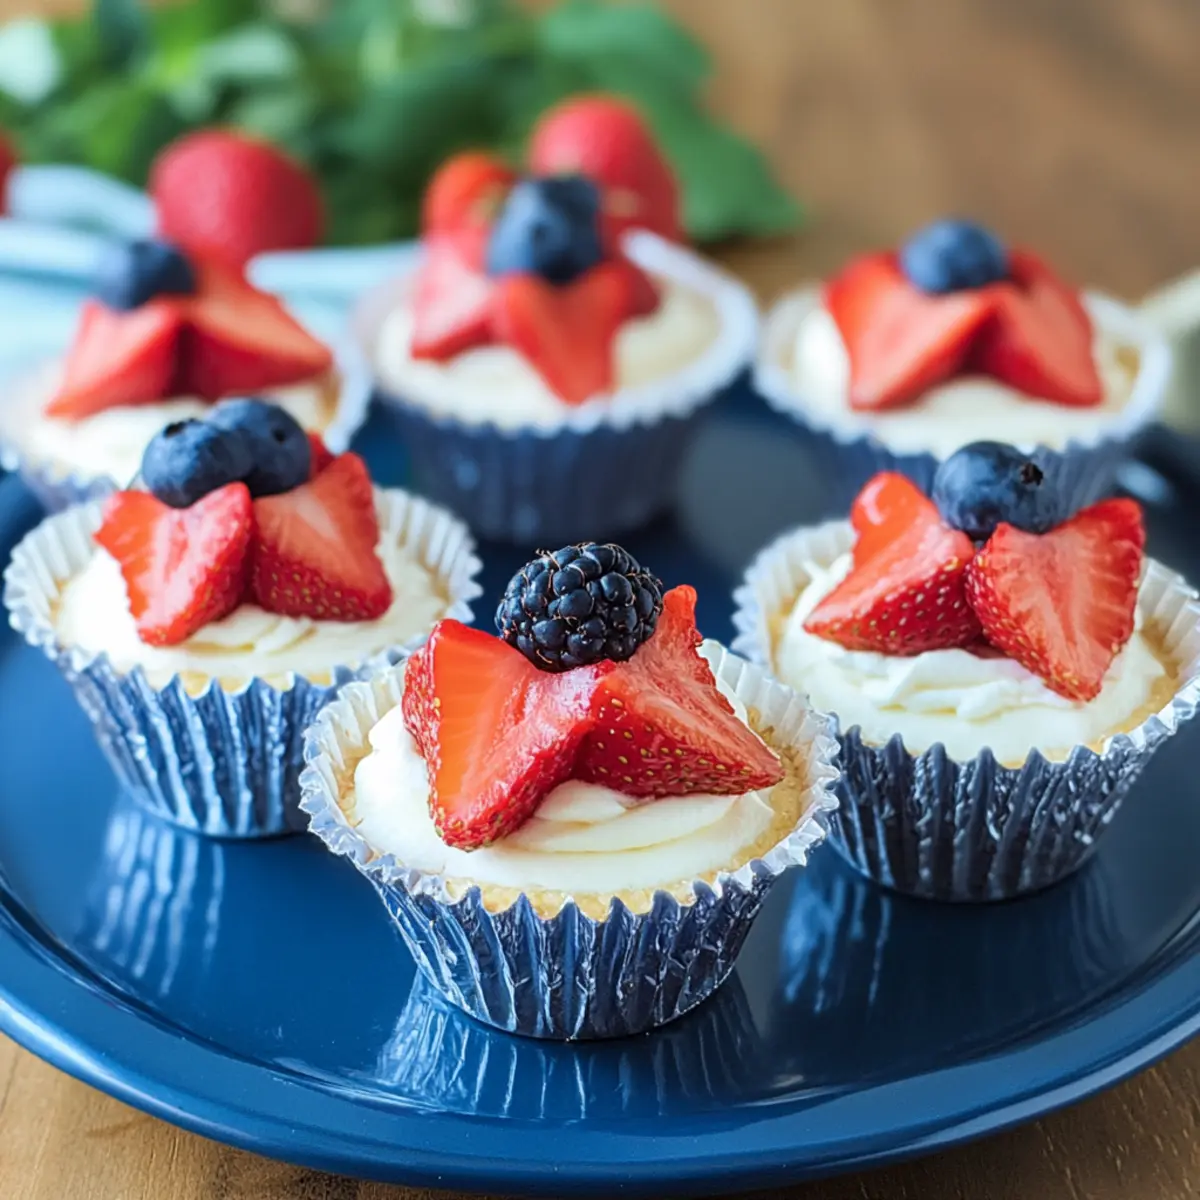
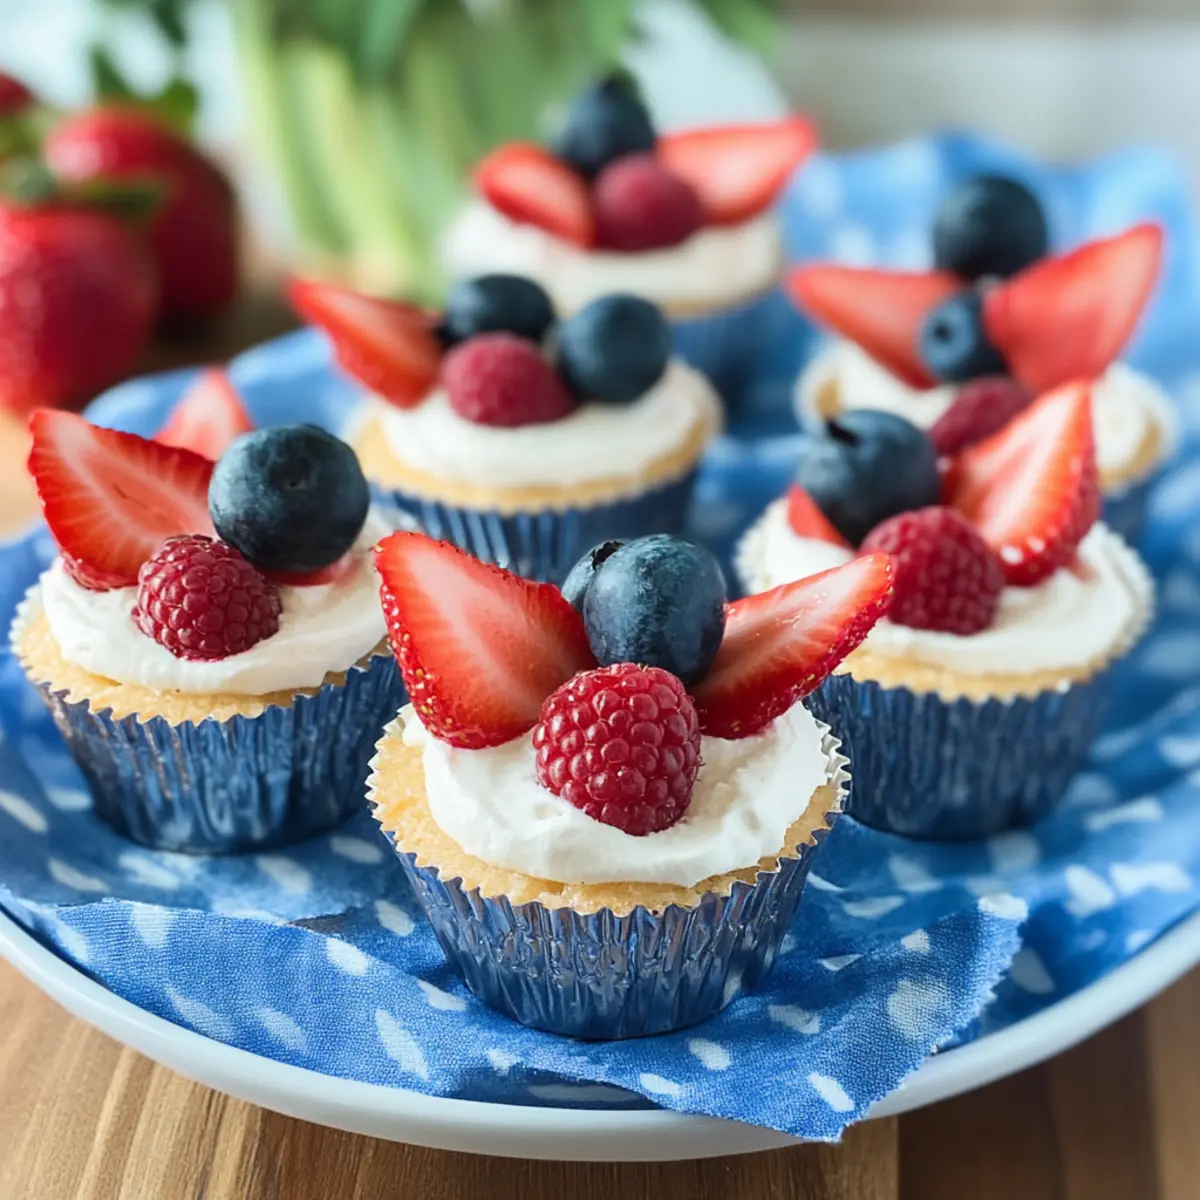
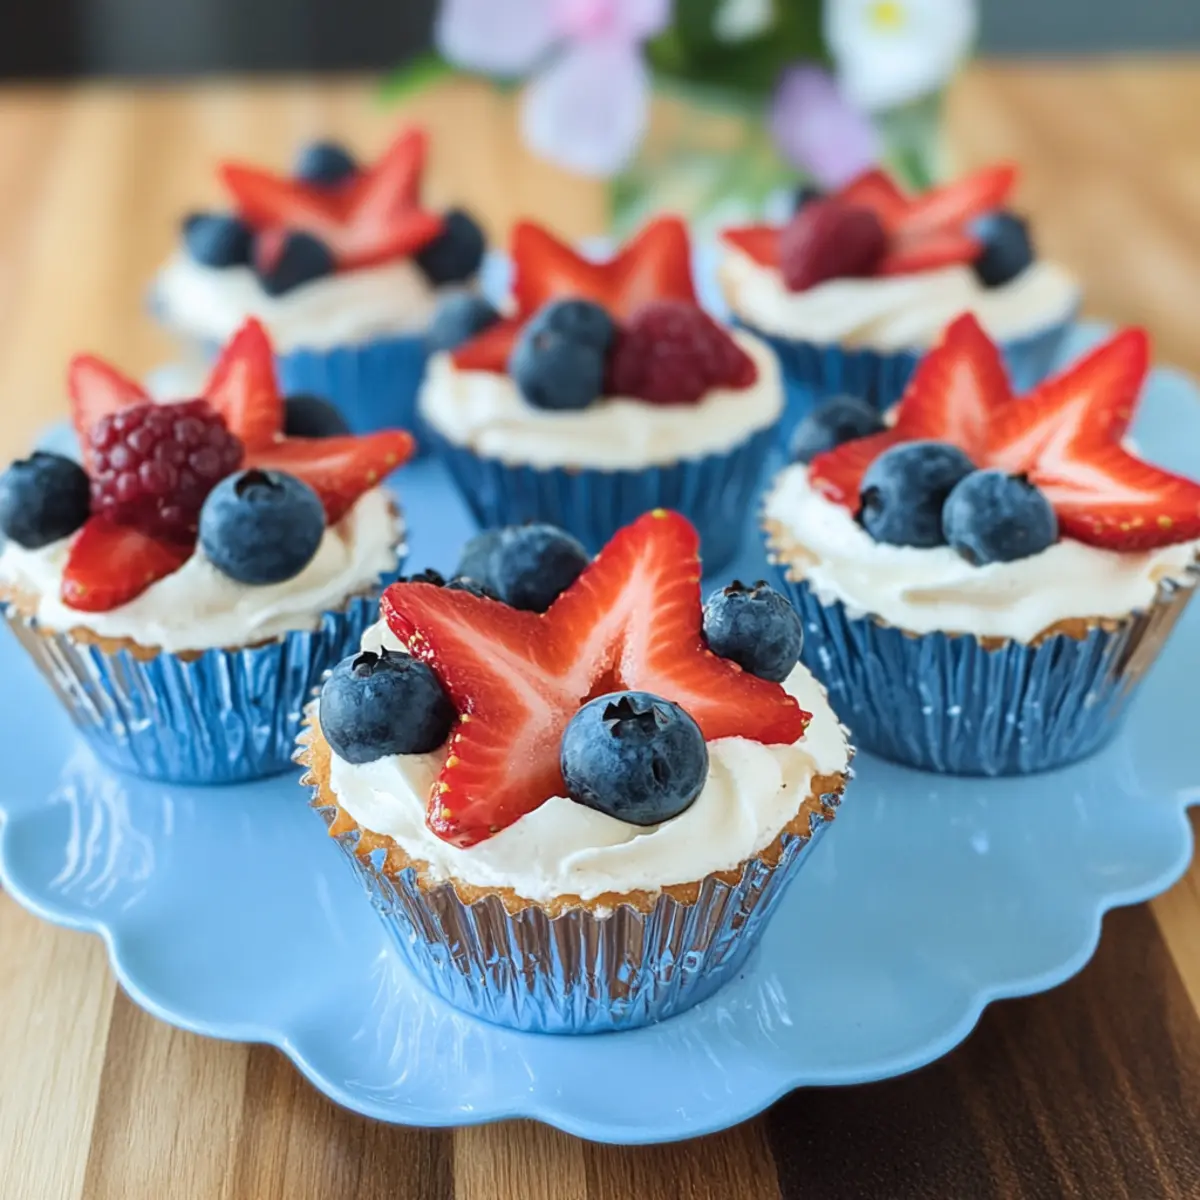
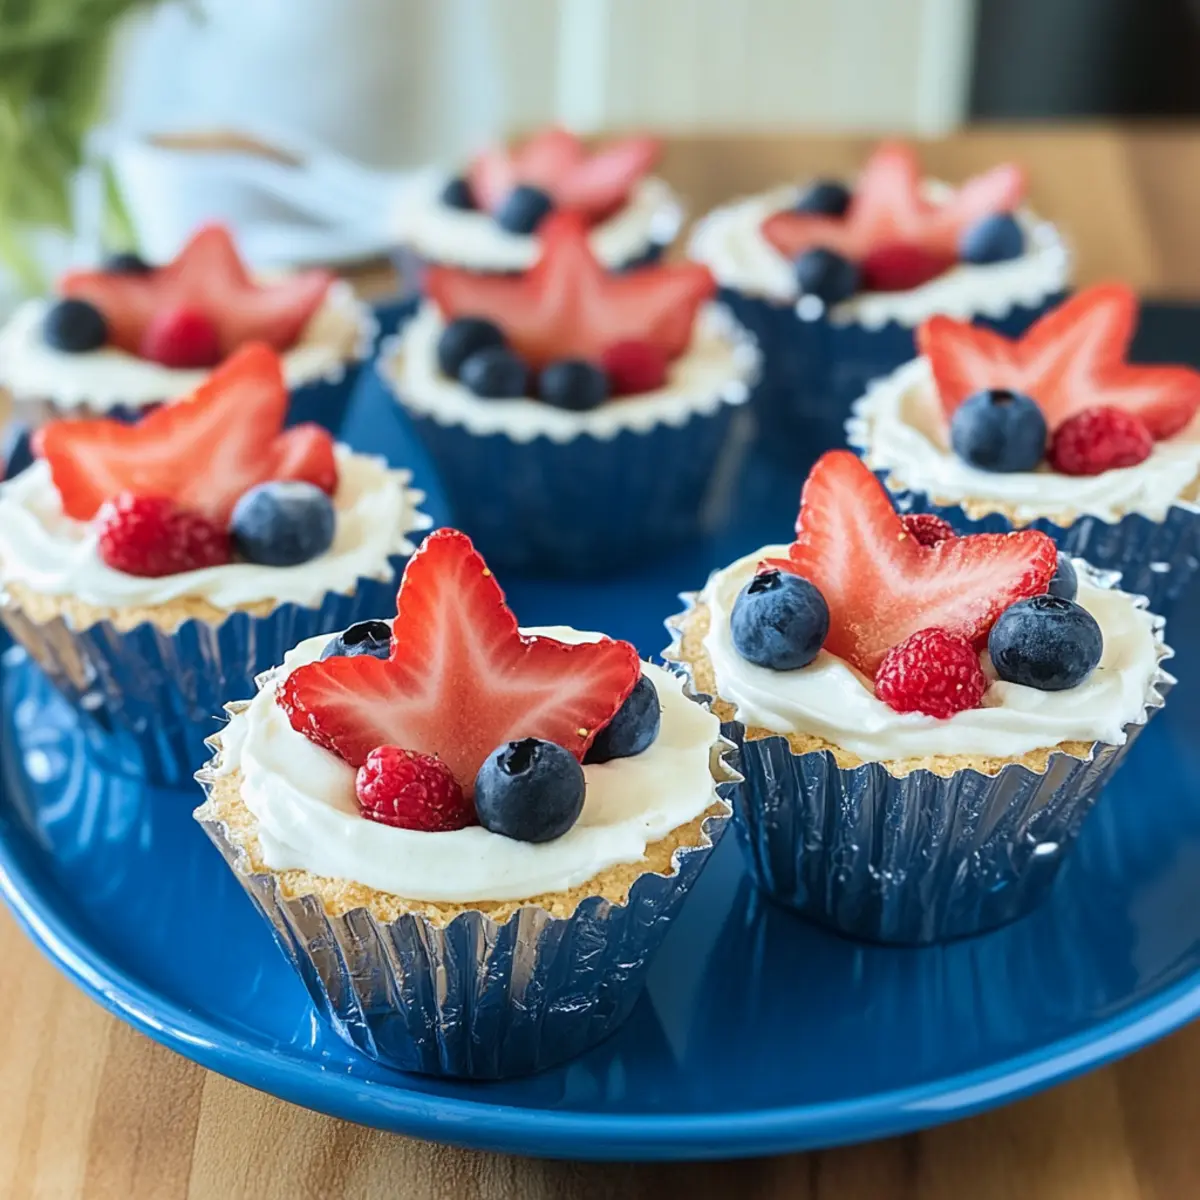
As the warm sun sets on a summer evening, the air fills with laughter and the tantalizing scent of grilled fare. That’s the perfect moment to unveil my No-Bake Cheesecake Cups, a dessert designed to elevate any gathering, from Memorial Day picnics to festive Fourth of July celebrations. These delightful little cups are not only a breeze to prepare but also offer a refreshing twist on traditional cheesecake with their light and airy texture. The creamy filling, sweetened with honey and brightened with a hint of lemon, is balanced by a crunchy cookie crust and topped with vibrant berries for a pop of color. They make for an elegant yet simple dessert that will leave your guests asking for seconds. Are you ready to become the star of your next summer bash? Let’s dive into this easy recipe!
Why Will You Adore These Cheesecake Cups?
Easy Preparation: You don’t need baking skills to impress your guests. Just mix, layer, and chill!
Refreshing and Light: These cups are a creamy delight, perfectly balanced with zesty lemon and sweet honey, offering a refreshing bite that screams summer.
Versatile Servings: Great for any occasion—be it Memorial Day or the Fourth of July—these individual portions are easy to serve and prevent the mess that comes with larger cakes.
Crowd-Pleasing Appeal: With their vibrant berry toppings, these No-Bake Cheesecake Cups not only taste amazing but also look beautiful on any dessert table. Your friends and family will rave about them, just like they did for my Gingerbread Cheesecake Cups!
Guilt-Free Indulgence: Lower in calories and sugar than traditional recipes, you can enjoy these sweet treats without the guilt. Don’t forget to check out my Chocolate Cheesecake Bars for another tasty, light option!
No-Bake Cheesecake Cups Ingredients
• Note: This list will cover all the essentials you’ll need to create these delightful No-Bake Cheesecake Cups!
For the Crust
- Crushed Coconut or Vanilla Cookies – Provides the dessert’s crust, adding sweetness and crunch; substitute with graham crackers for a traditional base.
- Toasted Unsweetened Coconut – Adds texture and a subtle nutty flavor; use sweetened coconut if preferred, but note it will increase sweetness.
- Butter (melted) – Binds the crust ingredients together; unsalted butter is recommended for better control over salt levels.
For the Filling
- Vanilla Greek Yogurt – Acts as a creamy base and contributes protein; substitute with plain Greek yogurt for a tangier twist.
- Cream Cheese (at room temperature) – The key player for that rich cheesecake texture; opt for low-fat cream cheese for a lighter option.
- Raw Honey – Naturally sweetens the filling with a delicious flavor; maple syrup can serve as a vegan alternative.
- Zest of 1 Lemon – Infuses the mixture with a fresh, citrusy note; lemon extract can be a suitable substitute for a more intense flavor.
- Kosher Salt – Balances the sweetness; table salt can be used in smaller amounts since it’s more concentrated.
For the Topping
- Assorted Berries – Adds a fresh, colorful finish; mix strawberries, blueberries, or raspberries based on availability.
- Optional Toppings – Toasted coconut can provide a delightful crunch atop the berries for an extra layer of flavor.
Step‑by‑Step Instructions for No-Bake Cheesecake Cups
Step 1: Prepare Crust
Using a food processor, pulse crushed coconut or vanilla cookies until they form fine crumbs. In a mixing bowl, combine the cookie crumbs with toasted coconut and melted butter until they’re well incorporated. Take about 1 tablespoon of this mixture and evenly press it into the bottom of muffin liners in a muffin tin. You want a firm base to support your delightful No-Bake Cheesecake Cups.
Step 2: Refrigerate Crust
Once you’ve pressed the crust mixture into the muffin liners, place the tin in the refrigerator and chill for approximately 15–20 minutes. This step allows the crust to firm up, ensuring it holds its shape when you add the creamy filling. A properly set crust will provide a delightful crunch that enhances the cheesecake experience.
Step 3: Mix Filling
In a large mixing bowl, add room-temperature cream cheese, vanilla Greek yogurt, raw honey, lemon zest, and a pinch of kosher salt. Using a hand mixer or whisk, blend the ingredients together until the mixture is smooth and creamy, which should take around 2–3 minutes. This luscious filling will be the star of your No-Bake Cheesecake Cups!
Step 4: Assemble Cups
Remove the chilled crusts from the refrigerator and carefully spoon the cream cheese filling on top of each crust. Gently spread the filling to ensure an even layer across all cups. Aim to fill each cup to the top, giving your guests a generous serving of this delightful dessert.
Step 5: Chill and Serve
After assembling the cups, return them to the refrigerator for at least 1 hour, allowing the filling to set and develop its flavors. Just before serving, add a handful of assorted berries on top of each cup for a fresh and vibrant finish. Optionally, sprinkle with toasted coconut for an extra crunch to complement the creamy cheesecake.
Make Ahead Options
These No-Bake Cheesecake Cups are a fantastic choice for meal prep, saving you time on busy days while still impressing your guests. You can prepare the crust up to 24 hours in advance; simply press the crushed cookie mixture into the muffin liners and refrigerate. For the filling, mix the Greek yogurt, cream cheese, honey, lemon zest, and salt ahead and store it in an airtight container in the fridge for up to 3 days. When you’re ready to serve, spoon the prepared filling into the chilled crusts and return the cups to the refrigerator for at least 1 hour to set. Just before serving, finish with fresh berries and toasted coconut for a delightful touch—ensuring they taste just as delicious as when freshly made!
No-Bake Cheesecake Cups Variations
Feel free to get creative with these delightful cheesecake cups to suit your taste or dietary needs!
- Dairy-Free: Substitute cream cheese with a dairy-free cream cheese and use coconut yogurt for a vegan twist.
- Fruit-Infused: Swirl in a layer of fruit purees, like raspberry or strawberry, beneath the cheesecake filling for a burst of flavor.
- Nutty Crust: Replace crushed cookies with a blend of almond and coconut flour for a gluten-free, nutty base that adds extra texture.
- Chocolate lovers: Mix in cocoa powder to the cream cheese filling or top with chocolate shavings for a rich, indulgent treat.
- Savory Touch: Incorporate a touch of sea salt into the honey for a salted caramel effect, pairing perfectly with the sweetness of fruit.
- Additional Zest: If you’re a fan of citrus, throw in some lime or orange zest to the filling for a unique refreshing twist.
- Flavored Yogurts: Experiment with flavored Greek yogurts, like peach or key lime, for a fun take on your classic cheesecake filling.
These variations not only elevate your No-Bake Cheesecake Cups but also make them suitable for different occasions, just like my beloved White Chocolate Cheesecakes! They’re sure to impress both in taste and presentation at any summer gathering.
What to Serve with No-Bake Cheesecake Cups
As the perfect sweet ending to your summer gatherings, these sumptuous bites deserve delightful companions.
- Creamy Fruit Salad: A mix of refreshing fruits adds a lightness that complements the richness of the cheesecake cups. The vibrant colors brighten the table and palate.
- Grilled Peaches: The caramelized sweetness of grilled peaches contrasts beautifully with the tangy cheesecake, creating a delightful harmony of flavors. A scoop of vanilla ice cream on top can elevate this dessert experience.
- Sparkling Lemonade: Bright, bubbly lemonade offers a zesty refreshment, perfectly balancing the creamy richness of your cheesecake cups. Serve it in festive glasses for a celebratory flair.
- Chocolate-Dipped Strawberries: These not only look elegant but provide a sweet contrast that enhances the dessert table. The smooth chocolate pairs deliciously with the tart cheesecake topping.
- Mini Muffins: Soft, tender muffins, perhaps lemon or berry-flavored, create a warm, inviting side, perfect for gathering leftovers while adding diverse textures and tastes to the feast.
- Minted Iced Tea: A refreshing sip of herbal iced tea with mint brings a cooling element to your dessert; its lightness clears the palate perfectly after indulging in rich cheesecake.
Storage Tips for No-Bake Cheesecake Cups
Fridge: Keep leftover No-Bake Cheesecake Cups covered in the refrigerator for up to 3 days to maintain their freshness and creamy texture.
Freezer: For longer storage, these cheesecake cups can be frozen for up to 2 months. Place them in an airtight container, separating layers with parchment paper to prevent sticking.
Thawing: When you’re ready to enjoy, thaw in the refrigerator overnight. Avoid microwaving, as it can affect the texture of the cheesecake.
Reheating: These cups are best served chilled; simply garnish with fresh berries before serving for a delightful presentation!
Tips for the Best No-Bake Cheesecake Cups
-
Room Temperature Cream Cheese: Ensure your cream cheese is at room temperature to blend smoothly into the filling; cold cream cheese can lead to lumps in your mixture.
-
Chill Time Matters: Allow enough chilling time for the cheesecake cups—at least one hour—to achieve the perfect, set texture before serving.
-
Fresh Berries: Choose ripe, fresh berries for topping your cheesecake cups; their natural sweetness enhances the dessert’s flavor significantly.
-
Experiment with Flavors: Don’t hesitate to swap out Greek yogurt flavors or toppings; this adds a unique twist to your No-Bake Cheesecake Cups that your guests will love.
-
Avoid Over-Mixing: Mix the filling gently to prevent incorporating too much air, which can create a fluffy, less dense cheesecake. You want that delightful creaminess!
-
Dress it up: For a touch of elegance, consider adding a drizzle of berry sauce or a mint leaf garnish right before serving for visual appeal.
No-Bake Cheesecake Cups Recipe FAQs
How do I select ripe and fresh berries for topping?
Absolutely! Look for berries that are plump, firm, and vibrant in color. Avoid any that show signs of mold or are mushy. For strawberries, choose those with a shiny skin and a bright red hue, while blueberries should be deep blue with a slight dusting. If you spot any dark spots all over, that means they’re past their prime!
What’s the best way to store leftover No-Bake Cheesecake Cups?
To keep your delightful cheesecake cups fresh, cover them with plastic wrap or place them in an airtight container in the refrigerator for up to 3 days. This will help retain their creamy texture and flavor, so they stay just as delightful as when you first made them.
Can I freeze No-Bake Cheesecake Cups? If so, how?
Yes, these cheesecake cups freeze beautifully! To do so, place them in an airtight container and separate layers with parchment paper to prevent them from sticking. They can be stored in the freezer for up to 2 months. When you’re ready to enjoy, simply thaw them in the refrigerator overnight for the best texture before serving.
What should I do if my filling seems lumpy?
No worries! If your filling doesn’t mix smoothly, ensure your cream cheese is at room temperature—it should be soft and creamy. If you encounter lumps after mixing, you can blend the mixture again with a hand mixer until it’s fully combined, making the filling silky smooth.
Are there any dietary considerations for these No-Bake Cheesecake Cups?
Very! If you’re looking for a lower-calorie or lighter option, opt for low-fat cream cheese and use maple syrup instead of honey for a vegan-friendly twist. People with nut allergies should be cautious about adding toasted coconut or using nut-based crusts, so stick with traditional cookie crusts if that’s the case.
How long should I chill these cheesecake cups to achieve the right texture?
To achieve that perfect set texture, be sure to chill your assembled No-Bake Cheesecake Cups for at least 1 hour in the refrigerator. This allows the filling to firm up nicely. For an even better result, chill them longer—2 to 3 hours is ideal for a firmer, creamier consistency!
Delightful No-Bake Cheesecake Cups for Summer Fun
Ingredients
Equipment
Method
- Prepare Crust: Pulse crushed cookies in a food processor until fine crumbs. Mix with toasted coconut and melted butter. Press 1 tablespoon into muffin liners.
- Refrigerate Crust: Chill the crust in the refrigerator for 15–20 minutes to firm up.
- Mix Filling: In a bowl, blend cream cheese, yogurt, honey, lemon zest, and salt until smooth.
- Assemble Cups: Spoon filling on top of the crusts, ensuring an even layer.
- Chill and Serve: Refrigerate for at least 1 hour, then top with berries and optional toasted coconut before serving.
Leave a Reply