
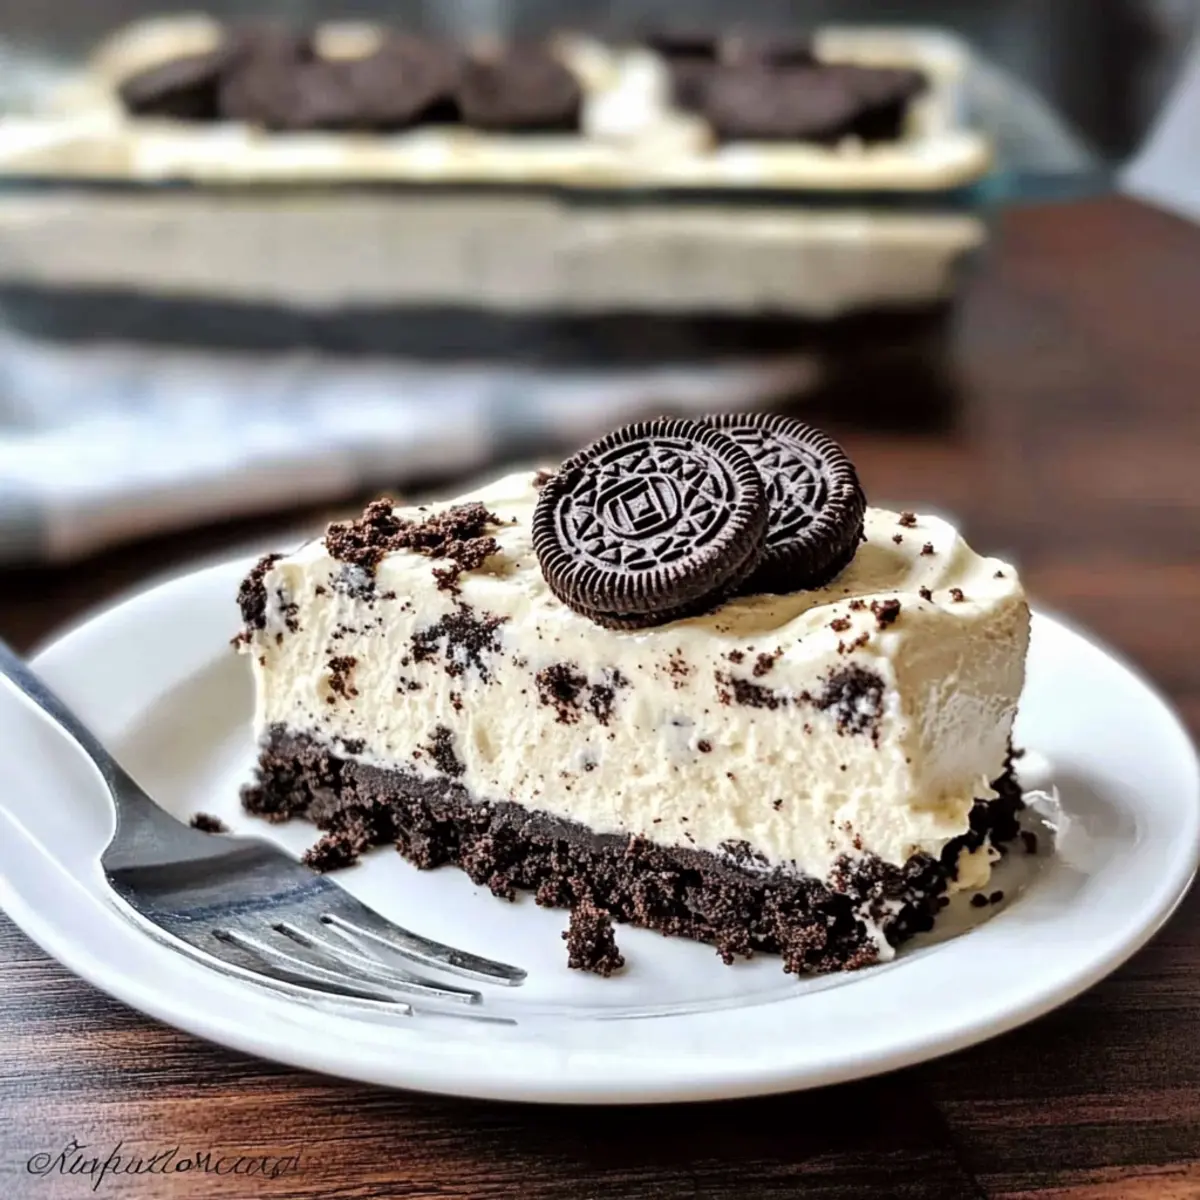
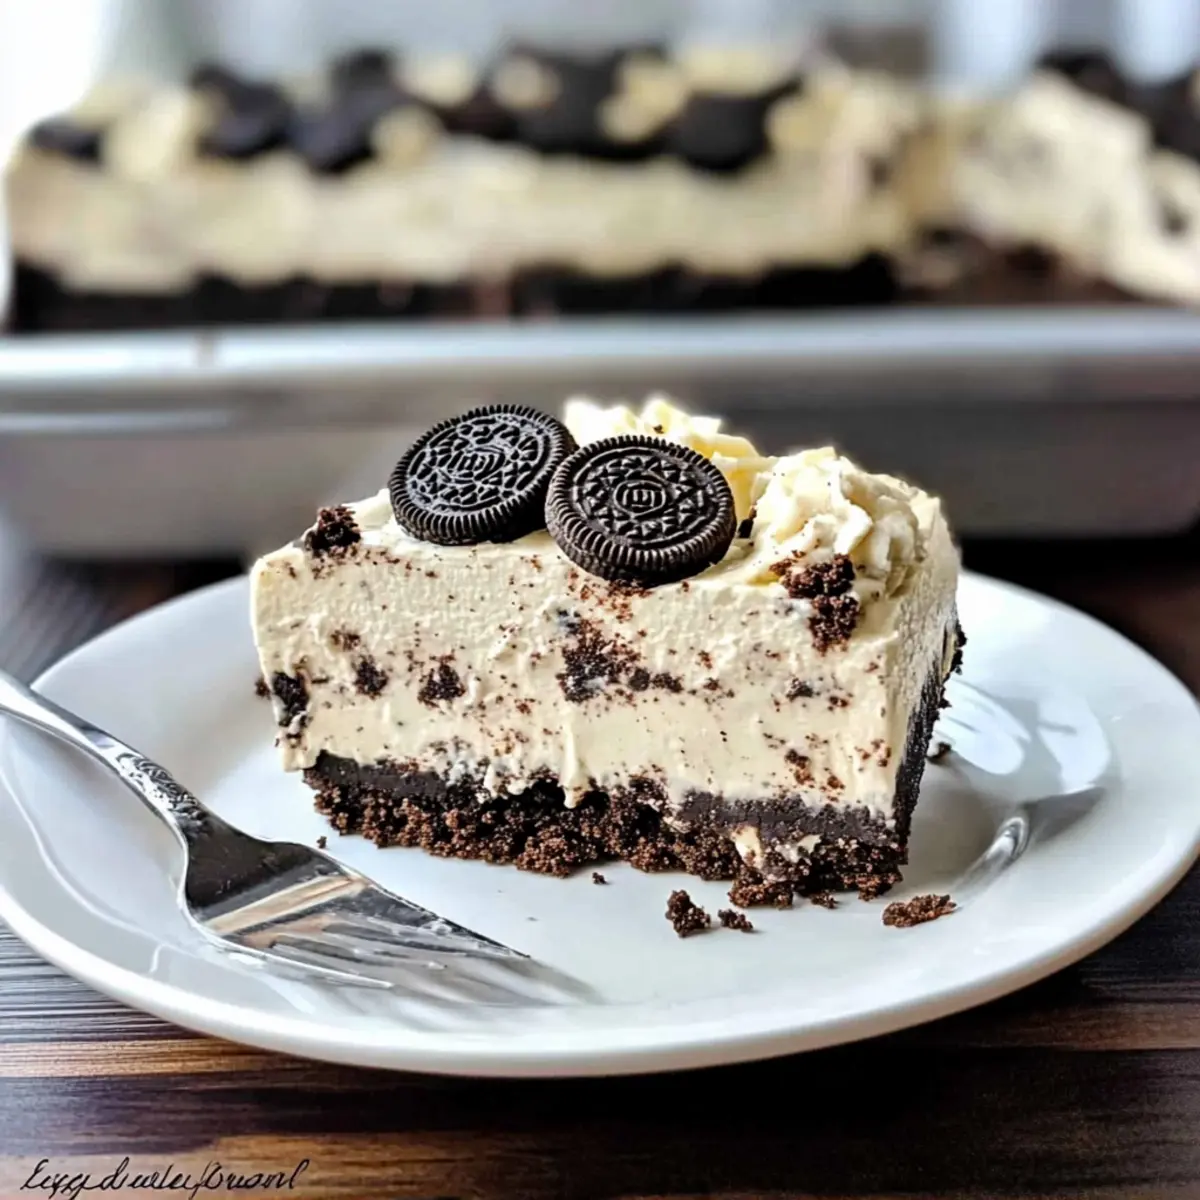
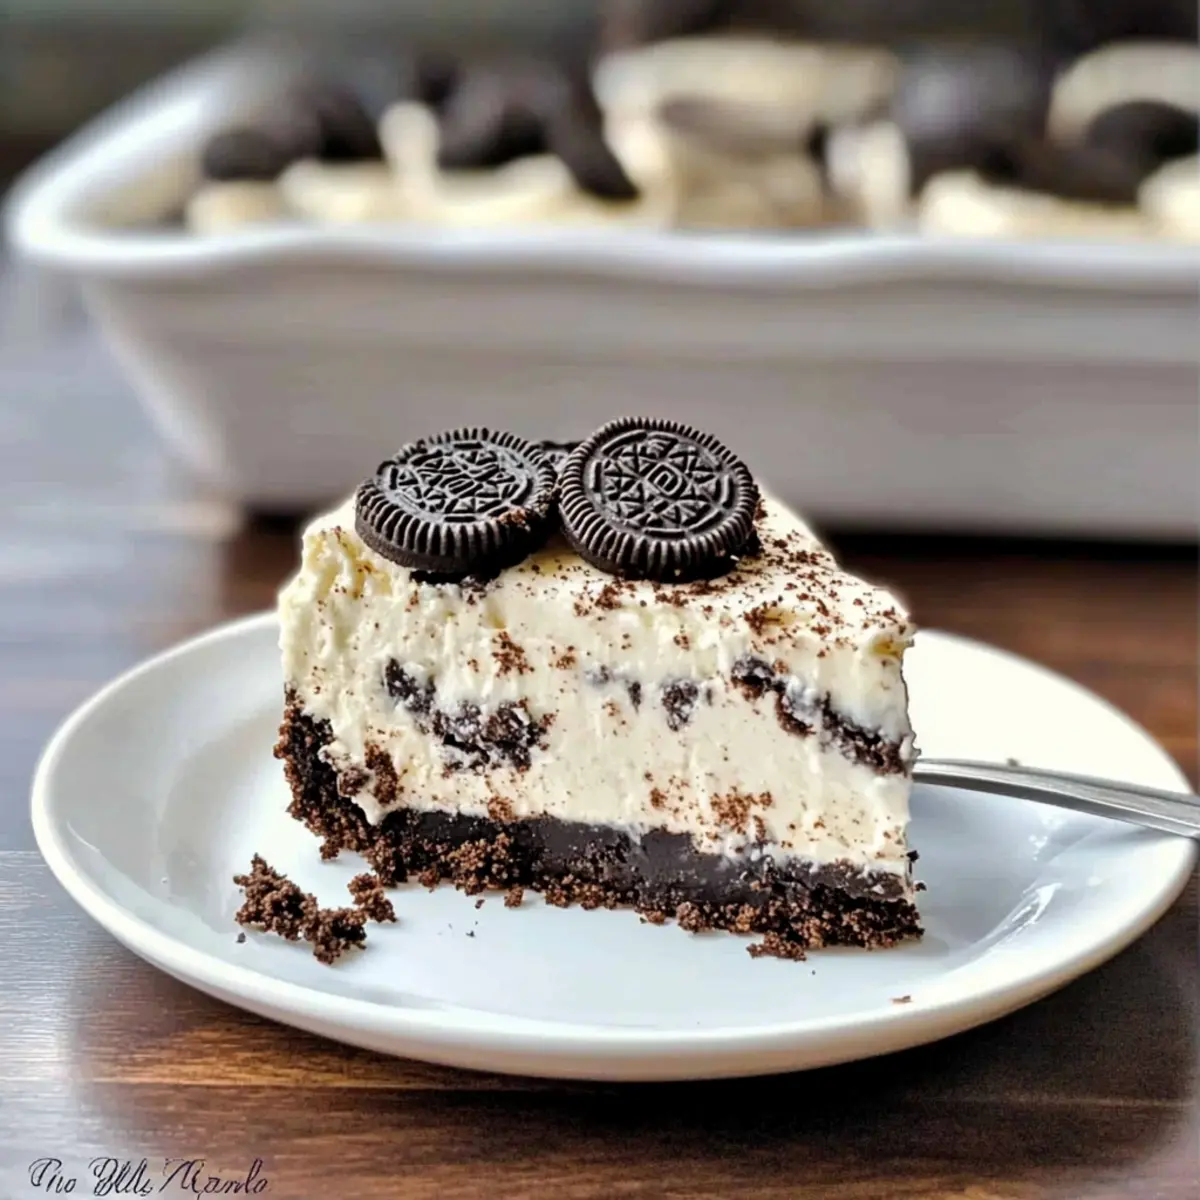
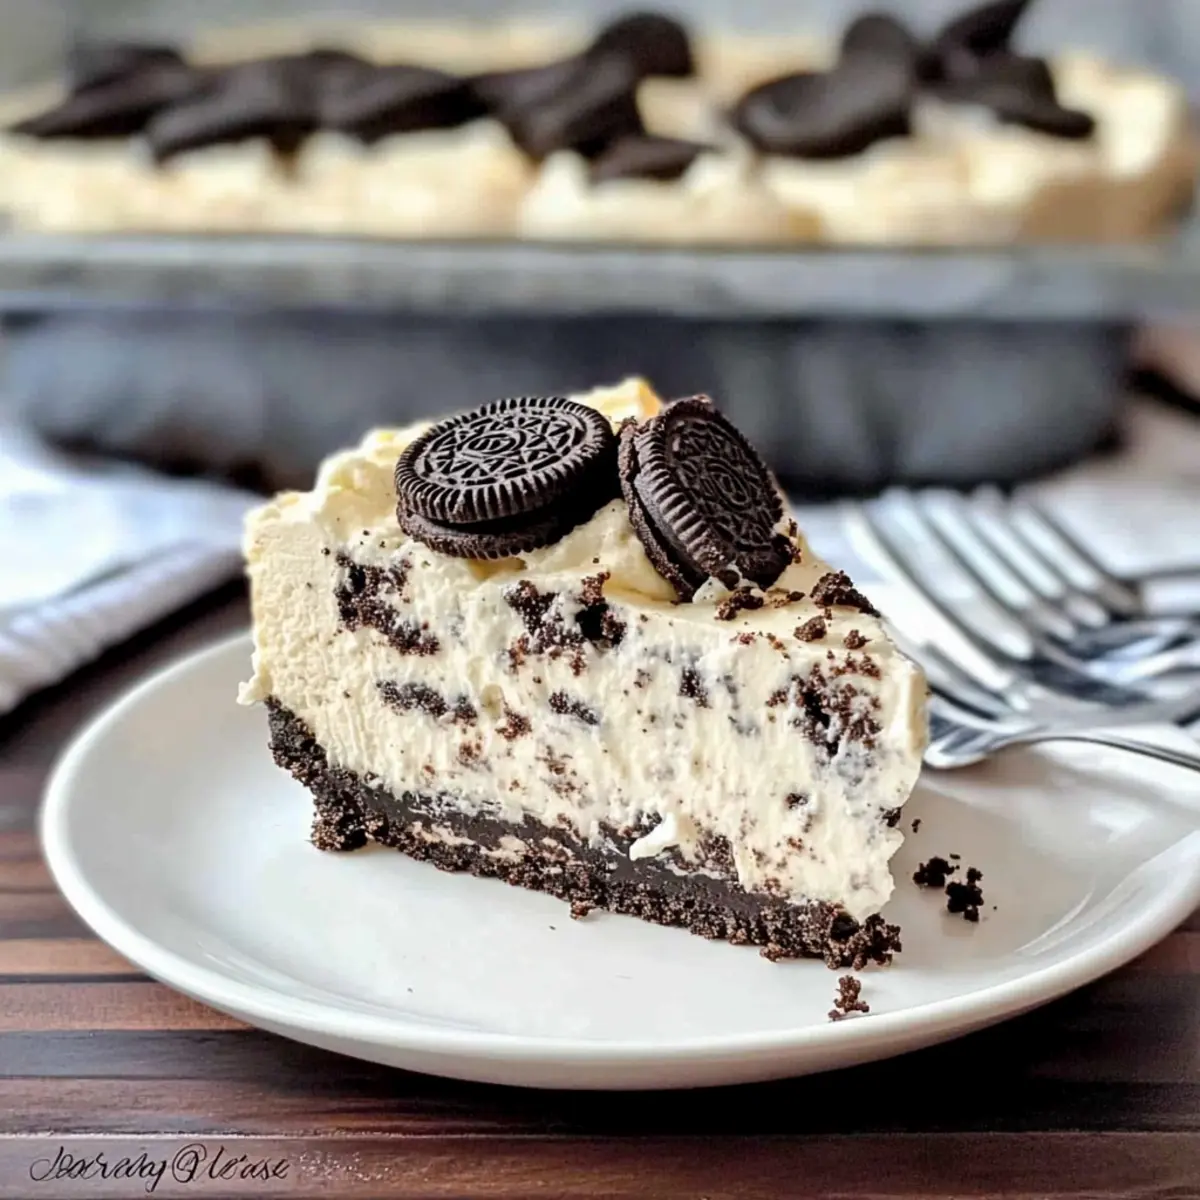
The moment I took my first bite of a No Bake Oreo Cheesecake, I was whisked away to sun-soaked summer picnics, where the air was filled with laughter and sweet memories. This Easy Gluten-Free No Bake Oreo Cheesecake is perfect for anyone craving a delightful dessert without turning on the oven. With a smooth, creamy filling combining rich cream cheese and fluffy Cool Whip, all nestled on a crunchy gluten-free chocolate cookie crust, it’s an effortless way to impress your friends and family. Plus, it requires minimal prep time and can be made ahead, making it the ultimate summer treat when you want to spend more time enjoying the sunshine than in the kitchen. Are you ready to bring a smile to your table?
Why is No Bake Oreo Cheesecake a Must-Try?
Simplicity at its best: This No Bake Oreo Cheesecake requires minimal effort and skill, perfect for home cooks of all levels.
Indulgent, creamy layers: The combination of cream cheese and Cool Whip creates a rich, velvety filling that will leave your taste buds dancing.
Crowd-pleaser appeal: Its delightful flavors and stunning presentation ensure it’s a hit at parties, picnics, or even a cozy night in.
Gluten-free goodness: Made with gluten-free chocolate cookies, it caters to those following dietary restrictions without compromising on flavor.
Make ahead convenience: Prepare this cheesecake in advance and chill, letting the flavors meld beautifully. It’s a time-saving treat that’s ready when you are!
For more delicious no-bake inspiration, check out my Mint Oreo Truffles or the decadent Bake White Chocolate.
No Bake Oreo Cheesecake Ingredients
For the Crust
• Gluten Free Chocolate Vanilla Creme Cookies – Main structure for the crust; substitute with any other gluten-free sandwich cookies if unavailable.
• Unsalted Butter – Binds the cookie crust together for a rich flavor; can substitute with coconut oil for a dairy-free version.
For the Filling
• Cream Cheese (32 ounces, softened) – Provides the creamy filling; ensure it’s at room temperature for smooth mixing.
• Granulated Sugar (¾ cup) – Adds sweetness to the filling; adjust based on preference or substitute with a sugar alternative.
• Vanilla Extract (1 teaspoon) – Enhances flavor; no substitution recommended for optimal taste.
• Cool Whip (8 ounces) – Adds fluffiness and light texture to the filling; for a homemade version, use heavy whipping cream whipped to medium peaks, ensuring it stabilizes the mixture.
Embrace the joy of creating a No Bake Oreo Cheesecake that delights not just the palate but the heart as well!
Step‑by‑Step Instructions for No Bake Oreo Cheesecake
Step 1: Crush the Cookies
Begin by placing your gluten-free chocolate vanilla crème cookies into a large Ziploc bag. Using a rolling pin, crush the cookies until you achieve small, fine pieces, resembling wet sand. Reserve about one-third of the crushed cookies in a small bowl for decoration later. This crunchy base will create the perfect foundation for your No Bake Oreo Cheesecake.
Step 2: Melt the Butter
In a small saucepan over low heat, melt the unsalted butter gently until fully liquid, stirring occasionally to prevent it from burning. Once melted, remove the saucepan from heat and let it cool slightly. This deliciously rich butter will bind with the cookie crumbs, ensuring a flavorful crust for your dessert.
Step 3: Combine Crust Ingredients
In a large mixing bowl, combine the crushed cookies with the melted butter, mixing thoroughly with a spatula until all crumbs are evenly coated. The mixture should feel slightly wet and hold together when pressed. Transfer this mixture into a 9″x13″ pan and firmly press it into an even layer across the bottom to form your cheesecake crust.
Step 4: Prepare the Filling
In a separate mixing bowl, place the softened cream cheese, granulated sugar, and vanilla extract. Using an electric mixer, beat these ingredients on medium speed until the mixture is smooth and creamy, about 2-3 minutes. This step is crucial for achieving a luscious filling that will blend beautifully with the whipped topping in your No Bake Oreo Cheesecake.
Step 5: Incorporate the Cool Whip
Once your cream cheese mixture is perfectly blended, gently fold in the Cool Whip using a spatula until fully incorporated. The fluffy texture of the Cool Whip will add lightness to your filling, making it easy to spread. Also, fold in half of the reserved crushed cookies to create delightful pockets of cookie goodness throughout the cheesecake.
Step 6: Spread the Filling
Carefully spread the cream cheese and Cool Whip mixture over the prepared crust, smoothing the top with a spatula to create an even layer. This step is essential to ensure every slice of your No Bake Oreo Cheesecake has a balanced ratio of crust to creamy filling. Take your time and make it visually appealing.
Step 7: Add the Finishing Touch
Sprinkle the remaining reserved cookie crumbs evenly over the top of your cheesecake filling. This not only adds a lovely texture but also provides a delightful visual contrast. With your cheesecake now complete, it’s time to chill; cover the pan with plastic wrap or a lid to keep it fresh.
Step 8: Chill and Serve
Place the cheesecake in the refrigerator to chill for at least 4 hours, preferably overnight. The chilling process is essential as it allows the flavors to meld and the filling to set properly. When ready to serve, slice into squares and enjoy the creamy, decadent flavors of your No Bake Oreo Cheesecake!
Expert Tips for No Bake Oreo Cheesecake
-
Soften Cream Cheese: Ensure your cream cheese is at room temperature before mixing to avoid lumps and achieve a smooth consistency in the filling.
-
Cookie Crust Texture: For a finer cookie crust, you can use a food processor instead of a Ziploc bag, but be careful not to over-process; you want a nice crumb, not dust.
-
Add Cookie Crumbs Last: To maintain their crunch, sprinkle the remaining cookie crumbs on top just before serving the No Bake Oreo Cheesecake.
-
Chill Time is Key: Don’t rush the chilling process! Allow your cheesecake to set for at least 4 hours, preferably overnight, for the best taste and texture.
-
Adjust Sweetness: Feel free to adjust the amount of sugar based on your sweetness preference; taste your filling before pouring it onto the crust.
No Bake Oreo Cheesecake Variations
Delight in customizing this No Bake Oreo Cheesecake to fit your cravings and dietary needs!
-
Dairy-Free: Substitute cream cheese with a dairy-free alternative and use coconut cream instead of Cool Whip for a plant-based delight. The result is surprisingly creamy and truly satisfying.
-
Sugar-Free: Use a sugar substitute to replace granulated sugar, giving you a guilt-free indulgence. It’s amazing how well you can enjoy dessert without the extra calories!
-
Fruit-Infused: Fold in pureed strawberries or raspberries into the cream cheese mixture. You’ll introduce a fresh burst of flavor that balances perfectly with the sweetness.
-
Peanut Butter Twist: Add creamy peanut butter to the filling for a nutty flavor explosion! Just folding in ½ cup will give you a decadent peanut butter Oreo cheesecake.
-
Minty Fresh: Incorporate peppermint extract into the cream cheese mixture for a refreshing mint twist. Finish with crushed mint Oreos on top for extra flair.
-
Different Cookie Crust: Experiment with different gluten-free cookies, such as chocolate mint or vanilla, for a new spin on the classic crust. Each flavor adds its unique profile, keeping it exciting!
-
Chocolate Lovers: Drizzle melted chocolate over the top before adding the crushed cookies. A chocolate twist elevates the indulgence to a whole new level.
If you’re looking for more delicious ideas, you might enjoy making Baileys Cheesecake Balls for a fun party treat or the rich and creamy Salted Caramel Cheesecake to satisfy your sweet tooth!
How to Store and Freeze No Bake Oreo Cheesecake
Fridge: Keep your No Bake Oreo Cheesecake in an airtight container in the refrigerator for up to 3 days to maintain its freshness and creamy texture.
Freezer: If you want to store it longer, you can freeze individual slices wrapped tightly in plastic wrap, then in aluminum foil for up to 2 months.
Thawing: When ready to enjoy, thaw in the fridge overnight for the best texture and flavor. Avoid defrosting in the microwave, as this may affect the creaminess.
Reheating: There’s no need for reheating, just serve chilled straight from the fridge for a refreshing treat!
Make Ahead Options
These No Bake Oreo Cheesecake delights are perfect for meal prep enthusiasts! You can prepare the crust and filling up to 24 hours in advance—just chill the assembled cheesecake in the refrigerator. For optimal freshness, store the prepared cheesecake covered tightly with plastic wrap to prevent any moisture loss and preserve that creamy texture. When it’s time to serve, simply add any desired toppings, such as the reserved cookie crumbs, right before presenting it to your guests. This way, the crust stays crunchy, and you can enjoy restaurant-quality results without any last-minute fuss. Embrace the convenience and let this cheesecake shine at your next gathering!
What to Serve with Easy Gluten-Free No Bake Oreo Cheesecake?
Nothing transports you to a blissful state quite like a slice of velvety cheesecake, paired perfectly with the right accompaniments.
- Fresh Berries: Bright, juicy strawberries or raspberries add a burst of freshness and a hint of tartness that beautifully contrasts the rich, creamy cheesecake.
- Chocolate Sauce: Drizzling a rich chocolate sauce over each slice enhances the indulgence and brings a touch of elegance to your dessert presentation.
- Whipped Cream: A dollop of freshly whipped cream adds an airy texture, elevating the creamy filling while balancing its sweetness; perfect for a celebratory touch!
To complete your cheesecake experience, consider pairing it with a refreshing drink.
- Iced Tea or Lemonade: A glass of chilled iced tea or zesty lemonade makes the perfect palate cleanser, wonderfully complementing the rich flavors of the cheesecake.
- Coffee or Espresso: The boldness of freshly brewed coffee or espresso provides a delightful contrast, balancing the richness of the cheesecake with its robust notes.
Whether you’re hosting a gathering, celebrating a special occasion, or simply indulging in a sweet treat at home, these pairings add an extra layer of joy to your Easy Gluten-Free No Bake Oreo Cheesecake!
No Bake Oreo Cheesecake Recipe FAQs
What kind of gluten-free cookies should I use for the crust?
Absolutely! For the crust, I recommend using gluten-free chocolate vanilla crème cookies as they provide the perfect flavor and texture. If you can’t find them, any other gluten-free sandwich cookies will work just as well. Just make sure they have a similar texture to maintain that crunchy crust.
How long can I store the No Bake Oreo Cheesecake in the fridge?
You can keep your No Bake Oreo Cheesecake in an airtight container in the refrigerator for up to 3 days. Be sure to cover it well to maintain its creamy texture and prevent any odors from affecting its delightful flavor.
Can I freeze No Bake Oreo Cheesecake?
Yes, you can! To freeze your cheesecake, start by cutting it into individual slices. Wrap each slice tightly in plastic wrap, then place them in a freezer-safe container or wrap them in aluminum foil for extra protection. It will keep well in the freezer for up to 2 months.
How do I thaw a frozen No Bake Oreo Cheesecake?
When you’re ready to savor your frozen cheesecake, simply transfer the wrapped slices to the fridge the night before you’d like to eat them. Let them thaw slowly overnight to preserve their creamy texture. Avoid defrosting in the microwave, as this can compromise the cheesecake’s indulgent qualities.
What should I do if my cream cheese mixture is lumpy?
Very! If your cream cheese is lumpy, it likely hasn’t been softened enough. Make sure to let it sit at room temperature for at least 30 minutes before mixing. If you still find lumps, I recommend using an electric mixer on medium speed for an additional minute or two to achieve that smooth, creamy consistency.
Are there any dietary alternatives for this recipe?
Absolutely! You can easily customize this No Bake Oreo Cheesecake to suit particular dietary needs. For a dairy-free option, substitute the cream cheese with a dairy-free cream cheese alternative and replace Cool Whip with homemade whipped coconut cream. Always check ingredient labels to ensure they align with your dietary preferences or allergies!
Creamy No Bake Oreo Cheesecake That's Gluten-Free and Easy
Ingredients
Equipment
Method
- Crush the Cookies: Crush the gluten-free chocolate vanilla crème cookies in a Ziploc bag using a rolling pin until they resemble wet sand.
- Melt the Butter: Melt the unsalted butter in a small saucepan over low heat and let cool slightly.
- Combine Crust Ingredients: Mix the crushed cookies with the melted butter and press the mixture into a 9x13 inch pan.
- Prepare the Filling: Beat the cream cheese, sugar, and vanilla extract until smooth and creamy.
- Incorporate the Cool Whip: Fold the Cool Whip into the cream cheese mixture and add half of the reserved cookie crumbs.
- Spread the Filling: Spread the mixture over the prepared crust evenly.
- Add the Finishing Touch: Sprinkle the remaining cookie crumbs over the cheesecake filling.
- Chill and Serve: Refrigerate for at least 4 hours before serving to allow flavors to meld.
Leave a Reply