
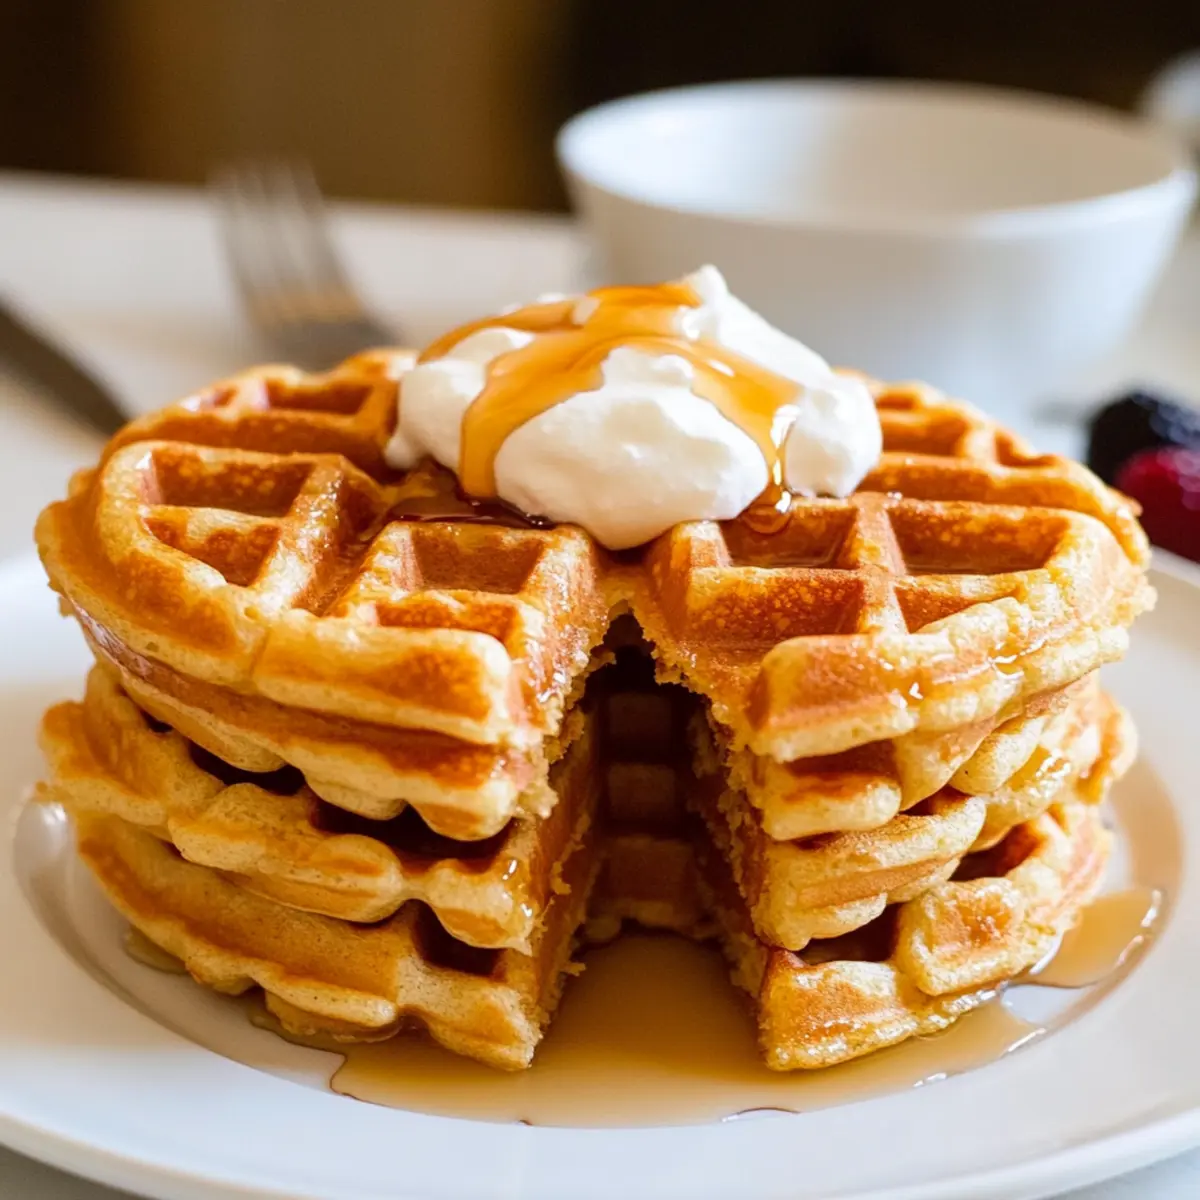
The morning sun peeked through my kitchen window as I flipped the last of my high protein waffles, and the scent was simply irresistible. These fluffy delights are more than just a breakfast treat; they deliver a powerful protein punch of over 45 grams per batch, making them a satisfying choice that keeps me energized throughout the day. Unlike traditional waffles, I can prepare these with a healthy twist, seamlessly incorporating ingredients like yogurt or applesauce for added nutrition. Whether you’re looking to kick-start your day with a guilt-free indulgence or impress your loved ones with a wholesome twist on breakfast classics, these protein waffles are your go-to solution. Imagine drizzling them with maple syrup and topping them with fresh berries—what could be better? Curious about how to make your mornings more deliciously nutritious? Let’s dive in!
Why Choose High Protein Waffles?
Nutritional Powerhouse: These waffles pack over 45 grams of protein per batch, providing a solid start to your day.
Versatile Ingredients: Customize easily with yogurt, applesauce, or different protein powders to suit any dietary preference.
Quick & Easy: Whip them up in minutes, making breakfast hassle-free and perfect for busy mornings.
Guilt-Free Indulgence: Crispy outside, fluffy inside—these aren’t just healthy; they taste incredible!
Meal Prep Friendly: Make a big batch and freeze for quick, nutritious breakfasts anytime.
Whether you’re enjoying them topped with fresh berries or maple syrup, these protein waffles turn every morning into a delightful occasion!
Protein Waffles Ingredients
To create your delicious Protein Waffles, gather the following ingredients:
For the Batter
- Protein Powder – Provides the primary protein punch; substitute with your preferred protein powder, such as whey or plant-based.
- Flour – Acts as the backbone of the waffles; you can use all-purpose flour, spelt flour, or a gluten-free option.
- Baking Powder – Essential for that airy fluffiness; don’t skip this key ingredient!
- Salt – Enhances the overall flavor; remember, a little goes a long way.
- Water – Hydrates the mixture; milk of choice is a perfect substitute for a creamier texture.
- Egg Whites – Adds protein and structure; for a vegan option, swap with flaxseed meal mixed with water.
- Yogurt or Applesauce – Brings moisture and tanginess; try using mashed bananas in place of yogurt for a fruity twist.
- Sweetener – Balances flavors; options include sugar, maple syrup, honey, or any sugar-free alternative you prefer.
- Oil – Optional for extra crispiness; you can omit this for a lighter version.
With these ingredients on hand, you’re ready to whip up your Protein Waffles and enjoy a hearty breakfast that’s both tasty and nutritious!
Step‑by‑Step Instructions for Protein Waffles
Step 1: Prepare Dry Ingredients
In a large mixing bowl, whisk together the protein powder, flour, baking powder, and salt until evenly combined. This dry mixture sets the foundation for your protein waffles, ensuring fluffiness and flavor. Aim for a smooth blend with no lumps visible in the mixture, which should take about 2 minutes.
Step 2: Mix Wet Ingredients
In another bowl, combine the water, egg whites, and yogurt or applesauce, whisking until well integrated. If you prefer a vegan option, substitute flaxseed meal mixed with water for the egg whites. Pour this creamy mixture into the dry ingredients, and mix gently until just combined, being careful not to overmix, as this could affect the texture.
Step 3: Heat the Waffle Iron
Preheat your waffle iron according to the manufacturer’s instructions, usually for about 5 minutes. Lightly grease the grid plates with non-stick spray to prevent the batter from sticking. You’ll know it’s ready when a drop of water sizzles on the surface, indicating optimal cooking temperature for your protein waffles.
Step 4: Cook the Waffles
Carefully pour the batter into the center of the preheated waffle iron, using a ladle for precision. Close the lid and cook according to the manufacturer’s timing—typically about 3 to 5 minutes. The waffles should turn golden brown and become crispy; a quick check after a few minutes will ensure they are baking evenly.
Step 5: Serve or Store the Waffles
Once cooked, carefully remove the protein waffles from the iron, using a fork to help if needed. Serve them immediately topped with your favorite ingredients like fresh berries or maple syrup. If making a batch for later, cool the waffles on a wire rack and then store them in an airtight container in the freezer for up to three months, ready for quick reheating.
Protein Waffles: Creative Twists Await
Feel free to make these protein waffles your own with delightful and nutritious twists that will spark your imagination and satisfy your taste buds!
-
Nutty Delight: Replace half the yogurt with peanut butter for a rich and creamy flavor twist that adds healthy fats.
-
Flavor Explosion: Experiment with flavored protein powders like chocolate or vanilla for added taste dimension and excitement. Imagine chocolate chip protein waffles—pure bliss!
-
Vegan Option: Substitute non-dairy yogurt and flaxseed for the egg whites, making a vegan version that’s just as delightful without eggs. Your plant-based friends will love them!
-
Fruit Forward: Swap yogurt for mashed bananas to introduce a natural sweetness, creating a delightful banana flavor that pairs beautifully with maple syrup.
-
Gluten-Free: Use a gluten-free flour blend as a base, ensuring that everyone can enjoy these fluffy wonders. They’ll never know they’re gluten-free; they taste that good!
-
Spicy Kick: Add a pinch of cinnamon or nutmeg to the batter for a warm, cozy flavor that transforms your breakfast into a comforting experience.
-
Zesty Add-ins: Toss in a handful of blueberries or dark chocolate chips for fun and flavor bursts in every bite. This makes breakfast feel like a treat rather than just a meal!
For even more delicious inspiration, consider diving into options like meal prep tips or customizing your favorite waffle toppings to make every bite memorable!
How to Store and Freeze Protein Waffles
Airtight Container: Store your protein waffles in an airtight container with parchment paper between layers to prevent sticking and maintain freshness.
Refrigeration: Keep cooked waffles refrigerated for up to 3 days if you plan to eat them soon; simply reheat in a toaster or microwave for crispy results.
Freezer Storage: For longer storage, freeze waffles in a single layer before placing them in a container; they will last for up to 3 months.
Reheating: When ready to enjoy, reheat frozen protein waffles in a toaster, or pop them in the oven at 350°F for about 10 minutes for that fresh-out-of-the-iron taste!
Make Ahead Options
These High Protein Waffles are perfect for meal prep enthusiasts! You can mix the dry ingredients (protein powder, flour, baking powder, salt) and store them in an airtight container for up to 3 days. Additionally, prepare the wet ingredients (water, egg whites, yogurt/applesauce) and store them in the refrigerator for up to 24 hours. When you’re ready to enjoy your waffles, simply combine the dry and wet mixtures, cook as directed, and you’ll have a quick, nutritious breakfast that tastes just as delicious as if you made it fresh. With these make ahead tips, your busy mornings can be hassle-free, offering you more time to savor every bite!
What to Serve with High Protein Waffles
Elevate your breakfast experience with delightful pairings that complement the fluffy goodness of these nutritious waffles.
-
Fresh Berries: Juicy strawberries, blueberries, or raspberries add a burst of flavor, tying in beautifully with the waffles’ light texture.
-
Maple Syrup: A classic choice, this sweet syrup enhances the waffles’ natural taste while introducing a comforting warmth that’s hard to resist.
-
Greek Yogurt: Creamy and protein-packed, it lends a tangy richness to your waffles, making for a well-rounded meal that fuels your morning.
-
Nut Butter Drizzle: Adding almond or peanut butter introduces a delightful nuttiness, enriching the flavor with healthy fats that keep you satisfied longer.
-
Whipped Coconut Cream: Velvety and dairy-free, this topping adds just the right amount of sweetness and creaminess, making every bite feel indulgent.
-
Cinnamon Sugar: A sprinkle of this warm mixture adds a delightful crunch and aromatic sweetness, creating a lovely contrast to the fluffy texture.
-
Smoothie or Fresh Juice: Pair with a refreshing smoothie or juice to incorporate more fruits and balance the meal—perfect for boosting energy and vitality.
-
Chopped Nuts: Toasted walnuts or pecans offer a crunch factor and a delightful contrast to the soft waffles, plus they can enrich your protein intake.
-
Poached Egg: For a savory twist, add a perfectly poached egg on top—its runny yolk adds richness and enhances the overall satisfaction of this breakfast ensemble.
Expert Tips for Protein Waffles
• Waffle Iron Prep: Ensure your waffle iron is thoroughly preheated and greased to prevent sticking. This is key for perfectly crispy protein waffles!
• Batter Consistency: If your batter is too thick, gradually add more liquid. A good consistency should be pourable but still thick enough to hold shape.
• Flavor Experimentation: Try different flavored protein powders for an exciting twist. Chocolate or vanilla can elevate your waffles to decadent heights without added sugar.
• Serving Ideas: Top with yogurt, nut butter, or fresh fruit for a balanced breakfast. This not only adds taste but also enhances the nutritional profile of your protein waffles.
• Storage Tips: For meal prep, separate layers of waffles with parchment paper in an airtight container to maintain freshness when freezing. Enjoy a quick breakfast anytime!
Protein Waffles Recipe FAQs
What kind of protein powder should I use?
Absolutely! You can use any preferred protein powder for these waffles, such as whey, casein, or a plant-based alternative. Each type offers unique flavors and nutritional profiles, so feel free to experiment with whatever you love most!
How long can I store my protein waffles?
You can store these delicious protein waffles in an airtight container in the refrigerator for up to 3 days. If you want to enjoy them later, I recommend freezing them; they last up to 3 months in the freezer when layered with parchment paper in between. This prevents sticking and keeps them fresh!
Can I freeze the protein waffles?
Very much so! To freeze, let the waffles cool completely first. Then, lay them in a single layer on a baking sheet for about 2 hours until they’re firm. After that, stack them with parchment paper in between and place in an airtight container or freezer bag. When you’re ready for a quick breakfast, just reheat them in a toaster or oven!
What if my batter is too thick or too thin?
No worries! If your batter is too thick, gradually add more water or milk to achieve a pourable consistency. Start with a tablespoon at a time until the desired thickness is reached. Conversely, if it’s too thin, add a bit more protein powder or flour until you meet the right balance; the perfect batter should hold its shape yet flow easily when poured.
Are these protein waffles suitable for people with allergies?
Definitely! You can adjust the ingredients to cater to various dietary needs. For a gluten-free version, use a gluten-free flour blend. If you’re vegan or have allergies to eggs, simply substitute egg whites with 1 tablespoon of flaxseed meal mixed with 2.5 tablespoons of water, letting it sit for a few minutes to thicken. Always check ingredient labels if you have specific allergies for full safety.
How should I serve my protein waffles?
The more the merrier! Top your protein waffles with fresh berries, a drizzle of natural maple syrup, a dollop of Greek yogurt, or even nut butter for an extra nutrient boost. Add a sprinkle of nuts or seeds for some crunch, and you have a breakfast that’s not only nutritious but also bursting with flavor!

Protein Waffles: Fluffy, Healthy Breakfast Dream You’ll Love
Ingredients
Equipment
Method
- Prepare Dry Ingredients: Whisk together protein powder, flour, baking powder, and salt in a large bowl.
- Mix Wet Ingredients: In another bowl, combine water, egg whites, and yogurt or applesauce; whisk well.
- Heat the Waffle Iron: Preheat waffle iron for about 5 minutes, grease lightly.
- Cook the Waffles: Pour batter into waffle iron and cook for 3 to 5 minutes until golden brown.
- Serve or Store the Waffles: Remove waffles, serve with toppings, or cool and freeze for later.
Leave a Reply